
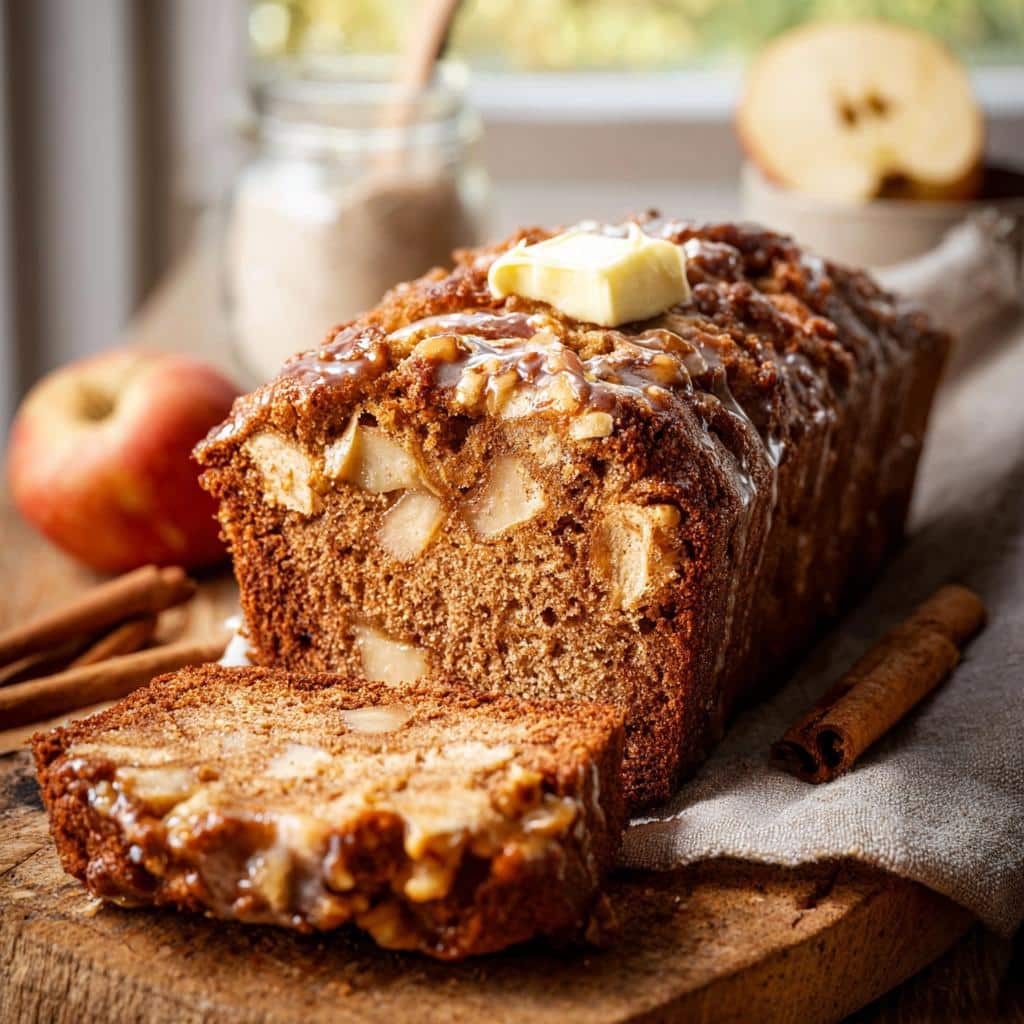
There’s just something about the smell of homemade apple bread wafting through the house that makes everything feel right in the world. This apple bread recipe has become my absolute go-to because it’s ridiculously simple—just a handful of pantry staples—and yet it turns out incredibly moist and full of flavor every single time. I’ve tested this recipe more times than I can count, tweaking the sugar, playing with apple varieties, and even sneaking in extra cinnamon when the kids weren’t looking. And honestly, the version I’m sharing with you today is the one my family begs for on repeat, especially when the weather turns crisp and cozy.
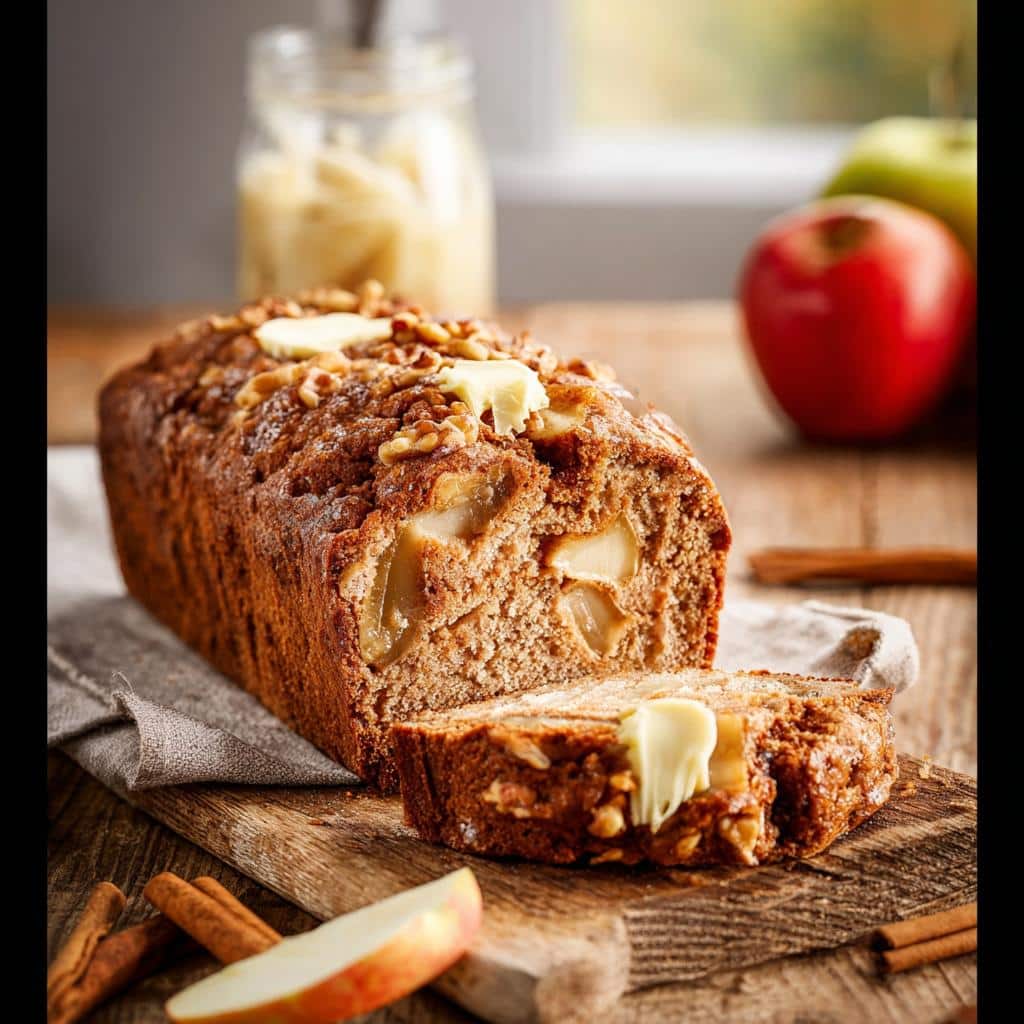
Why You’ll Love This Apple Bread
I’m honestly a little obsessed with how easy this apple bread is. It’s one of those recipes that feels like a warm hug, and I think you’re going to love it just as much as I do. Here’s why it’s earned a permanent spot in my baking rotation:
- It’s quick to mix up. No stand mixer required, no complicated techniques. You just whisk the dry stuff in one bowl, the wet stuff in another, stir them together, and fold in the apples. The whole mixing process takes maybe 10 minutes, tops. It’s my go-to when I want something homemade without spending all afternoon in the kitchen.
- Uses basic pantry staples. I love a recipe I can make without a special trip to the store. You probably already have flour, sugar, oil, eggs, and cinnamon in your kitchen. All you really need to pick up is a couple of apples, and you’re good to go.
- It’s the perfect fall treat. I mean, come on—cinnamon-spiced apple bread? That’s basically autumn in a loaf pan. It fills your house with the coziest smell, and it’s perfect for those crisp mornings when you want something warm and comforting with your coffee.
- Kids absolutely love it. My own little ones gobble this up faster than I can slice it. It’s not too sweet, it’s soft, and those little pockets of tender apple are a fun surprise. Plus, it’s a sneaky way to get them to eat fruit!
Ingredients for Apple Bread
I love that this recipe doesn’t call for anything fancy—just good, honest ingredients you probably already have on hand. Let’s go through each one so you know exactly what to grab.
- 2 cups all-purpose flour – Nothing special here, just regular flour. It gives the bread the perfect tender crumb.
- 1 teaspoon baking soda – This is our leavening agent, so make sure it’s fresh. If your baking soda’s been sitting in the back of the pantry for a year, it might be time for a new box.
- 1/2 teaspoon salt – Just a pinch to balance the sweetness and bring out all those cozy flavors.
- 1 teaspoon cinnamon – I’m a little generous with this one. It’s the star spice here, and it makes the whole house smell incredible while it bakes.
- 1/2 cup granulated sugar – Regular white sugar for sweetness and structure.
- 1/2 cup brown sugar, packed – Make sure you really pack it into the measuring cup. The molasses in brown sugar adds moisture and a deep, caramel-like flavor that’s just perfect with apples.
- 1/2 cup vegetable oil – Oil keeps this apple bread super moist without needing butter. Any neutral oil works—canola, avocado, or even melted coconut oil.
- 2 large eggs – Large eggs, not medium or extra-large. They help bind everything together and add richness.
- 1 teaspoon vanilla extract – Pure vanilla if you’ve got it, but imitation works fine too. It rounds out the flavors beautifully.
- 2 cups peeled and diced apples – You’ll want to peel them first, then cut into about 1/4-inch pieces. I usually use Granny Smith for tartness, but Honeycrisp or a mix is lovely too. Don’t skip the peeling—those little bits of peel can get chewy in the finished bread.
- 1/2 cup chopped walnuts (optional) – I love the crunch they add, but feel free to leave them out or swap for pecans. My kids prefer it without, so sometimes I split the batter and add nuts to just half.
That’s it—eleven simple ingredients, and you’re on your way to the coziest apple bread you’ll ever make.
How to Make Apple Bread
Alright, let’s get to the fun part—actually making this apple bread! I promise, it’s way easier than you might think. The whole process is pretty straightforward, and I’ll walk you through each step so you feel totally confident. Grab your ingredients, and let’s get baking.
Preheat and Prep the Pan
First things first—set your oven to 350°F (175°C). You want it nice and hot before that batter goes in. While it’s heating up, grease a 9×5-inch loaf pan really well. I usually use butter or a good nonstick spray, but my favorite trick? Line the pan with a strip of parchment paper, leaving a little overhang on the two long sides. That way, when the bread’s done, you can just lift it right out. No fuss, no sticking. Trust me, it’s a game-changer.
Mix the Dry Ingredients
Grab a large bowl and whisk together the 2 cups of flour, 1 teaspoon of baking soda, 1/2 teaspoon of salt, and 1 teaspoon of cinnamon. Just whisk ’em until they’re all combined and no lumps are hiding. I usually give it a good 20-30 seconds. If you want an extra-light texture, you can sift everything together, but honestly, I don’t bother most of the time. A whisk does the job just fine.
Combine the Wet Ingredients
In a separate, medium-sized bowl, it’s time for the wet stuff. Whisk together the 1/2 cup of granulated sugar, 1/2 cup of packed brown sugar, 1/2 cup of vegetable oil, 2 large eggs, and 1 teaspoon of vanilla extract. Whisk until everything is smooth and well combined—you shouldn’t see any streaks of egg or pockets of sugar. But don’t go crazy here. You just want it mixed, not beaten into submission. A minute of gentle whisking is all it takes.
Combine and Fold
Now for the moment of truth. Pour the wet mixture into the bowl with the dry ingredients. Grab a rubber spatula and stir gently, just until the flour disappears. Seriously, stop the second you don’t see any more white streaks. Overmixing will make your apple bread tough and dense, and we definitely don’t want that. A few lumps are totally okay. Once it’s combined, gently fold in the diced apples and the walnuts if you’re using them. The batter will be pretty thick—almost like a cookie dough—so don’t panic. That’s exactly how it should look.
Bake and Cool
Scrape the batter into your prepared loaf pan and spread it out evenly with the spatula. Pop it in the oven and bake for 55 to 65 minutes. I like to rotate the pan halfway through so it bakes evenly. You’ll know it’s done when a toothpick inserted into the center comes out clean or with just a few moist crumbs clinging to it. The top should be a beautiful golden brown, and the edges will start to pull away from the pan. Let it cool in the pan for about 10 minutes—this is important, because it needs that time to set. Then, using your parchment sling or just a careful flip, transfer it to a wire rack to cool completely. I know it’s tempting to slice into it right away, but if you wait until it’s fully cool, you’ll get much cleaner slices. Worth it, I promise.
Tips for Perfect Apple Bread
After making this apple bread more times than I can count, I’ve picked up a few tricks that really make a difference. These little tips are the difference between a good loaf and a great one, and I’m happy to share them with you.
Use a mix of sweet and tart apples. I love using one Granny Smith for that bright, tangy kick, and one Honeycrisp or Fuji for natural sweetness. The contrast makes the apple bread so much more interesting. If you use all sweet apples, it can be a little one-note. And stay away from soft, mealy apples like Red Delicious—they’ll just turn to mush in the oven.
Do not overmix the batter. I know I’ve said it before, but it’s worth repeating. When you combine the wet and dry ingredients, stir only until the flour disappears. A few lumps are totally fine. Overmixing develops the gluten too much, and you’ll end up with a tough, dense loaf instead of a tender, moist one. Be gentle, and you’ll be rewarded.
Check for doneness early. Every oven runs a little differently, so start checking your apple bread at the 50-minute mark. Stick a toothpick or a thin knife right into the center. If it comes out clean or with just a few moist crumbs clinging to it, you’re golden. If it’s still wet, give it another 5 minutes and check again. Better to check early than to overbake it.
Let it cool completely for clean slices. I know, I know—the smell is intoxicating, and you want to dig in immediately. But trust me on this one. If you slice into the bread while it’s still warm, it’ll crumble and fall apart. Let it cool in the pan for 10 minutes, then transfer it to a wire rack and let it cool completely. That wait is the secret to those beautiful, bakery-style slices you’re after.
Store it right for maximum moisture. Once your apple bread is completely cool, wrap it tightly in plastic wrap or aluminum foil and keep it in an airtight container at room temperature. It’ll stay moist and delicious for up to three days. If you live in a humid climate, you might want to pop it in the fridge after day two. And if it starts to dry out a little, just warm a slice in the microwave for 10-15 seconds—it’ll taste fresh out of the oven.
Apple Bread Variations
One of my absolute favorite things about this apple bread recipe is how easy it is to switch things up. I love having a base recipe I can trust, and then just playing around with different add-ins and toppings depending on my mood or what I have in the pantry. Here are a few of my favorite variations that I think you’ll love too.
Toss in some dried fruit. If you want a little extra chew and sweetness, fold in about 1/2 cup of raisins or dried cranberries along with the apples. I love using dried cranberries in the fall—they add a nice tart pop that’s just gorgeous with the cinnamon and apples. Just make sure to roughly chop the raisins if they’re large, so they distribute evenly throughout the batter.
Swap the walnuts for pecans. Not a fan of walnuts? No problem at all. Pecans are a fantastic substitute. They have a slightly sweeter, more buttery flavor that pairs beautifully with the apples. I actually prefer pecans in this apple bread when I’m feeling fancy. Just chop them up the same way you would the walnuts, and fold them right in.
Add a crumb topping for extra crunch. Okay, this one is my secret weapon. If you want your apple bread to feel extra special, make a quick crumb topping. Just mix together 1/4 cup of cold butter (cut into small pieces), 1/4 cup of all-purpose flour, 1/4 cup of packed brown sugar, and 1/2 teaspoon of cinnamon. Use your fingers or a pastry cutter to blend it until it looks like coarse sand. Sprinkle it generously over the batter before it goes into the oven. It bakes up into this gorgeous, buttery, crunchy crust that’s absolutely irresistible. Trust me, your family will go crazy for it.
Make it gluten-free. I’ve had a few friends ask if they could enjoy this apple bread, and I’m happy to say it works beautifully with a good 1:1 gluten-free flour blend. Look for one that contains xanthan gum—that’s what helps mimic the structure of gluten. I’ve used Bob’s Red Mill and King Arthur’s measure-for-measure blends with great success. Just swap it in for the regular flour, and follow the recipe exactly as written. The texture might be just slightly more tender, but it’s still absolutely delicious. No one will even know it’s gluten-free!
Serving Suggestions
Okay, so you’ve got this beautiful loaf of apple bread cooling on the counter, and the whole house smells like a cozy autumn dream. Now comes the best part—deciding how to enjoy it! I have a few favorite ways, and honestly, they’re all wonderful.
My absolute go-to is to slice off a thick piece while it’s still slightly warm and slather it with a generous pat of salted butter. The butter melts right into the tender crumb, and it’s just pure comfort. If I’m feeling a little fancy, I’ll spread a thin layer of cream cheese on there instead. The tanginess is a perfect match for the sweet apples and cinnamon.
And for those days when you want to treat yourself? Drizzle a little warm caramel sauce over the top. I’m not kidding—it turns this simple loaf into a dessert that feels like a special occasion. A scoop of vanilla ice cream on the side wouldn’t hurt either, but that’s getting into dangerous territory!
As for when to eat it, I love this apple bread for breakfast with a hot cup of coffee or tea. It’s also my favorite afternoon snack—just a slice with a mug of something warm, and I’m set. It’s not too sweet, so it fits right in at any time of day. Honestly, I’ve even been known to grab a slice for a late-night snack, and I have zero regrets.
Storing and Reheating Apple Bread
So you’ve baked this gorgeous loaf, and hopefully you’ve managed to save some for later—though honestly, no judgment if it disappears fast! When you do have leftovers, storing your apple bread the right way makes all the difference. I’ve learned this the hard way after a few sad, dried-out slices that I forgot about on the counter.
For short-term storage, just wrap the cooled loaf (or individual slices) tightly in plastic wrap or aluminum foil and pop it in an airtight container. It’ll stay perfectly moist at room temperature for up to three days. If your kitchen runs warm or humid, go ahead and stick it in the fridge—it’ll last up to a week there. Just a heads-up, though: refrigeration can dry out baked goods a little faster, so make sure it’s really well wrapped.
For longer storage, this apple bread freezes like a dream. I do this all the time when I want to have a stash ready for busy mornings or unexpected guests. Wrap the whole loaf or individual slices in a double layer of plastic wrap, then pop them in a freezer-safe bag or container. Squeeze out as much air as you can before sealing. It’ll keep beautifully for up to three months. When you’re ready to enjoy it, just thaw it overnight in the fridge or on the counter for a couple of hours.
Now, for reheating—this is where the magic happens. I love warming up a slice in the microwave for about 15 seconds. It comes out soft and almost like it just came out of the oven. If you want a slightly crisper edge, pop it in a toaster oven or regular oven at 350°F for about 5 minutes. My personal favorite? A quick toast in the toaster, then a generous smear of butter. That little bit of warmth really brings all those apple-cinnamon flavors back to life. Just don’t overdo it, or you’ll end up with dry bread—and nobody wants that!
Frequently Asked Questions
I get asked a lot of questions about this apple bread, and honestly, I love hearing from you all! Here are the ones that pop up most often. I hope they help you bake the perfect loaf every single time.
Can I use whole wheat flour instead of all-purpose?
You sure can, but I’ll be straight with you—the bread will come out denser and a little more hearty. Whole wheat flour soaks up more moisture, so the texture changes a bit. My favorite trick is to use half whole wheat and half all-purpose flour. That way, you get a little of that nutty whole wheat flavor and a little more fiber, but the bread still stays tender and moist, just like you want it. If you go all whole wheat, don’t forget to add an extra tablespoon or two of liquid—maybe a splash of milk or even apple juice—to help keep things from drying out.
What apples are best for apple bread?
Oh, this is such a good question, and honestly, the apple you choose really does make a difference. My personal favorite is Granny Smith—they’re tart, firm, and they hold their shape beautifully while baking. That little bit of tanginess balances the sweetness of the bread perfectly. If you want something sweeter, Honeycrisp or Fuji are fantastic choices too. They’re nice and firm, so they won’t turn to mush. My go-to is actually a mix: one Granny Smith for tartness and one Honeycrisp for sweetness. The combination is just lovely. Whatever you do, stay away from soft apples like Red Delicious or McIntosh. They break down too much in the oven and can make your bread soggy. Trust me on this one—I learned that lesson the hard way!
How do I know when the apple bread is done?
I always use the trusty toothpick test, and it’s never let me down. Just stick a toothpick or a thin knife right into the center of the loaf. If it comes out clean or with just a few moist crumbs clinging to it, you’re good to go. But I also look for a couple of other signs. The top should be a beautiful, deep golden brown, and you’ll notice the edges starting to pull away from the sides of the pan. If the top is browning too fast but the center is still wet, tent the loaf loosely with a piece of foil for the last 10-15 minutes of baking. And remember, every oven is a little different, so start checking around the 50-minute mark to be safe. Better to check early than to overbake it!
Can I make this recipe dairy-free?
Great news—the recipe as written is already dairy-free! The oil takes the place of butter, so there’s no milk, cream, or butter in the batter itself. The only potential dairy sneaking in is if you use butter to grease the pan. Just swap that out for a nonstick spray or a little more oil, and you’re all set. Or use a dairy-free butter alternative if you have one on hand. So yes, this moist apple bread is totally dairy-friendly without any changes at all. One less thing to worry about!
Apple Bread Nutrition Information
I know a lot of us like to keep an eye on what we’re eating, so here’s the breakdown for this apple bread. These numbers are based on one slice, assuming you cut the loaf into ten even pieces. Keep in mind, these are estimates—the exact numbers can shift a little depending on the specific brands you use, the size of your apples, or if you decide to go heavy-handed on the walnuts (I won’t blame you!).
- Calories: 280
- Fat: 12g
- Saturated Fat: 2g
- Carbohydrates: 38g
- Fiber: 2g
- Sugar: 20g
- Protein: 4g
- Sodium: 220mg
- Cholesterol: 35mg
And hey, if you’re looking at that sugar number and feeling a little unsure, just remember—most of it comes from the natural sweetness of the apples and the brown sugar, which adds so much more than just sweetness. It’s all about balance, right? A slice of this apple bread with a cup of coffee is a perfectly reasonable way to start your day, if you ask me.
Print
Apple Bread: The 1 Recipe You’ll Crave
- Total Time: 1 hour 15 minutes
- Yield: 1 loaf (10 servings) 1x
- Diet: Vegetarian
Description
This apple bread is moist and flavorful. It uses simple ingredients. You can enjoy it for breakfast or as a snack.
Ingredients
- 2 cups all-purpose flour
- 1 teaspoon baking soda
- 1/2 teaspoon salt
- 1 teaspoon cinnamon
- 1/2 cup granulated sugar
- 1/2 cup brown sugar, packed
- 1/2 cup vegetable oil
- 2 large eggs
- 1 teaspoon vanilla extract
- 2 cups peeled and diced apples
- 1/2 cup chopped walnuts (optional)
Instructions
- Preheat your oven to 350°F (175°C). Grease a 9×5 inch loaf pan.
- In a large bowl, whisk together flour, baking soda, salt, and cinnamon.
- In a separate bowl, mix granulated sugar, brown sugar, oil, eggs, and vanilla until smooth.
- Pour the wet ingredients into the dry ingredients. Stir until just combined.
- Fold in the diced apples and walnuts.
- Pour the batter into the prepared loaf pan.
- Bake for 55 to 65 minutes, until a toothpick inserted in the center comes out clean.
- Cool in the pan for 10 minutes, then transfer to a wire rack to cool completely.
Notes
- You can use any apple variety. Granny Smith works well for tartness.
- Store leftover bread in an airtight container at room temperature for up to 3 days.
- For a sweeter bread, add an extra 2 tablespoons of sugar.
- Prep Time: 15 minutes
- Cook Time: 60 minutes
- Category: Bread
- Method: Bake
- Cuisine: American
Nutrition
- Serving Size: 1 slice
- Calories: 280
- Sugar: 20g
- Sodium: 220mg
- Fat: 12g
- Saturated Fat: 2g
- Unsaturated Fat: 9g
- Trans Fat: 0g
- Carbohydrates: 38g
- Fiber: 2g
- Protein: 4g
- Cholesterol: 35mg