
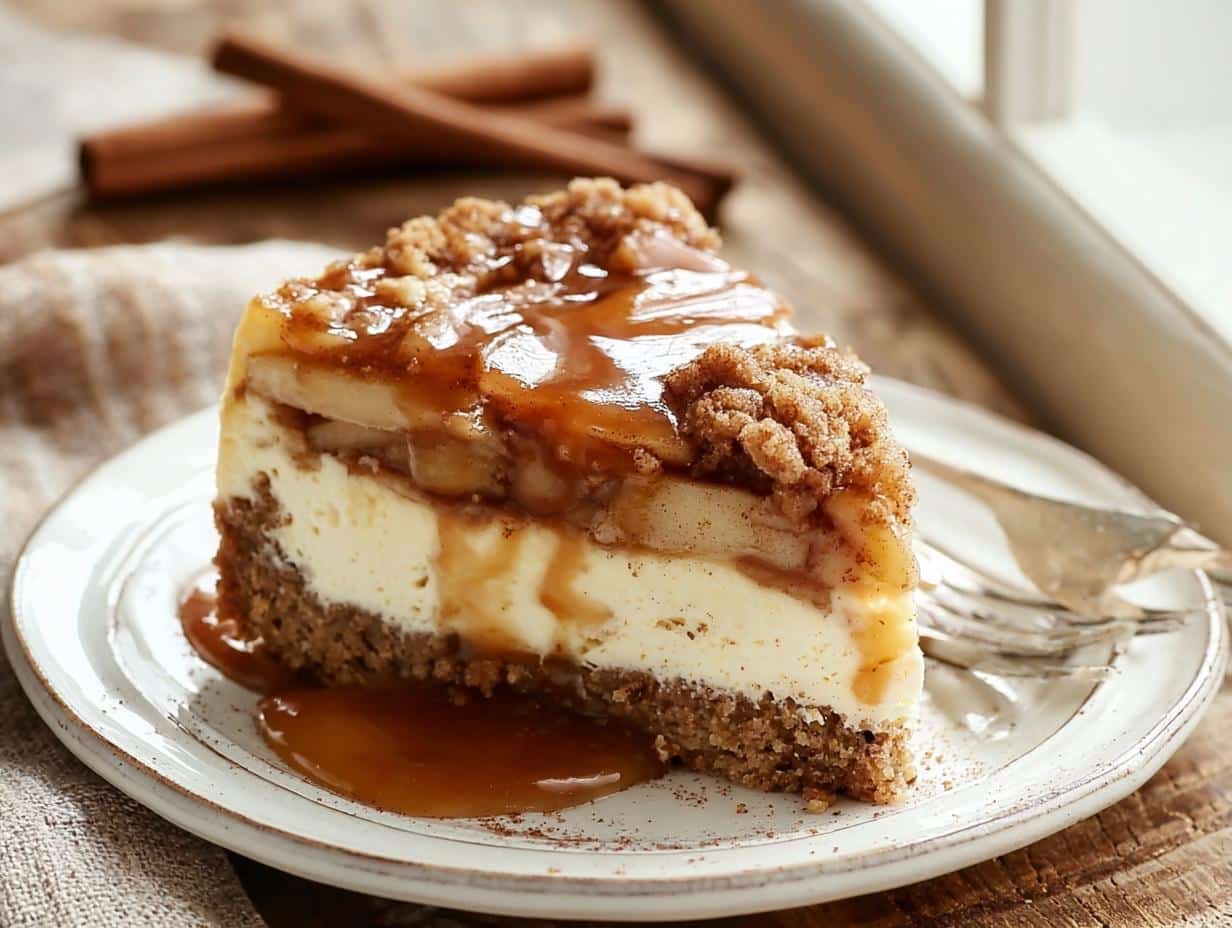
What happens when you take the silky, rich goodness of cheesecake and pile it high with warm, spiced apples? You get this incredible Apple Pie Cheesecake, obviously. It’s the perfect mashup of two all-time favorite desserts, and it’s been my go-to for fall gatherings for years. Last Thanksgiving, I brought it to my sister’s place, and let me tell you, there wasn’t a crumb left. After over a decade of baking and testing recipes, I can honestly say this one hits every single note: a buttery graham cracker crust, a smooth and creamy center, and that glorious apple pie topping. Trust me, you’re going to love this one!
Why You’ll Love This Apple Pie Cheesecake
- Simple ingredients, big payoff. You probably have most of this stuff in your pantry already—no weird, hard-to-find items here.
- Holiday-worthy, but easy enough for a Tuesday. It looks super impressive on a dessert table, but I promise it’s way simpler than it sounds.
- That texture, though. The cheesecake filling is rich, creamy, and totally luscious, while the apple topping adds a soft, spiced, almost jammy layer.
- Seasonal flavor you’ll crave. Cinnamon, nutmeg, and tender apples? It’s basically fall on a plate.
- No water bath drama. I’ll give you my tips so you can skip the fuss and still get a crack-free top. Seriously.
Ingredients for Apple Pie Cheesecake
Before we get started, let me walk you through the lineup. I’ve tested this one a bunch, so I’m pretty particular about a few things—like making sure your cream cheese is truly at room temperature and your apples are fresh. Here’s what you’ll need:
- For the crust: 1½ cups graham cracker crumbs, ¼ cup granulated sugar, and ½ cup unsalted butter (melted).
- For the cheesecake filling: 3 (8 oz) packages cream cheese (softened to room temperature!), ¾ cup granulated sugar, 3 large eggs (also room temp), 1 teaspoon vanilla extract, and ½ cup sour cream.
- For the apple topping: 2 cups peeled and diced apples (that’s about 2 medium apples), ¼ cup packed brown sugar, 1 teaspoon ground cinnamon, ¼ teaspoon ground nutmeg, 1 tablespoon lemon juice, and a slurry made from 1 tablespoon cornstarch mixed with 2 tablespoons water.
How to Make Apple Pie Cheesecake
Alright, let’s get to the fun part! I’ve broken this down into simple steps so you don’t get overwhelmed. The key things to remember: make sure your cream cheese and eggs are truly at room temperature (I know, I sound like a broken record, but it really matters), and don’t overmix the filling once the eggs go in. Here’s how it all comes together.
Prepare the Crust for Apple Pie Cheesecake
Start by preheating your oven to 325°F. In a bowl, stir together the graham cracker crumbs, ¼ cup sugar, and melted butter until it looks like wet sand. Press the mixture firmly into the bottom of a 9-inch springform pan. I like to use the bottom of a flat measuring cup to really pack it down evenly. Bake for 10 minutes, then set it aside to cool while you make the filling.
Make the Apple Pie Cheesecake Filling
In a large bowl, beat the softened cream cheese and ¾ cup sugar together until it’s completely smooth and fluffy—no lumps allowed! Add the eggs one at a time, beating gently after each just until combined. Then mix in the vanilla and sour cream. Here’s the thing: scrape down the sides of the bowl often, and once everything’s incorporated, stop mixing. Overbeating adds too much air and can cause cracks later. Pour the filling over your cooled crust and give the pan a gentle tap on the counter to release any bubbles.
Bake the Apple Pie Cheesecake
Now, for that perfectly creamy texture, I really recommend a water bath. Wrap the bottom of your springform pan tightly with heavy-duty foil (I use two layers just to be safe). Place it in a larger roasting pan, then pour hot water into the larger pan until it comes about halfway up the sides of the cheesecake pan. Bake for 50 to 60 minutes—the center should still be a little jiggly, like firm Jell-O, but the edges should be set. Turn off the oven, crack the door open, and let the cheesecake sit inside for 1 hour. This gentle cooling helps prevent cracks. Then transfer it to the fridge and chill for at least 4 hours, though overnight is even better.
Cook the Apple Topping for Apple Pie Cheesecake
While the cheesecake is chilling, you can make the topping. In a medium saucepan, combine the diced apples, brown sugar, cinnamon, nutmeg, and lemon juice. Cook over medium heat, stirring occasionally, until the apples soften—about 5 minutes. Give your cornstarch slurry a quick stir, then pour it into the pan. Cook for another minute until the mixture thickens and looks glossy. Remove from the heat and let it cool completely. I usually pop it in the fridge to speed things up.
Assemble the Apple Pie Cheesecake
Just before you’re ready to serve, take your fully chilled cheesecake out of the springform pan. Spread the cooled apple topping evenly over the top with an offset spatula. For clean, beautiful slices, run your knife under hot water, wipe it dry, then cut. Repeat between each slice. That’s it—you’ve just made the most incredible Apple Pie Cheesecake!
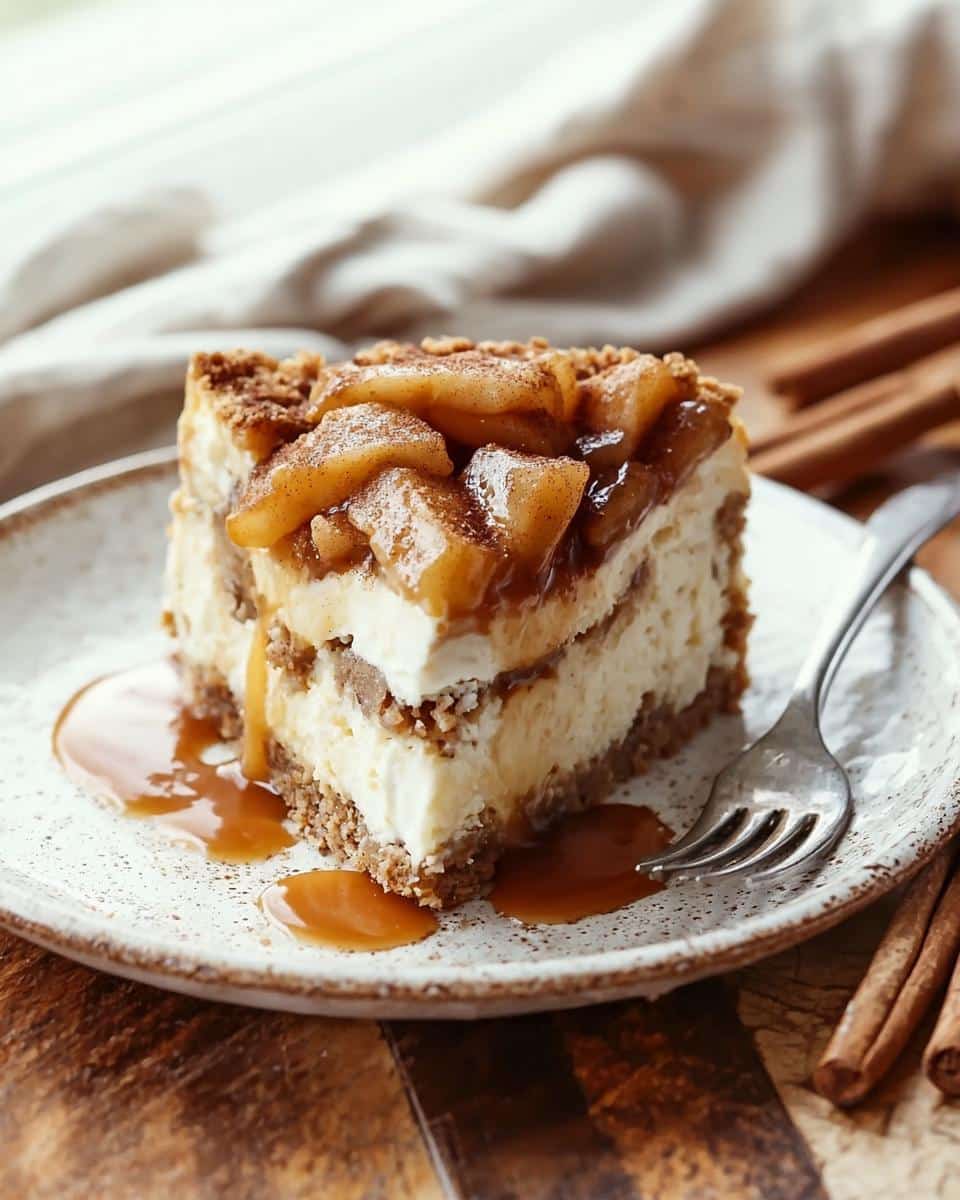
Tips for Perfect Apple Pie Cheesecake
Okay, let’s talk about a few things that’ll really set you up for success. I’ve made this recipe more times than I can count, and these little tricks are what separate a good cheesecake from a truly great one. First off, room temperature ingredients are non-negotiable. Cold cream cheese leads to a lumpy filling, and cold eggs can make the batter curdle. Just pull everything out an hour before you start. Second, don’t overmix the filling once the eggs go in. Mix just until combined, then stop. Too much air creates cracks. Third, use a water bath—I know it sounds fussy, but it’s the secret to that silky, even texture. And finally, cool it gradually. A sudden temperature change is the number one cause of cracks. Trust me, follow these tips and you’ll be golden.
Water Bath for Apple Pie Cheesecake
Don’t let the water bath scare you—it’s really simple. Just wrap the bottom of your springform pan tightly with heavy-duty foil. I actually use two layers, just to be extra safe against leaks. Place the wrapped pan in a larger roasting pan, then pour hot water into the larger pan until it comes about halfway up the sides of the cheesecake pan. That gentle, even heat keeps the edges from baking too fast while the center sets up perfectly. No cracks, no dry edges—just creamy perfection.
Cooling and Chilling Apple Pie Cheesecake
This step is where patience pays off. After baking, turn off the oven and crack the door open. Let the cheesecake sit inside for a full hour. This gradual cooling prevents that sudden shock that causes cracks. Then, transfer it to the fridge and chill for at least 4 hours, but overnight is honestly best. I know it’s hard to wait, but the texture gets so much better after a good long rest. Don’t rush it!
Variations and Substitutions for Apple Pie Cheesecake
One of the best things about this recipe is how easy it is to tweak. If you need a gluten-free crust, just swap in gluten-free graham crackers—works like a charm. Not an apple fan? Pears or peaches make a fantastic substitute—just adjust the sugar a bit if they’re super sweet. I also love drizzling a little caramel sauce over the top for extra decadence. And if you’re out of cinnamon, apple pie spice is a perfect one-for-one swap. Play around with it and make it your own!
Serving Suggestions for Apple Pie Cheesecake
I love serving this beauty with a big dollop of freshly whipped cream or a scoop of vanilla ice cream—the cool creaminess is perfect against the spiced apples. A light dusting of cinnamon on top looks gorgeous, too. And for drinks? A mug of hot cider or a strong cup of coffee is all you need. It’s basically the coziest fall dessert situation.
Storing and Reheating Apple Pie Cheesecake
Got leftovers? Lucky you! Just cover the cheesecake tightly with plastic wrap or foil and pop it in the fridge. It’ll stay fresh and delicious for up to 5 days. I don’t recommend freezing this one—the apple topping gets watery, and the texture of the cheesecake suffers. And honestly, I think it’s best served cold, straight from the fridge. No reheating needed!
Apple Pie Cheesecake Nutrition Information
Here’s the nutritional breakdown for one slice (that’s 1/12 of the whole cheesecake): about 480 calories, 30g fat (17g saturated), 45g carbs, and 8g protein. Keep in mind these are just estimates—they’ll shift a little depending on the brands you use and any swaps you make. But it’s a good ballpark!
Frequently Asked Questions About Apple Pie Cheesecake
I get a lot of questions about this recipe, so let me answer a few of the most common ones. If you’ve got something else on your mind, just drop it in the comments below—I love hearing from you!
Can I use a different crust for Apple Pie Cheesecake?
Absolutely! Vanilla wafer crumbs or shortbread cookies make a fantastic swap. Just keep an eye on the butter—shortbread is a bit richer, so you might need a tablespoon less. I’ve also used crushed gingersnaps for a little extra spice, and wow, that’s a good one.
How do I prevent cracks in Apple Pie Cheesecake?
That’s the million-dollar question, right? My top three tips: use a water bath (I swear by it), don’t overmix the filling once the eggs go in, and cool the cheesecake gradually in the oven with the door cracked. Follow those and you’ll get a smooth, beautiful top every time.
Can I make Apple Pie Cheesecake ahead?
Yes, and I actually recommend it! You can make the entire cheesecake (minus the topping) up to two days in advance. Just keep it covered in the fridge. Then, the day you’re serving it, make the apple topping, let it cool, and spread it on. It saves you a ton of stress on the big day.
Can I use frozen apples in Apple Pie Cheesecake?
I wouldn’t, honestly. Frozen apples release a ton of extra liquid as they thaw, and that turns your beautiful topping into a watery mess. Stick with fresh, firm apples—like Granny Smith or Honeycrisp—for the best texture and flavor.
How long does Apple Pie Cheesecake keep?
Stored properly in the fridge (tightly covered so it doesn’t pick up any weird smells), it’ll stay delicious for up to 5 days. I’ve never had it last that long in my house, but it’s good to know! And remember, serve it cold straight from the fridge—no need to warm it up.
Got more questions? Leave a comment below, rate the recipe if you’ve tried it, or share a photo on social media—I’d love to see your Apple Pie Cheesecake creations!
Print
Apple Pie Cheesecake: The Ultimate 2-in-1 Dessert
- Total Time: 1 hour 30 minutes (plus 4 hours chilling)
- Yield: 12 servings 1x
- Diet: Vegetarian
Description
A creamy cheesecake with a spiced apple topping and a buttery graham cracker crust. This dessert combines two favorites into one rich treat.
Ingredients
- 1 1/2 cups graham cracker crumbs
- 1/4 cup granulated sugar
- 1/2 cup unsalted butter, melted
- 3 (8 oz) packages cream cheese, softened
- 3/4 cup granulated sugar
- 3 large eggs
- 1 teaspoon vanilla extract
- 1/2 cup sour cream
- 2 cups peeled and diced apples (about 2 medium apples)
- 1/4 cup brown sugar
- 1 teaspoon ground cinnamon
- 1/4 teaspoon ground nutmeg
- 1 tablespoon lemon juice
- 1 tablespoon cornstarch mixed with 2 tablespoons water
Instructions
- Preheat oven to 325°F. Mix graham cracker crumbs, 1/4 cup sugar, and melted butter. Press into bottom of a 9-inch springform pan. Bake 10 minutes. Cool.
- Beat cream cheese and 3/4 cup sugar until smooth. Add eggs one at a time, beating after each. Mix in vanilla and sour cream. Pour over crust.
- Bake 50-60 minutes until center is almost set. Turn off oven, leave door ajar, and let cheesecake cool inside for 1 hour. Refrigerate at least 4 hours.
- For apple topping: In a saucepan, combine apples, brown sugar, cinnamon, nutmeg, and lemon juice. Cook over medium heat until apples soften, about 5 minutes. Stir in cornstarch mixture. Cook 1 minute until thickened. Cool.
- Spread apple topping over chilled cheesecake before serving.
Notes
- Use a water bath to prevent cracks. Wrap pan in foil and place in a larger pan with hot water.
- Let cheesecake cool gradually to avoid cracking.
- Refrigerate leftovers up to 5 days.
- Prep Time: 30 minutes
- Cook Time: 1 hour
- Category: Dessert
- Method: Baking
- Cuisine: American
Nutrition
- Serving Size: 1 slice
- Calories: 480
- Sugar: 32 g
- Sodium: 350 mg
- Fat: 30 g
- Saturated Fat: 17 g
- Unsaturated Fat: 10 g
- Trans Fat: 0.5 g
- Carbohydrates: 45 g
- Fiber: 2 g
- Protein: 8 g
- Cholesterol: 120 mg