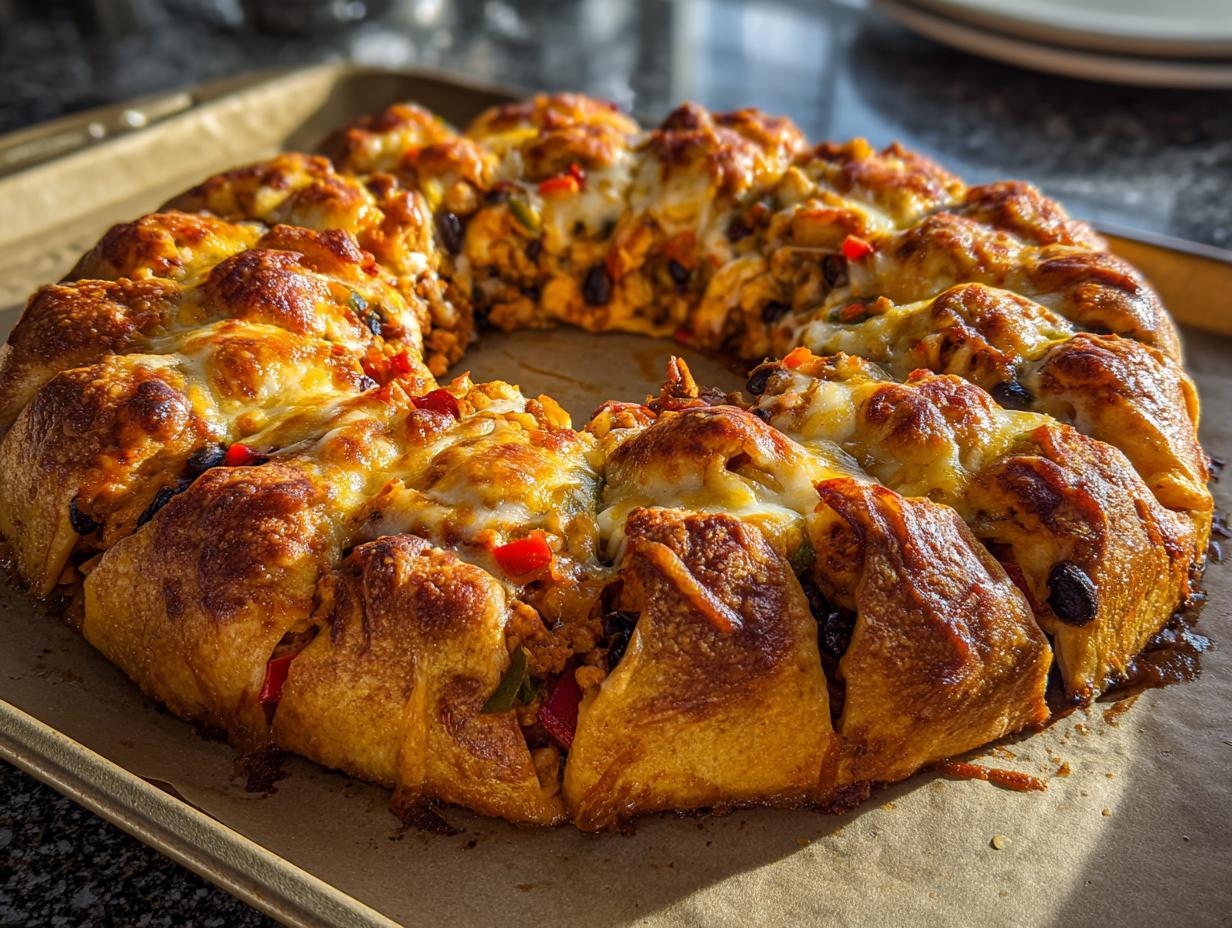
Picture this: your kitchen filled with the irresistible smell of melted cheese and spicy chicken, and a gorgeous golden ring of deliciousness sitting pretty on your serving platter. That’s the magic of my Blooming Quesadilla Ring – the party appetizer that never fails to get “oohs” and “aahs!” I first made this for my niece’s birthday, and now it’s my go-to for every gathering. What I love most? It’s shockingly easy to throw together (way simpler than it looks!), feeds a crowd, and disappears faster than you can say “seconds please!” Just wait until you see everyone’s faces when you bring this beauty to the table.
Why You’ll Love This Blooming Quesadilla Ring
Trust me, once you try this recipe, it’ll become your secret weapon for any get-together. Here’s why everyone goes crazy for my Blooming Quesadilla Ring:
- It’s a total showstopper – That gorgeous sunburst shape makes it look like you spent hours in the kitchen, but we’ll keep our little secret about how easy it really is!
- Customizable to please everyone – Got picky eaters? Swap the chicken for beef, leave out the beans, or add some spicy jalapeños. The possibilities are endless.
- Perfect party food – No more stuck serving individual quesadillas. This ring lets everyone dig in together – just add some dipping bowls in the center!
- Quick and foolproof – From fridge to table in 35 minutes flat. Even my 12-year-old nephew can make this (and has – with minimal supervision!).
- Leftovers taste amazing – If you’re lucky enough to have any left, they reheat beautifully for next-day snacking.
Seriously, this blooming quesadilla ring solves all my “what to bring” dilemmas. The first time I served it, three people asked for the recipe before they’d even finished eating!

Ingredients for Blooming Quesadilla Ring
Here’s everything you’ll need to create this cheesy masterpiece – I promise it’s all simple stuff you probably have already!
- 4 large flour tortillas (10-inch) – The bigger size makes rolling so much easier
- 2 cups tightly packed shredded cheese – I use Mexican blend, but sharp cheddar works too
- 1 cup cooked chicken, finely diced – Rotisserie chicken saves so much time
- 1/2 cup black beans, rinsed and drained – Pat them dry so they don’t make the tortillas soggy
- 1/4 cup diced bell peppers – Any color adds a nice crunch
- 1/4 cup diced onions – Red onions give extra flavor pop
- 1 tsp taco seasoning – My secret weapon for instant flavor
- 2 tbsp butter, melted – For that gorgeous golden finish
See? Nothing fancy – just good, simple ingredients that come together magically. Now let’s get cooking!
Equipment You’ll Need
Don’t worry – no fancy gadgets required here! Just grab these basics:
- A large baking sheet (no need to grease it!)
- Mixing bowl for your filling
- Pastry brush for that buttery finish
- Sharp knife for cutting tortillas
That’s it – now you’re ready to make magic happen!
How to Make a Blooming Quesadilla Ring
Okay, let’s get to the fun part! Making this blooming quesadilla ring is easier than you think – just follow these simple steps and you’ll have a masterpiece in no time.
Step 1: Prep the Filling
First things first – get that filling ready! In a large bowl, toss together your diced chicken, black beans (make sure they’re thoroughly drained – soggy beans = soggy quesadillas), bell peppers, onions, and that magical taco seasoning. Mix it all up until everything’s nicely coated. Pro tip: I like to let this sit for about 5 minutes so the flavors can start mingling while I prep the tortillas.
Step 2: Assemble the Ring
Now grab your tortillas and cut each one into 4 equal wedges (like you’re slicing a pizza). Spread about 1 tablespoon of cheese on each wedge, then add a generous spoonful of the filling mixture. Here’s the important part – roll them up tight starting from the wide end! Not too tight though, or they might burst open. Arrange them in a circle on your baking sheet with the pointed ends facing outward – they should overlap slightly like sunflower petals.
Step 3: Bake to Perfection
Time for the magic! Brush those beautiful rolls with melted butter (this gives them that irresistible golden color) and pop them in your preheated 375°F oven. Bake for 15-20 minutes until they’re golden brown and the cheese is gloriously melted. Want extra crispiness? Broil for the last 1-2 minutes – just keep a close eye so they don’t burn!

Oh! Almost forgot – resist the urge to dig in right away. Let them rest for about 2 minutes before serving (trust me, they’ll hold together better). Now step back and admire your handiwork – you just made restaurant-worthy appetizers with minimal effort!
Tips for the Best Blooming Quesadilla Ring
After making this blooming quesadilla ring more times than I can count (seriously, my family requests it weekly!), I’ve picked up some game-changing tricks you’ll love:
- Warm those tortillas first! 10 seconds in the microwave makes them flexible and less likely to crack when rolling. Cold tortillas = cracked tortillas.
- Rotate your pan halfway through baking. Ovens have hot spots, and turning ensures every wedge gets evenly golden. I forgot once and ended up with a “two-toned” ring – tasty but not my prettiest work!
- Let it rest before serving. I know it’s tempting to dive right in, but waiting 2 minutes lets the cheese set so your beautiful ring holds its shape when serving.
- Pat fillings super dry. That extra minute spent blotting beans and veggies with paper towels makes all the difference in preventing sogginess.
Follow these simple tips and your blooming quesadilla ring will come out perfect every single time. My neighbor still thinks I spent culinary school perfecting this – little does she know it’s all about these easy tricks!
Ingredient Substitutions & Variations
The beauty of this blooming quesadilla ring is how easily you can make it your own! Here are all my favorite twists after years of experimenting:
- Protein swaps: That rotisserie chicken can easily become ground beef (browned with taco seasoning), shredded pork, or even just beans for vegetarian friends. Last Thanksgiving, I used leftover turkey – total hit!
- Tortilla options: Need gluten-free? Corn tortillas work beautifully (just warm them extra to prevent cracking). For low-carb, I’ve had success with almond flour tortillas – a bit delicate but delicious.
- Cheese choices: Mexican blend is my go-to, but pepper jack adds nice heat. Vegan? Some of the new plant-based cheeses melt surprisingly well now – just look for ones labeled “good for melting.”
- Fun add-ins: Toss in some corn kernels for sweetness, sliced jalapeños for heat, or even a sprinkle of cilantro for freshness. My sister adds a thin layer of refried beans under the cheese – messy to roll but oh-so-worth it!
The best part? No matter what combos you try, that gorgeous ring shape always wows people. My most memorable version was a breakfast ring with scrambled eggs and bacon – served it at a brunch shower and got three marriage proposals (just kidding… mostly).

Serving Suggestions
Now for my favorite part – making your blooming quesadilla ring look as incredible as it tastes! Presentation is everything with this dish, and I’ve got some foolproof ways to turn it into a real centerpiece:
- The classic trio: Place small bowls of chunky salsa, creamy guacamole, and tangy sour cream right in the center of the ring. The colors pop against the golden wedges, and it makes serving a breeze!
- Lime crema magic: My secret weapon? Whisk together sour cream with lime zest and a squeeze of juice – that bright citrus flavor cuts through the richness perfectly.
- Garnish game strong: A sprinkle of chopped cilantro, thin radish slices, or even just a lime wedge on the side makes it look restaurant-worthy. I sometimes add a little bowl of pickled jalapeños for the spice lovers.
- Serve it hot: Honestly, this dish disappears so fast that fancy plating isn’t even necessary. Just set the whole baking sheet in the middle of the table with some tongs and watch the magic happen!
Pro tip from many messy parties – put the dipping bowls on small plates to catch any drips. And don’t be surprised when people start Instagramming your creation – my blooming quesadilla ring has photobombed more group shots than I can count!
Storage & Reheating
Here’s my no-fail method for keeping your blooming quesadilla ring tasting fresh (because let’s be real – leftovers rarely happen with this crowd-pleaser, but just in case!):
- Storing: Let the ring cool completely, then transfer to an airtight container – I like separating the wedges with parchment paper so they don’t stick together. They’ll keep beautifully in the fridge for up to 3 days.
- Reheating magic: For that just-baked crispness, always use your oven or toaster oven at 350°F for about 8-10 minutes. The microwave is tempting for speed, but trust me, it turns those perfect crispy edges into sad, soggy messes (learned that the hard way during my lazy college days!).
- Freezer hack: Yes, you can freeze these! Wrap individual wedges tightly in foil, then place in a freezer bag for up to 2 months. Reheat straight from frozen – just add a few extra minutes in the oven.
Funny story – my husband once ate a cold wedge straight from the fridge at 2am and declared it “still amazing.” I don’t recommend this, but it proves how tasty these stay even after chilling!

FAQs About Blooming Quesadilla Ring
After making this blooming quesadilla ring for every party imaginable, I’ve gotten the same questions over and over – so let me save you some trouble with all the answers I’ve discovered through trial and (sometimes hilarious) error!
Can I make the blooming quesadilla ring ahead of time?
Absolutely! Here’s my secret: assemble the whole ring on the baking sheet, cover tightly with plastic wrap, and refrigerate for up to 8 hours before baking. Just add an extra 2-3 minutes in the oven since it’s going in cold. I did this for my book club last month and got to actually socialize instead of being stuck in the kitchen!
Can I freeze leftover blooming quesadilla wedges?
You bet! Freeze the baked wedges on a parchment-lined tray first (about 1 hour), then transfer to freezer bags. They’ll keep for 2 months – just reheat at 350°F straight from frozen for 12-15 minutes. My kids actually prefer these over store-bought frozen snacks now!
How do I keep my blooming quesadilla ring from getting soggy?
Oh honey, I learned this the hard way at my first attempt! Three golden rules:
1) Pat those beans and veggies bone-dry with paper towels
2) Don’t over-sauce the filling (save salsa for dipping!)
3) Make sure your rolled wedges aren’t touching on the pan – they need breathing room to crisp up properly. Follow these and you’ll get perfect crispiness every time.
There you have it – all my hard-earned wisdom in one place! Now go forth and bloom those quesadillas with confidence. And when your friends inevitably ask for the recipe, just send them my way – I love hearing about all the creative variations people come up with!
Nutritional Information
Now let’s talk about the good stuff – what’s actually in this delicious blooming quesadilla ring! Keep in mind these are just estimates since your exact ingredients will vary (especially depending on cheese brands and tortilla types). But here’s the scoop:
Each serving gives you a nice balance of protein from the chicken and beans, plus some wholesome veggies tucked in those tortillas. The cheese? That’s where most of the richness comes from (and let’s be real – that’s what makes it so irresistible!).
If you’re watching certain nutrients, here are some easy tweaks I’ve used: swap in low-carb tortillas, use reduced-fat cheese, or load up more on the veggie fillings. But honestly? Life’s too short not to enjoy the full-fat, full-flavor version sometimes – especially when you’re sharing it with friends!
Ready to make some kitchen magic? Try this recipe and wow your guests at your next gathering – I promise they’ll be begging for your secret!
Print
1 Amazing Blooming Quesadilla Ring That Wows Every Time
- Total Time: 35 mins
- Yield: 8 servings 1x
- Diet: Low Lactose
Description
A fun and impressive dish that turns a classic quesadilla into a shareable ring. Perfect for parties or family meals.
Ingredients
- 4 large flour tortillas
- 2 cups shredded cheese (cheddar or Mexican blend)
- 1 cup cooked chicken, diced
- 1/2 cup black beans, rinsed
- 1/4 cup diced bell peppers
- 1/4 cup diced onions
- 1 tsp taco seasoning
- 2 tbsp butter, melted
Instructions
- Preheat oven to 375°F (190°C).
- Mix chicken, black beans, bell peppers, onions, and taco seasoning in a bowl.
- Cut each tortilla into 4 equal wedges.
- Spread cheese and filling mix on each wedge, then roll them up tightly.
- Arrange rolls in a circle on a baking sheet, slightly overlapping.
- Brush with melted butter and bake for 15-20 minutes until golden.
- Serve warm with salsa or sour cream.
Notes
- Use rotisserie chicken for faster prep.
- Customize fillings to your taste.
- For crispier texture, broil for 1-2 minutes at the end.
- Prep Time: 15 mins
- Cook Time: 20 mins
- Category: Appetizer
- Method: Baking
- Cuisine: Mexican
Nutrition
- Serving Size: 1 wedge
- Calories: 210
- Sugar: 1g
- Sodium: 380mg
- Fat: 11g
- Saturated Fat: 6g
- Unsaturated Fat: 4g
- Trans Fat: 0g
- Carbohydrates: 18g
- Fiber: 2g
- Protein: 12g
- Cholesterol: 35mg