There’s something magical about the smell of cinnamon and apples filling the kitchen – it takes me straight back to my grandma’s farmhouse every time. My Classic Double-Crust Apple Pie has won over more people than I can count, and it all comes down to two simple things: that impossibly flaky crust (seriously, people beg for the secret) and the perfect balance of sweet-tart apples kissed with warm spices. I’ve been making this pie for twenty Thanksgivings now, tweaking it each year until I got it just right – tender enough to cut cleanly but sturdy enough to hold that mountain of spiced apples. Trust me, once you try this version, you’ll never go back to store-bought again.
Why You’ll Love This Classic Double-Crust Apple Pie
This isn’t just any apple pie – it’s the kind that makes people sneak second (or third) slices when they think no one’s looking. Here’s why:
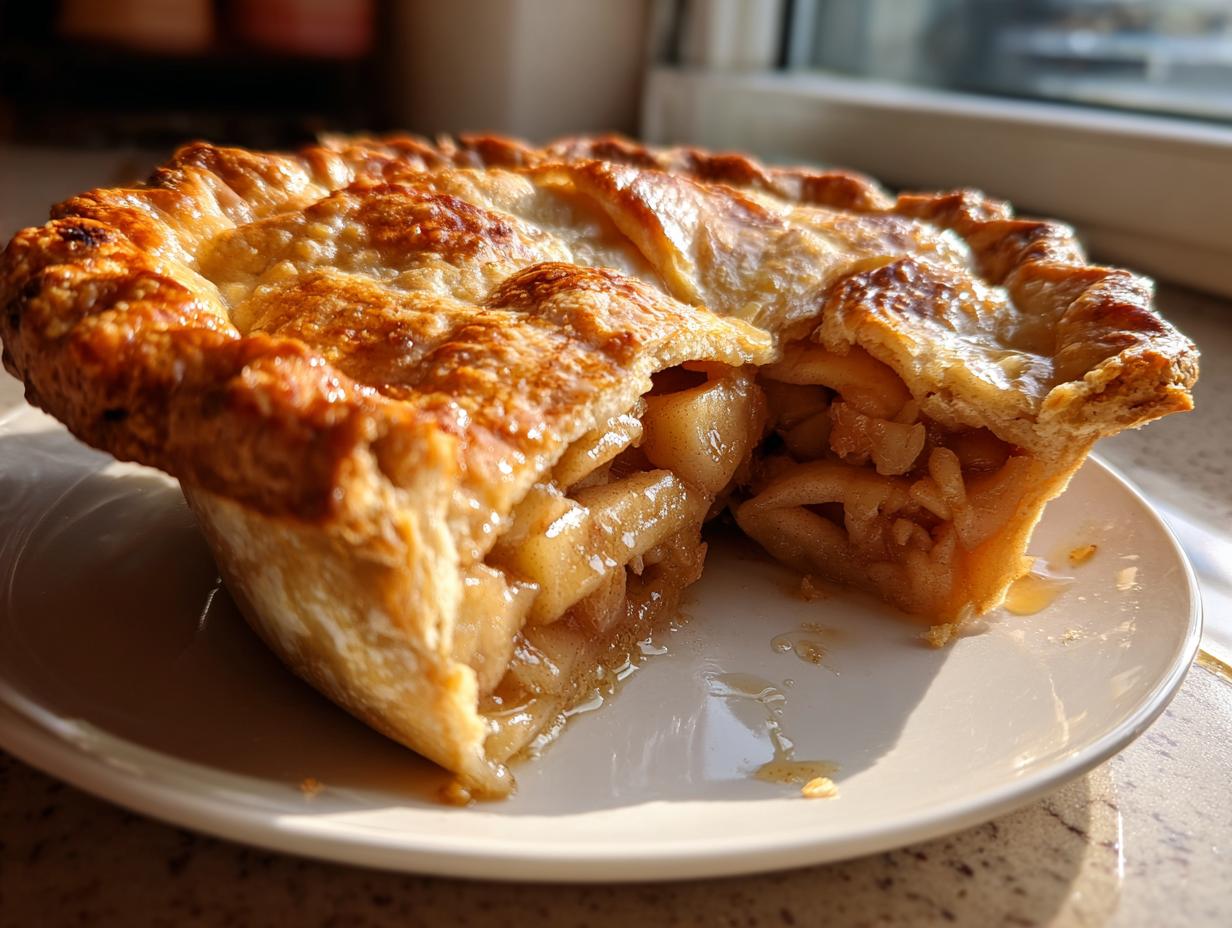
- That crust! Flaky, buttery layers that shatter when you bite into them – no sad, soggy bottoms here
- Perfectly spiced filling with just the right balance of cinnamon and nutmeg to let the apples shine
- Old-fashioned flavor that tastes like it came straight from Grandma’s kitchen window
- Foolproof recipe with all my tested tricks to guarantee pie success every time
Seriously, this pie disappears faster than I can make it – and I’ve seen grown adults fight over the last slice!
Ingredients for Classic Double-Crust Apple Pie
Let’s talk ingredients – because using the right stuff makes all the difference between a good pie and a knock-your-socks-off pie. I swear by these measurements after years of tweaking:
For the Flaky Crust:
- 2 ½ cups all-purpose flour (spooned and leveled – no packing!)
- 1 teaspoon fine sea salt (trust me, it boosts flavor)
- 1 cup unsalted butter, chilled and diced into pea-sized pieces (I freeze mine for 15 minutes first)
- 6-8 tablespoons ice water (yes, actual ice cubes floating in it)
For the Spiced Apple Filling:
- 6-7 cups thinly sliced peeled apples (about 5-6 medium Granny Smiths – slice them ¼” thick)
- ¾ cup granulated sugar (sometimes I do half brown sugar for extra depth)
- 2 tablespoons fresh lemon juice (bottled just isn’t the same)
- 1 ½ teaspoons ground cinnamon (the good stuff from the spice shop)
- ¼ teaspoon freshly grated nutmeg (your nose will thank you)
- 1 tablespoon unsalted butter, diced small (for dotting the filling)
- 1 egg, beaten (for that gorgeous golden sheen)
Pro tip: Measure everything before you start – pie-making waits for no one once that butter comes out!
Equipment You’ll Need for Classic Double-Crust Apple Pie
Listen, you could make this pie with a wine bottle as a rolling pin and a cereal bowl as a pie dish… but trust me, having the right tools makes all the difference between pie stress and pie success. Here’s what I always grab from my kitchen:
- A trusty 9-inch pie dish (glass or ceramic for even browning)
- Heavy rolling pin (none of that flimsy stuff)
- Large mixing bowls (I use two – one for crust, one for filling)
- Pastry cutter or two forks (for that perfect pea-sized butter texture)
- Sharp knife or apple slicer (those apples won’t slice themselves!)
- Pastry brush (for that golden egg wash)
That’s it! No fancy gadgets needed – just good old-fashioned tools that’ll last you a lifetime of pies.
How to Make Classic Double-Crust Apple Pie
Alright, let’s get to the good stuff! Making this pie is like a little dance – follow the steps, and you’ll end up with a masterpiece. Don’t let the crust intimidate you; I’ve broken it down so anyone can nail it.
Preparing the Crust
First things first – that flaky crust everyone raves about. Here’s how we do it:
- Whisk together flour and salt in your largest mixing bowl. Now grab that ice-cold butter and start cutting it in with a pastry cutter (or two forks if you’re improvising). You want it to look like coarse crumbs with some pea-sized butter bits still visible – those are your future flaky layers!
- Now for the water: sprinkle in ice water one tablespoon at a time, mixing gently with a fork after each addition. Stop when the dough just holds together when pinched. Too wet? Add flour. Too dry? More water. Easy!
- Divide the dough into two equal balls (no cheating on sizes!) and flatten into discs. Wrap them tight in plastic and pop in the fridge for at least an hour. This chill time relaxes the gluten and keeps your crust tender. Trust me, don’t skip this!
Pro tip: Overworking the dough makes it tough. Handle it like you’re holding a butterfly – gentle but confident.
Making the Apple Filling
While that dough chills, let’s tackle the star of the show – those glorious spiced apples:
- Peel and slice your apples about 1/4 inch thick – any thinner and they’ll turn to mush, any thicker and they won’t cook through. I like to hold a slice up to check – you should be able to see light through it.
- Toss the slices in a big bowl with sugar, lemon juice, cinnamon and nutmeg. Get in there with your hands and mix it all up until every piece is coated. The sugar will draw out juices – that’s perfect!
- Let this sit while you roll out the crust. Those 15 minutes let the flavors marry and the apples soften just a tad.
Assembling and Baking
Showtime! Here’s where the magic happens:
- Preheat your oven to 375°F (190°C) – no cheating on preheating!
- Roll out one dough disc on a floured surface to about 1/8 inch thick. Gently lift it into your pie dish, letting the edges drape over. No stretching!
- Pile in your apple mixture (juices and all) and dot with those tiny butter pieces – this adds richness.
- Roll out the second disc and drape it over the top. Trim the edges to about 1 inch overhang, tuck under, and crimp however you like – I do a simple fork press.
- Cut steam vents (get creative with patterns!) and brush with beaten egg for that golden shine.
- Bake for 45-55 minutes until the crust is deeply golden and juices bubble through the vents. Your kitchen will smell like heaven!
Let it cool at least 2 hours before slicing – I know it’s hard, but this keeps the filling from running everywhere. Worth the wait!
Tips for the Perfect Classic Double-Crust Apple Pie
After burning my fair share of pies (and learning some tough lessons), here are my can’t-live-without tips for apple pie perfection:
- Butter should be COLD – I mean, “just came from the freezer” cold. Warm butter makes tough crust. If your hands start warming it while mixing, pop the bowl in the fridge for 5 minutes.
- Don’t skimp on vent holes – Cut at least 4-5 good-sized slits in the top crust. That steam needs somewhere to go, or you’ll get a soggy mess.
- Wait to slice! I know it’s torture, but let the pie cool at least 2 hours. The filling thickens as it cools – slice too soon, and it’ll run everywhere.
- Bake on the bottom rack – This ensures the bottom crust cooks through before the top burns. If the top browns too fast, tent it with foil.
- Listen to your pie – When those juices bubble thickly through the vents (not watery!), it’s done. No timer can beat that visual cue.
Follow these, and you’ll avoid all the mistakes I made the hard way!
Ingredient Notes and Substitutions
Okay, let’s talk swaps! While I swear by the original ingredients, life happens – here’s how to adapt without sacrificing that perfect pie:
Apple Varieties
Granny Smiths are my go-to for their tartness and structure, but mix it up! Honeycrisps add sweetness, Fujis stay firm, and a handful of Pink Ladies bring floral notes. Avoid Red Delicious – they turn to mush. Pro tip: Using 2-3 varieties gives amazing depth.
Sweetener Swaps
Ran out of white sugar? Brown sugar adds caramel notes (use ½ cup white + ¼ cup packed brown). Maple syrup works in a pinch (reduce other liquids slightly). Just steer clear of honey – it makes the filling weep.
Butter Alternatives
For vegan pies, chilled coconut oil works (expect slightly denser crust). Margarine can sub in, but the flavor won’t be as rich. Whatever you use, keep it COLD – that’s non-negotiable for flaky layers!
Serving Suggestions for Classic Double-Crust Apple Pie
Oh, the possibilities! A slice of this pie is glorious on its own, but why stop there? My family goes wild when I serve it warm with a scoop of vanilla ice cream melting into the flaky crust. Fresh whipped cream with a hint of cinnamon is my personal favorite. For special occasions, I’ll drizzle caramel sauce over the top – the way it pools into those flaky layers is pure magic. And if you’re feeling extra? Add a sprinkle of sea salt to balance the sweetness. Trust me, you’ll want to lick the plate.
Storing and Reheating Classic Double-Crust Apple Pie
Here’s the good news – this pie actually gets better the next day as the flavors meld! At room temp, it keeps beautifully under a cake dome for 2 days (if it lasts that long). For longer storage, wrap slices tightly in foil and freeze for up to 3 months – just pop them straight into a 350°F oven for 15 minutes to revive that crisp crust. My secret? Place a baking sheet under the pie when reheating to catch any drips and prevent a soggy bottom. Pro tip: Never microwave it – you’ll sacrifice that perfect flaky texture we worked so hard for!
Classic Double-Crust Apple Pie FAQs
After years of making this pie (and fielding countless questions from friends), here are the answers to the things everyone wants to know:
Which apples make the best pie filling?
Hands down, Granny Smiths are my first choice for their perfect balance of tartness and structure. They hold their shape beautifully during baking. That said, mixing varieties creates magic – try adding some Honeycrisp or Braeburn for sweetness. Just avoid mealy apples like Red Delicious unless you want apple sauce pie!
How do I prevent a soggy bottom crust?
Oh, the dreaded soggy bottom! My triple-defense system: 1) Bake on the bottom rack for maximum heat. 2) Brush the bottom crust with egg wash before adding filling (creates a moisture barrier). 3) Let the pie cool completely before slicing – rushing this guarantees juice runoff.
Can I make the pie ahead of time?
Absolutely! The dough discs keep wrapped in the fridge for 2 days or freeze for 3 months. The assembled (but unbaked) pie freezes beautifully too – just add 10-15 minutes to baking time. Day-old baked pie reheats like a dream at 350°F for 15 minutes.
Why did my crust shrink?
I feel your pain! This happens when dough isn’t chilled enough before baking. Always chill your shaped crust in the pie dish for 30 minutes before adding filling. And don’t stretch the dough when placing it – that tension makes it contract.
My filling is runny – how can I thicken it?
Toss your apples with 1 tablespoon cornstarch or flour along with the sugar and spices. If it’s still too juicy after baking, let it cool completely (I know, torture!) – the filling sets as it cools. Still loose? Next time try draining some juice before filling the crust.
Nutritional Information
Okay, let’s be real – we’re not eating apple pie for its health benefits! But because I know you’re curious, here’s the scoop on one glorious slice (based on 8 servings per pie):
- Calories: About 320 (worth every one!)
- Fat: 14g (mostly from that glorious butter)
- Sugar: 24g (apples are nature’s candy, after all)
- Fiber: 3g (hey, apples count for something!)
Remember, these are estimates – your exact numbers might vary based on apple sweetness or how generously you slice. But honestly? When that cinnamon-scented flaky crust hits your tongue, I promise nutritional math will be the last thing on your mind!
Share Your Classic Double-Crust Apple Pie
Nothing makes me happier than seeing your pie creations! Snap a photo of your golden masterpiece and tag me – I wanna see those perfect flaky layers! Leave a comment below telling me how it turned out (or which lucky souls got to taste it). Happy baking, friends!
Print
Irresistible Classic Double-Crust Apple Pie with Flaky Perfection
- Total Time: 1 hour 20 minutes (plus chilling)
- Yield: 1 (9-inch) pie 1x
- Diet: Vegetarian
Description
A traditional double-crust apple pie with a flaky crust and sweet, spiced apple filling.
Ingredients
- 2 ½ cups all-purpose flour
- 1 teaspoon salt
- 1 cup unsalted butter, chilled and diced
- 6–8 tablespoons ice water
- 6–7 cups thinly sliced peeled apples (such as Granny Smith)
- ¾ cup granulated sugar
- 2 tablespoons lemon juice
- 1 ½ teaspoons ground cinnamon
- ¼ teaspoon ground nutmeg
- 1 tablespoon unsalted butter, diced
- 1 egg, beaten (for egg wash)
Instructions
- Mix flour and salt in a large bowl. Cut in chilled butter until the mixture resembles coarse crumbs.
- Gradually add ice water, 1 tablespoon at a time, mixing until the dough just holds together.
- Divide the dough into two equal parts, shape into discs, wrap in plastic, and refrigerate for at least 1 hour.
- Preheat oven to 375°F (190°C).
- Roll out one dough disc on a floured surface and fit it into a 9-inch pie dish.
- In a large bowl, toss apples with sugar, lemon juice, cinnamon, and nutmeg. Pour into the pie crust.
- Dot the filling with diced butter.
- Roll out the second dough disc and place it over the filling. Seal and crimp the edges. Cut slits in the top crust.
- Brush the top with beaten egg.
- Bake for 45-55 minutes, or until golden brown and bubbly. Cool before serving.
Notes
- Use cold butter for a flaky crust.
- Let the pie cool slightly before slicing to set the filling.
- Serve with vanilla ice cream or whipped cream.
- Prep Time: 30 minutes
- Cook Time: 50 minutes
- Category: Dessert
- Method: Baking
- Cuisine: American
Nutrition
- Serving Size: 1 slice
- Calories: 320
- Sugar: 24g
- Sodium: 180mg
- Fat: 14g
- Saturated Fat: 9g
- Unsaturated Fat: 4g
- Trans Fat: 0g
- Carbohydrates: 45g
- Fiber: 3g
- Protein: 3g
- Cholesterol: 45mg