
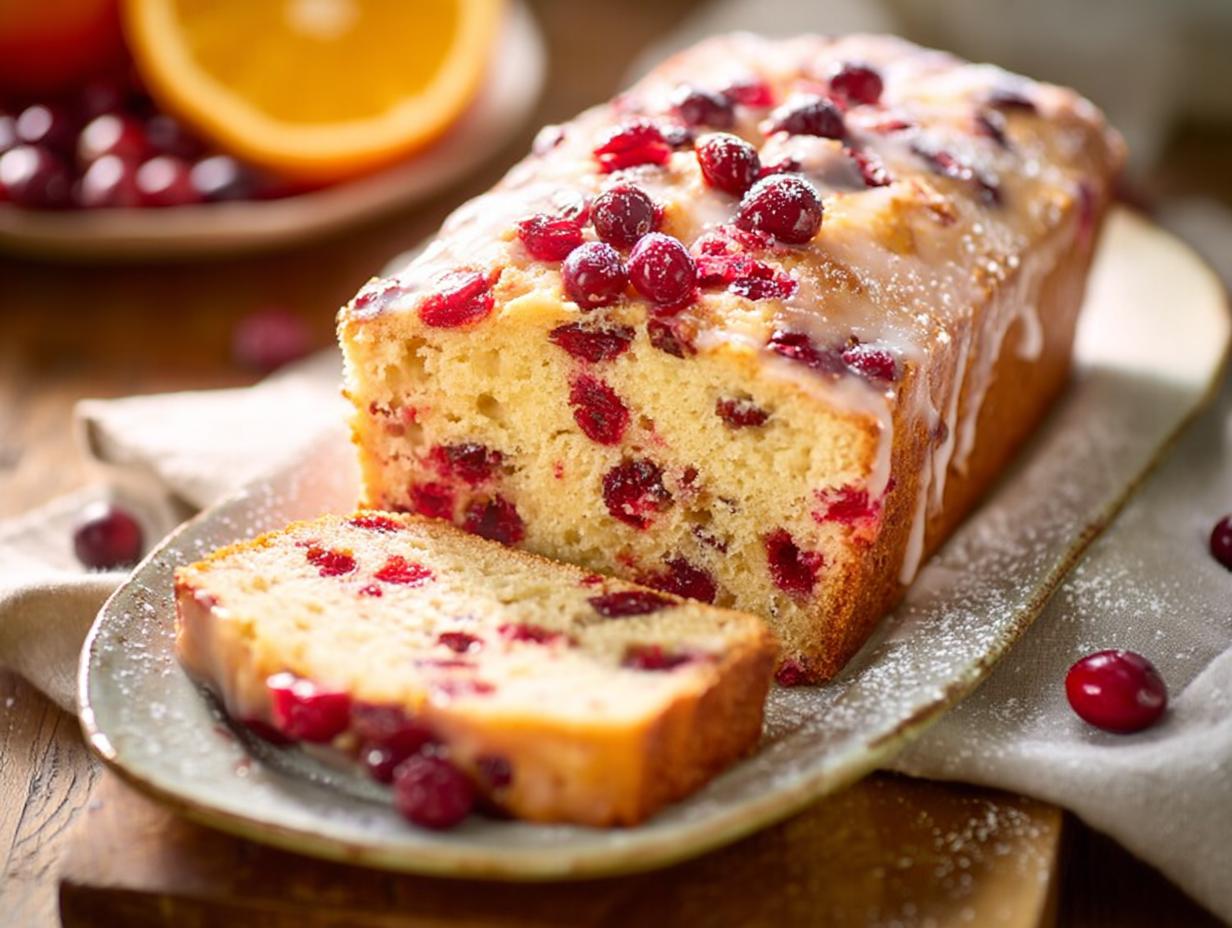
There’s something so simple and satisfying about a slice of homemade Cranberry Bread, fresh from the oven. That perfect balance of tart cranberries and sweet, tender crumb? It’s pure comfort. What I love about this recipe is that it uses basic pantry ingredients, it’s totally foolproof for beginners, and it delivers a moist, bakery-style loaf every single time. I’ve been baking this for holiday gatherings for years, and it never fails to disappear fast.
Why This Cranberry Bread Recipe Works Every Time
I’ve tested a lot of cranberry bread recipes over the years, and this one wins because it’s built on a few simple techniques that make all the difference. The first rule? Don’t overmix the batter. I know it’s tempting to keep stirring until everything looks perfectly smooth, but stop the second the flour disappears. Overmixing develops gluten, and that’s what turns a tender quick bread into a tough, rubbery loaf. Buttermilk is another secret weapon here. Its acidity reacts with the baking soda to give you a beautiful rise, plus it keeps the crumb incredibly moist without feeling greasy. And here’s a trick I swear by: toss your cranberries in a tablespoon of flour before folding them in. That little coating creates friction, so the berries stay suspended in the batter instead of sinking to the bottom. Trust me, these three things are the difference between good cranberry bread and absolutely perfect cranberry bread.
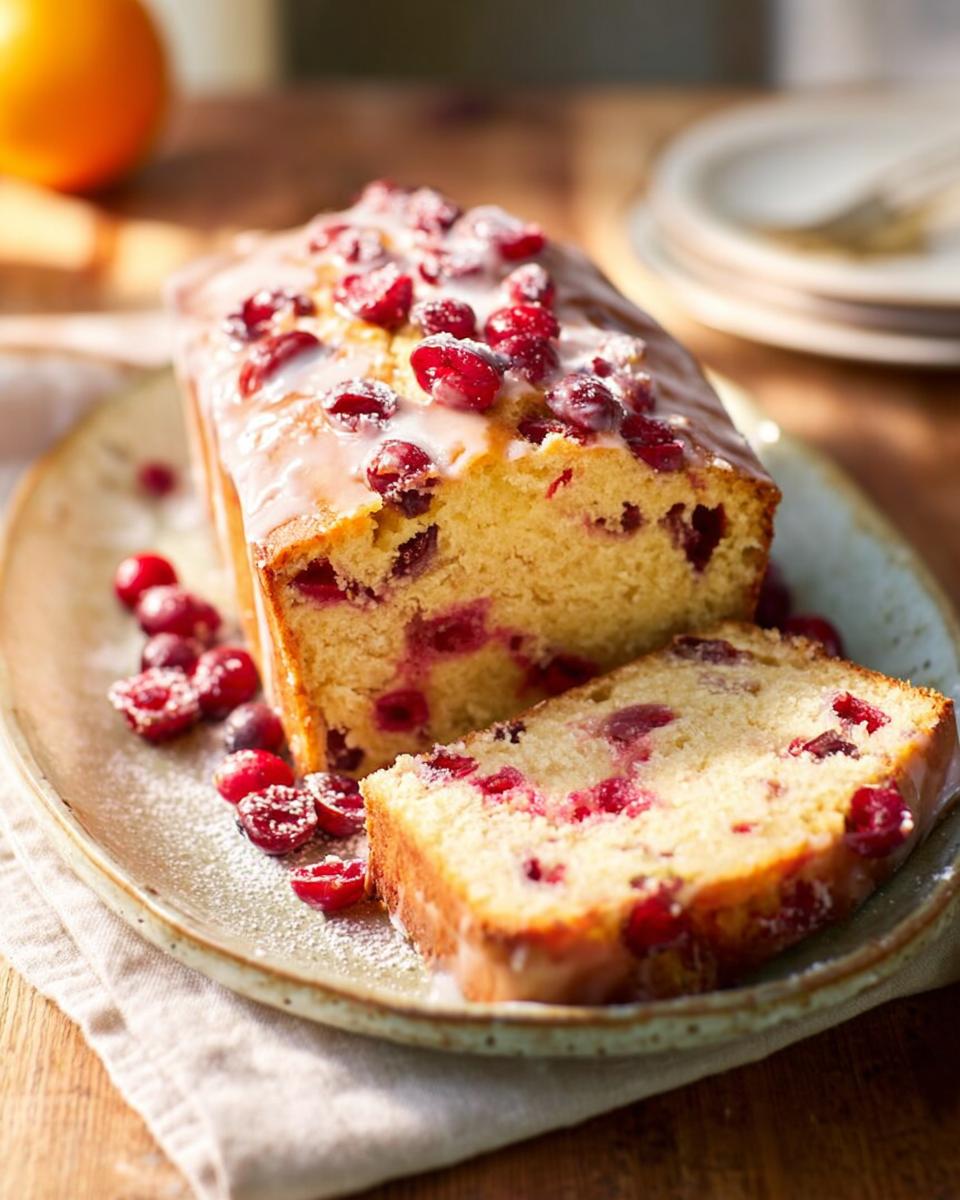
The Secret to a Moist and Tender Crumb
Here’s the thing about quick breads: the less you mix, the better the texture. When you combine your wet and dry ingredients, use a rubber spatula and fold gently until just combined. A few streaks of flour still visible in the batter? That’s totally fine. They’ll disappear as the bread bakes. Overmixing is the enemy here because it develops gluten, which gives you a tough, dense loaf instead of that soft, tender crumb we’re after. So stir sparingly and stop early.
Why Buttermilk is a Game Changer
Buttermilk does double duty in this recipe. First, the acid reacts with the baking soda to create a lovely lift, giving the bread a nice domed top and a light interior. Second, it keeps the crumb incredibly moist without making it greasy or heavy. I always use full-fat buttermilk when I can, but low-fat works fine too. If you don’t have buttermilk on hand, no worries. Just add 1 tablespoon of lemon juice or white vinegar to a cup of milk, let it sit for 5 minutes, and you’ve got a perfect homemade substitute. For more on the science behind baking with acidic ingredients, check out this guide to acidic ingredients in baking.
Ingredients for the Perfect Cranberry Bread
Let me walk you through what you’ll need. I’ve tested this recipe more times than I can count, and each ingredient plays a specific role in making that perfect loaf. Here’s what to grab:
- All-purpose flour: Spoon it into your measuring cup and level with a knife. Scooping directly packs the flour, and that’s how you end up with dry bread. Trust me, this little habit makes a big difference.
- Granulated sugar: Just your standard white sugar. Nothing fancy here. It sweetens the bread just enough to balance those tart cranberries.
- Baking powder and baking soda: Check the expiration dates before you start. I learned this the hard way when my bread came out flat as a pancake. Fresh leavening agents are non-negotiable for a good rise.
- Salt: Fine sea salt or table salt works perfectly. Don’t skip it – salt enhances all the other flavors and keeps the bread from tasting flat.
- Buttermilk: Full-fat is my go-to for the richest texture, but low-fat works just fine too. The acidity is what matters here, and it’s what gives the bread that incredible tenderness.
- Vegetable oil: Use a neutral oil like canola or avocado. You want the cranberry flavor to shine, not the oil.
- Large egg: Bring it to room temperature before you start. A cold egg can seize up the batter and make it harder to mix evenly. Just set it on the counter 30 minutes before baking.
- Vanilla extract: Pure vanilla extract, please. The imitation stuff has a weird aftertaste, and this bread deserves the real deal.
- Fresh or frozen cranberries: If you’re using frozen, do not thaw them first. Toss them in straight from the freezer. Thawing turns them mushy and turns your batter purple.
Ingredient Substitutions and Tips
Don’t have buttermilk? No problem. Just add 1 tablespoon of lemon juice or white vinegar to 1 cup of milk, let it sit for 5 minutes, and you’ve got a perfect substitute. For the cranberries, frozen ones work great straight from the bag – no thawing needed. Fresh cranberries are wonderful too; you can leave them whole or give them a rough chop if you want more berry in every bite. Just remember to toss them in a little flour first so they don’t sink to the bottom.
Step-by-Step Instructions for Homemade Cranberry Bread
Alright, let’s get baking! I’ve broken this down into simple steps so you can follow along without any stress. Trust me, if you take it one step at a time, you’ll end up with a gorgeous loaf that looks and tastes like it came from a fancy bakery. Here’s exactly how I do it.
1. Prep Your Oven and Pan
First things first, preheat your oven to 350°F (175°C). Then grab your 9×5-inch loaf pan and grease it well with butter or non-stick spray. I like to take it one step further and line it with a strip of parchment paper, leaving a little overhang on the long sides. That parchment “handles” make lifting the finished loaf out so much easier. Trust me, it’s worth the extra few seconds.
2. Combine the Dry Ingredients
In a large bowl, whisk together the flour, sugar, baking powder, baking soda, and salt. Don’t just stir lazily—whisk it for a good 30 seconds. This aerates the flour and makes sure the leavening agents are evenly distributed. You don’t want one slice to get all the baking soda and another to get none, right?
3. Mix the Wet Ingredients
In a separate medium bowl, whisk together the buttermilk, vegetable oil, egg, and vanilla extract. Whisk until everything is smooth and fully combined. I use a fork or a small whisk for this. It takes about 20 seconds. Make sure that egg is well incorporated—you don’t want any streaks of white hiding in there.
4. Combine Wet and Dry
Now pour the wet mixture into the bowl with the dry ingredients. Grab a rubber spatula and gently fold everything together. Here’s the most important part: stir only until no large pockets of flour remain. A few small streaks of flour are totally okay. They’ll disappear as the bread bakes. Do not overmix! I know it’s tempting to keep stirring until it’s perfectly smooth, but that develops gluten and makes the bread tough. Stop early, I promise.
5. Fold in the Cranberries
Gently fold the cranberries into the batter with just a few strokes. If you’re using frozen cranberries (which I usually do), do not thaw them first. Add them straight from the bag. Thawing them makes them release juice, which turns your batter purple and makes the berries mushy. Frozen berries stay intact and give you those beautiful tart bursts in every bite.
6. Bake to Golden Perfection
Pour the batter into your prepared pan and spread it evenly with the spatula. Bake for 50 to 60 minutes. I start checking at 50 minutes by inserting a toothpick into the center. It should come out clean or with just a few moist crumbs attached. If the top is browning too quickly (around the 40-minute mark), tent the pan loosely with a piece of foil. That keeps the crust from burning while the inside finishes baking.
7. Cool Before Slicing
Let the bread cool in the pan on a wire rack for 10 minutes. Then run a knife around the edges (if you didn’t use parchment) and lift the loaf out using the parchment overhang. Place it on the wire rack to cool completely before slicing. I know it’s hard to wait, but slicing while it’s still warm will make the bread crumble and fall apart. Patience pays off here. Once it’s completely cool, you’ll get perfect, clean slices every time.
Expert Tips for the Best Cranberry Bread
I’ve made this recipe more times than I can count, and I’ve learned a few tricks that turn a good loaf into a truly great one. Let me share what I’ve discovered so you can nail it on your first try.
First, measure your flour the right way. Don’t just scoop the cup into the bag—that packs the flour and you end up with way too much. Instead, spoon it into your measuring cup and level it off with a knife. It takes two extra seconds, but it’s the difference between a tender crumb and a dry, dense loaf.
Next, let your ingredients come to room temperature. I know it’s tempting to pull the egg straight from the fridge and crack it in, but a cold egg can make the batter seize up. Just set everything out on the counter for about 30 minutes before you start. The batter comes together smoother, and the bread rises more evenly.
And here’s the golden rule: don’t overmix the batter. Stop stirring the second the flour disappears. A few streaks left are totally fine. Overmixing develops gluten, and that’s what makes quick breads tough and rubbery. I’ve made that mistake before, and trust me, it’s not worth it.
One more tip that changed everything for me: toss your cranberries in one tablespoon of flour before folding them into the batter. That little coating creates friction, so the berries stay suspended throughout the loaf instead of sinking to the bottom. You’ll get a perfect distribution of tart cranberries in every single slice.
Finally, start checking for doneness at 50 minutes. Ovens vary wildly, and the difference between perfectly baked and overbaked is just a few minutes. Insert a toothpick into the center—if it comes out clean or with just a few moist crumbs, it’s done. If the top is browning too fast, tent it loosely with foil around the 40-minute mark. These little habits make all the difference.
Variations to Customize Your Cranberry Bread
One of the things I love most about this cranberry bread recipe is how easy it is to make it your own. I’ve played around with different add-ins over the years, and honestly, it’s hard to pick a favorite. These variations are all super simple – they don’t change the base recipe at all, just add a little something extra to make it uniquely yours. Here are a few of my go-to combinations:
Orange Cranberry Bread
This is probably my most requested version, especially around the holidays. Just add 1 tablespoon of fresh orange zest to the sugar before you start mixing. Use your fingers to rub the zest into the sugar until it smells amazing – that releases the citrus oils and spreads the flavor throughout the whole loaf. The bright, sunny orange flavor pairs so beautifully with the tart cranberries. It’s like Christmas in a slice.
Cranberry Walnut Bread
If you like a little crunch in your bread, this one’s for you. Simply fold in about 1/2 cup of chopped walnuts or pecans along with the cranberries. I like to toast the nuts lightly in a dry skillet first – it really brings out their nutty flavor. The combination of tart berries, crunchy nuts, and that tender crumb? Absolutely irresistible. My husband says this version is his favorite, and he’s not even a big nut person. For more nutty additions to your baking, check out these apple walnut charoset.
Cranberry White Chocolate Bread
Okay, this one’s a little indulgent, but so worth it. Fold in 1/2 cup of white chocolate chips along with the cranberries. The sweet, creamy white chocolate balances out the tartness of the berries perfectly. It’s like a fancy bakery treat, but you made it right in your own kitchen. If you’ve got a sweet tooth, this is definitely the variation for you. Just be warned – it might not last very long!
Gluten-Free Cranberry Bread
I’ve made this for friends who are gluten-free, and they always rave about it. Just swap the all-purpose flour for a 1:1 gluten-free baking blend, and you’re good to go. The key is to be extra careful not to overmix the batter – gluten-free flours can get gummy if you work them too much. Other than that, everything else stays exactly the same. It’s that easy to make this recipe work for everyone at the table.
How to Store and Freeze Cranberry Bread
Let’s be real—if your cranberry bread lasts long enough to need storing, you’re doing better than I usually do! But when I’m making it ahead for the holidays or just want to savor it over a few days, I’ve got some tried-and-true methods to keep it tasting fresh. Here’s how I handle mine.
For short-term storage, wrap your cooled loaf tightly in plastic wrap or pop it in an airtight container. It’ll stay perfectly moist at room temperature for up to 3 days. I keep mine on the counter, not the fridge, because the fridge tends to dry out baked goods faster. But hey, if you prefer a denser, firmer texture, go ahead and refrigerate it—it’ll last up to 5 days that way.
Now for freezing, which is my secret weapon for holiday prep. Once the bread is completely cool, wrap it tightly in a layer of plastic wrap, then add a second layer of aluminum foil. That double wrap protects it from freezer burn and keeps all that moisture locked in. It’ll stay good for up to 3 months. I’ve even frozen whole loaves and individual slices—both work great.
When you’re ready to enjoy it, just let it thaw at room temperature, still wrapped, for about 2 to 3 hours. Don’t unwrap it while it’s thawing, or you’ll lose moisture and end up with condensation on the bread. Trust me, I learned that the hard way.
To reheat slices, you’ve got two easy options. For a quick fix, pop a slice in the microwave for 15 to 20 seconds—it’ll taste almost fresh from the oven. Or, if you want a slightly crisper edge, toast it lightly. The warmth really brings out that cranberry tartness and makes the butter melt beautifully. Either way, it’s pure comfort.
Frequently Asked Questions About Cranberry Bread
Can I use frozen cranberries without thawing?
Yes, absolutely! In fact, I always use frozen cranberries straight from the bag. Don’t thaw them first. Thawing makes them release all that juice, which turns your batter purple and makes the berries mushy. Frozen berries stay nice and firm, and they give you those beautiful tart bursts in every bite. Just toss them in the flour first so they don’t sink.
Why did my cranberries sink to the bottom?
Oh, I’ve been there! It’s frustrating, but it’s usually one of two things. Either you overmixed the batter – that thins it out too much so the berries can’t stay suspended – or you skipped tossing the cranberries in a little flour before folding them in. That flour coating creates friction, kind of like little anchors. Trust me, that one extra step makes all the difference. Now every slice has berries evenly distributed from top to bottom.
Can I make this into muffins?
You bet! I do this all the time when I want something more portable. Just divide the batter evenly into a greased 12-cup muffin tin. Bake at 350°F (175°C) for 18 to 22 minutes. Start checking at 18 minutes with a toothpick. They come out perfectly domed and tender. My kids love them for breakfast, and they freeze beautifully too.
Can I use fresh cranberries?
Yes, fresh cranberries work perfectly. I use them in the fall when they’re in season. You can leave them whole or coarsely chop them if you want more berry in every bite. Just remember the same rule: toss them in a little flour before folding them in so they don’t all sink to the bottom. Fresh or frozen, both are fantastic.
Why is my bread dry?
That’s usually a sign of overbaking, honestly. I know we all want to be sure it’s done, but check for doneness at 50 minutes. Ovens vary so much, and just a few extra minutes can dry out the crumb. The other culprit is incorrect flour measurement – if you scooped the cup right into the bag, you probably packed in too much flour. Spoon and level next time, and your bread will come out beautifully moist. I’ve made both mistakes myself, and once you fix them, this recipe is foolproof.
Nutritional Information
I always get asked about the numbers, so here’s the breakdown for one slice of this cranberry bread. Keep in mind these are estimates—they’ll shift a little depending on the exact brands you use and whether you go for the white chocolate chips or walnuts. But this gives you a solid idea of what you’re working with.
- Serving Size: 1 slice
- Calories: 200
- Total Fat: 8g
- Saturated Fat: 3g
- Unsaturated Fat: 4g
- Trans Fat: 0g
- Cholesterol: 20mg
- Sodium: 200mg
- Total Carbohydrates: 30g
- Dietary Fiber: 1g
- Sugars: 18g
- Protein: 3g
Note: Nutritional values are estimates and will vary based on specific ingredients and portion sizes. I always recommend checking your own labels if you’re tracking closely!
Print
Cranberry Bread 3 Secrets for Perfect Moist Loaf
- Total Time: 1 hour 10 minutes
- Yield: 1 loaf (12 slices) 1x
- Diet: Vegetarian
Description
A moist and tangy quick bread loaded with fresh or frozen cranberries.
Ingredients
- 2 cups all-purpose flour
- 1 cup granulated sugar
- 1 1/2 teaspoons baking powder
- 1/2 teaspoon baking soda
- 1/2 teaspoon salt
- 1 cup buttermilk
- 1/2 cup vegetable oil
- 1 large egg
- 1 teaspoon vanilla extract
- 2 cups fresh or frozen cranberries
Instructions
- Preheat your oven to 350°F (175°C). Grease a 9×5-inch loaf pan.
- In a large bowl, whisk together flour, sugar, baking powder, baking soda, and salt.
- In another bowl, mix buttermilk, oil, egg, and vanilla until smooth.
- Pour the wet ingredients into the dry ingredients. Stir until just combined. Do not overmix.
- Gently fold in the cranberries.
- Pour the batter into the prepared pan. Spread evenly.
- Bake for 50-60 minutes, or until a toothpick inserted in the center comes out clean.
- Cool in the pan for 10 minutes, then transfer to a wire rack to cool completely.
Notes
- If using frozen cranberries, do not thaw them before adding to the batter.
- For a sweeter bread, increase sugar to 1 1/4 cups.
- Store leftover bread wrapped in plastic at room temperature for up to 3 days.
- Prep Time: 15 minutes
- Cook Time: 55 minutes
- Category: Bread
- Method: Bake
- Cuisine: American
Nutrition
- Serving Size: 1 slice
- Calories: 200
- Sugar: 18g
- Sodium: 200mg
- Fat: 8g
- Saturated Fat: 3g
- Unsaturated Fat: 4g
- Trans Fat: 0g
- Carbohydrates: 30g
- Fiber: 1g
- Protein: 3g
- Cholesterol: 20mg