Oh, these Cranberry Maple Scones! They’re my absolute go-to when I want to treat myself (and anyone lucky enough to stop by my kitchen) to something special. There’s just something magical about that tart pop of cranberries dancing with the deep, cozy sweetness of real maple syrup. I first made these on a chilly autumn morning when I was craving something warm and comforting, and now they’re a staple in my baking rotation. Whether it’s a lazy weekend breakfast or a quick afternoon pick-me-up, these scones never fail to hit the spot. Trust me, once you try them, you’ll understand why I keep coming back to this recipe!

Why You’ll Love These Cranberry Maple Scones
These scones are my little triumph of simplicity and flavor—here’s why you’ll adore them too:
- Quick & easy: From bowl to table in under 35 minutes—perfect for lazy mornings or surprise guests.
- The flavor magic: Tart cranberries and sweet maple syrup create that irresistible sweet-tart balance your tastebuds crave.
- Versatile superstar: Fancy enough for brunch with friends, sturdy enough to toss in a lunchbox (they’ll think you’re a baking genius).
- Texture perfection: Crisp edges with a tender, just-sweet-enough crumb that makes you want to nibble slowly… or devour in two bites.
Honestly? I’ve yet to meet a person who doesn’t light up when I pull these golden beauties out of the oven.
Ingredients for Cranberry Maple Scones
Gathering your ingredients is the first step to scone success! Here’s everything you’ll need (and my little chef’s notes on why each one matters):
- 2 cups all-purpose flour – The backbone of our scones. No fancy substitutions here – all-purpose gives just the right structure.
- 1/4 cup granulated sugar – Just enough sweetness to let the maple and cranberries shine through.
- 1 tbsp baking powder – Our rising agent. Make sure yours is fresh for maximum lift!
- 1/2 tsp salt – Don’t skip this – it balances all the flavors beautifully.
- 1/2 cup unsalted butter, cold and cubed – I mean REALLY cold. Like “just out of the fridge 5 minutes ago” cold. This is the secret to flaky layers.
- 1/2 cup dried cranberries – My go-to for convenience, but fresh cranberries (chopped) work too if you want extra tartness.
- 1/4 cup maple syrup – The good stuff! None of that pancake syrup – real maple syrup makes all the difference.
- 1/2 cup heavy cream – Makes the dough rich and tender. Whole milk works in a pinch but won’t be quite as luxurious.
- 1 tsp vanilla extract – The flavor booster that ties everything together. Use pure vanilla if you have it!
See? Nothing too fancy – just quality ingredients treated right. Now let’s get mixing!
Equipment You’ll Need
No need for fancy gadgets here—just a few trusty kitchen tools to make these scones come together like a dream. (Though if you’re like me, you might already have flour dust on half of these!) Here’s what you’ll want to grab:
- Large mixing bowl – Where all the magic starts. I use my favorite wide ceramic one so I can really see the butter getting worked in.
- Pastry cutter or two forks – For cutting that cold butter into the flour. I swear by my grandma’s old pastry cutter—it’s like a security blanket for baking.
- Measuring cups and spoons – Precision matters! That tablespoon of baking powder isn’t a suggestion.
- Baking sheet – No need to grease it if you’re using parchment paper (my lazy hack for easy cleanup).
- Parchment paper or silicone mat – Lifesavers for preventing sticking and keeping your baking sheet pristine.
- Bench scraper or sharp knife – For dividing the dough into perfect wedges. I sometimes use a pizza wheel for fun!
That’s it! Well… plus an oven, obviously. Now who’s ready to make some scones?
How to Make Cranberry Maple Scones
Alright, let’s get our hands floury! Making these scones is easier than you think—just follow these steps and you’ll be pulling golden, fragrant scones from your oven before you know it. I’ve made this recipe dozens of times (okay, maybe hundreds), and these are all my little tricks for perfect results every time.
Step 1: Prep Dry Ingredients
First things first—let’s get our dry team ready. In your big mixing bowl, whisk together the flour, sugar, baking powder, and salt. And I mean REALLY whisk—we want everything evenly distributed so there aren’t any surprise pockets of baking powder. I usually do about 15 good whisks around the bowl. You’ll know it’s ready when the mixture looks like pale sand with no visible streaks of white flour left.
Step 2: Cut in Butter
Here’s where the magic starts! Take your ice-cold butter cubes and scatter them over the flour mixture. Now grab your pastry cutter (or forks if you’re going old-school) and start cutting the butter into the flour. You’re aiming for pea-sized crumbs—some bigger chunks are totally fine! The key is to work quickly so the butter stays cold. When you pinch some between your fingers, it should hold together slightly but still feel crumbly. This is what gives us those dreamy flaky layers later!

Step 3: Add Wet Ingredients
Time to bring it all together! In a separate bowl, whisk the maple syrup, heavy cream, and vanilla until they’re best friends. Now make a well in your dry ingredients and pour the wet mixture in. Here’s my secret: use a fork to gently stir just until the dough comes together—there WILL be dry bits at the bottom of the bowl, and that’s okay! Overmixing is the enemy of tender scones. Fold in the cranberries last, giving them just a few gentle turns to distribute.
Step 4: Shape and Bake
Turn your shaggy dough out onto a lightly floured surface and pat it into a circle about 1-inch thick—no rolling pin needed! I like to use my hands to gently press and shape it. Then, with a sharp knife or bench scraper, cut it into 8 wedges like you’re slicing a pizza. Transfer them to your lined baking sheet, spacing them about an inch apart—they’ll puff up beautifully as they bake. Pop them in your preheated oven and wait for that magical moment when your kitchen smells like a cozy bakery. They’re ready when the edges are golden brown and the tops spring back lightly when touched.
Pro tip: Resist the urge to peek too often! That rush of cold air can make them bake unevenly. Just trust the process—I promise it’s worth the wait.
Tips for Perfect Cranberry Maple Scones
After burning my fair share of scones (and learning from every single one), I’ve collected these foolproof tricks that make all the difference:
- Keep everything COLD: If your kitchen’s warm, chill the mixing bowl and flour for 10 minutes first. I’ve even been known to freeze my butter cubes for 15 minutes—it helps create those coveted flaky layers.
- Don’t fear the shaggy dough: It’ll look messy when you mix in the wet ingredients. That’s perfect! Overworking it makes tough scones. A few dry spots? Just press them in when shaping.
- The 10-minute rest: After shaping your scones, pop the whole baking sheet in the fridge while the oven finishes preheating. This resets the butter’s chill for maximum rise.
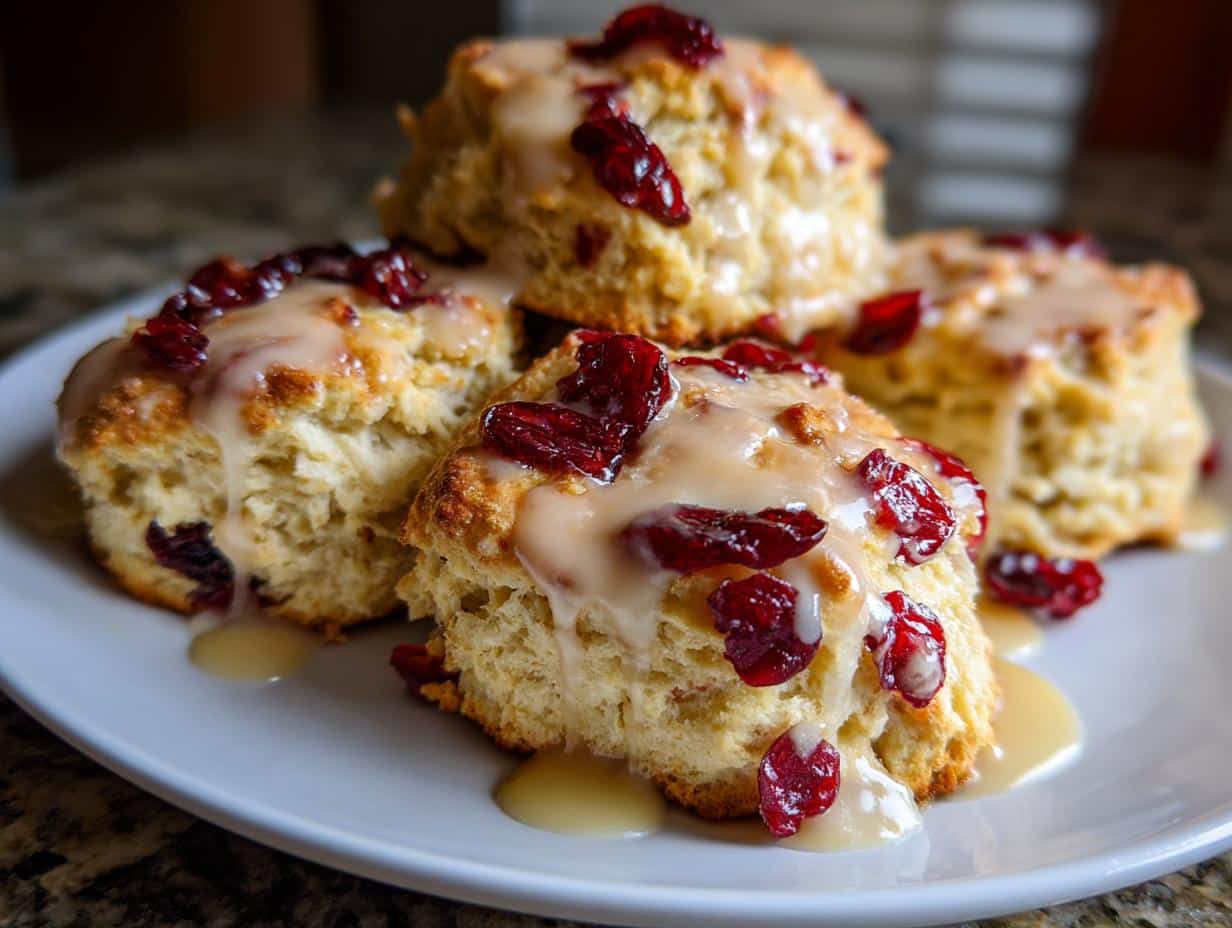
- Glaze game strong: For a drizzle that’ll wow everyone, mix 1/2 cup powdered sugar with 1 tbsp maple syrup and 1 tsp milk. Wait until scones are completely cool, then zigzag it on with a spoon.
- Fresh berry hack: If using fresh cranberries, toss them with 1 tbsp flour first—it prevents juice explosions and keeps the dough from getting soggy.
Oh, and the golden rule? Eat them warm. Split one open right out of the oven, let the steam escape, and slather it with butter that melts into all those nooks and crannies. Pure bliss.
Variations for Cranberry Maple Scones
One of the best things about these scones is how easily you can tweak them to suit your mood (or whatever’s in your pantry). Here are some of my favorite twists that keep things fresh and fun:
- Add some crunch: Fold in 1/4 cup chopped pecans or walnuts with the cranberries. The nutty flavor pairs perfectly with the maple sweetness.
- Citrus zing: Grate the zest of one orange into the wet ingredients for a bright, citrusy kick. It’s like sunshine in every bite!
- Spice it up: Add 1/2 tsp cinnamon or a pinch of nutmeg to the dry ingredients for a cozy, autumnal vibe.
- White chocolate lover?: Swap out half the cranberries for white chocolate chips. The creamy sweetness is downright addictive.
- Go fresh: If you’re feeling adventurous, use fresh cranberries instead of dried. Just chop them coarsely and toss with 1 tbsp sugar to balance their tartness.
- Gluten-free option: Replace the all-purpose flour with a 1:1 gluten-free blend. Just make sure it includes xanthan gum for structure.
The beauty of this recipe is how forgiving it is—feel free to mix and match these ideas or come up with your own. That’s how the best kitchen adventures start!
Serving Suggestions
Now for the best part—eating these beauties! I’ve served these scones every which way over the years, and here are my favorite ways to enjoy them (plus a few sneaky storage tricks for later):
- Morning perfection: Still slightly warm from the oven with a thick slather of salted butter melting into all those craggy edges. Pair with strong black coffee—the bitterness cuts through the sweetness just right.
- Afternoon tea vibes: Split them horizontally and dollop with clotted cream and a spoonful of lemon curd. Earl Grey tea optional but highly recommended for full British bakery fantasy.
- Weekend brunch star: Make them mini by cutting into 16 wedges instead of 8. Serve alongside scrambled eggs and crispy bacon for sweet-savory heaven.
- Unexpected delight: Crumble day-old scones over vanilla ice cream—the maple flavor becomes even deeper when chilled, and those dried cranberries turn into little flavor bombs.
If you (somehow) have leftovers, store them in an airtight container at room temperature for 2 days. They’ll lose some crispness but stay delicious—just pop them in a 300°F oven for 5 minutes to revive them. For longer storage, freeze the baked and cooled scones in a ziplock bag for up to 3 months. No need to thaw—straight from freezer to toaster oven for that just-baked magic!
Storage and Reheating
Okay, let’s talk about keeping these scones tasting fresh—because let’s be real, they rarely last long in my house! Here’s exactly how I store them to keep that just-baked magic going strong:
- Room temp short-term: Once completely cooled, tuck them into an airtight container with a piece of paper towel at the bottom. They’ll stay fresh for 2-3 days this way. The paper towel absorbs any excess moisture that might make them soggy (trust me, it’s a game-changer).
- Freezing for later: My secret weapon! Wrap each cooled scone individually in plastic wrap, then pop them all into a freezer bag. They’ll keep beautifully for up to 3 months. I always stash a few for “emergencies” (like surprise guests or my 3pm sugar cravings).
- Reheating like a pro: For room temp scones, just 10 seconds in the microwave softens them perfectly. Frozen? No need to thaw—place them directly on a baking sheet in a 300°F oven for 12-15 minutes. You’ll swear they’re fresh from the oven!
One warning: if you added a maple glaze, store those separately at room temperature. The glaze gets tacky when refrigerated, and nobody wants sticky-fingered scones!
Cranberry Maple Scones Nutrition
Now, I’m no nutritionist, but I know we all like to have a general idea of what we’re eating (especially before going back for that second scone—no judgment here!). These numbers are estimates based on standard ingredients, but remember, your exact counts might vary depending on specific brands or if you tweak the recipe. Here’s the scoop per scone:
- Calories: About 320 – perfect for a satisfying breakfast or that 3pm pick-me-up
- Total Fat: 16g (10g saturated) – thank you, glorious butter and heavy cream!
- Carbohydrates: 42g – mostly from that lovely maple sweetness and flour
- Fiber: 2g – the cranberries are doing their best!
- Sugar: 18g – a combo of natural fruit sugars and our maple syrup addition
- Protein: 4g – not bad for a pastry, right?
- Sodium: 210mg – just enough to balance all those flavors
And hey—if you’re watching specific macros, you can always adjust the recipe slightly. Swap half the all-purpose flour for whole wheat (adds more fiber), use a sugar substitute, or reduce the butter by a tablespoon or two. But between you and me? Sometimes a little indulgence with real ingredients is exactly what the soul needs.
FAQs About Cranberry Maple Scones
Over the years, I’ve gotten so many questions about these scones—here are the ones that pop up most often with all my hard-earned baking wisdom packed into the answers:
Can I use frozen cranberries instead of dried?
Absolutely! Just thaw them first and pat them super dry with paper towels (wet berries = soggy scones). I like to roughly chop them too, so you get little bursts of tartness in every bite. Pro tip: toss them with a tablespoon of flour before adding to the dough—it helps absorb extra juice.
Why did my scones turn out dry?
Oh no! Usually this means either the dough was overmixed (remember, we want it just barely combined) or the oven ran hot. Next time, try checking them a couple minutes early—they’re perfect when the edges are golden but the centers still feel slightly soft. And that heavy cream measurement? No skimping—it’s our moisture insurance!
Can I make the dough ahead and bake later?
You’re speaking my lazy baker language! Shape the scones, pop them on a baking sheet, and freeze until solid (about 1 hour). Then transfer to a freezer bag. When the craving hits, bake straight from frozen—just add 3-5 extra minutes. I always keep a batch ready for impromptu guests (or midnight snack attacks).
Is there a dairy-free version that still tastes good?
For sure! Swap the butter for very cold coconut oil (the solid kind) and use full-fat coconut milk instead of cream. The texture changes slightly—more crumbly than flaky—but the maple flavor still shines. I’ve even had success with almond milk, but add an extra tbsp of oil since it’s leaner.
Help! My scones spread flat—what went wrong?
Ah, the dreaded pancake scones. This usually means either your butter was too warm (keep it fridge-cold until the last second!) or your baking powder is past its prime. Test your baking powder by mixing 1 tsp with 1/2 cup hot water—it should bubble vigorously. If not, time for a fresh can!
Did I miss your burning scone question? Drop it in the comments—I love swapping baking war stories and troubleshooting tips. And if you make these, tag me on social media so I can see your gorgeous creations!
Print
35-Minute Cranberry Maple Scones for Irresistible Mornings
- Total Time: 35 minutes
- Yield: 8 scones 1x
- Diet: Vegetarian
Description
These Cranberry Maple Scones are a perfect blend of tart cranberries and sweet maple flavor, ideal for breakfast or a snack.
Ingredients
- 2 cups all-purpose flour
- 1/4 cup granulated sugar
- 1 tbsp baking powder
- 1/2 tsp salt
- 1/2 cup unsalted butter, cold and cubed
- 1/2 cup dried cranberries
- 1/4 cup maple syrup
- 1/2 cup heavy cream
- 1 tsp vanilla extract
Instructions
- Preheat your oven to 400°F (200°C).
- In a large bowl, mix flour, sugar, baking powder, and salt.
- Cut in the cold butter until the mixture resembles coarse crumbs.
- Stir in the dried cranberries.
- In a separate bowl, whisk together maple syrup, heavy cream, and vanilla extract.
- Add the wet ingredients to the dry ingredients and stir until just combined.
- Turn the dough out onto a floured surface and shape into a circle about 1 inch thick.
- Cut the circle into 8 wedges and place them on a baking sheet.
- Bake for 15-20 minutes or until golden brown.
- Cool on a wire rack before serving.
Notes
- Use fresh cranberries if you prefer a more tart flavor.
- For a glaze, mix powdered sugar with a little maple syrup and drizzle over cooled scones.
- Prep Time: 15 minutes
- Cook Time: 20 minutes
- Category: Baking
- Method: Oven Baked
- Cuisine: American
Nutrition
- Serving Size: 1 scone
- Calories: 320
- Sugar: 18g
- Sodium: 210mg
- Fat: 16g
- Saturated Fat: 10g
- Unsaturated Fat: 5g
- Trans Fat: 0g
- Carbohydrates: 42g
- Fiber: 2g
- Protein: 4g
- Cholesterol: 45mg