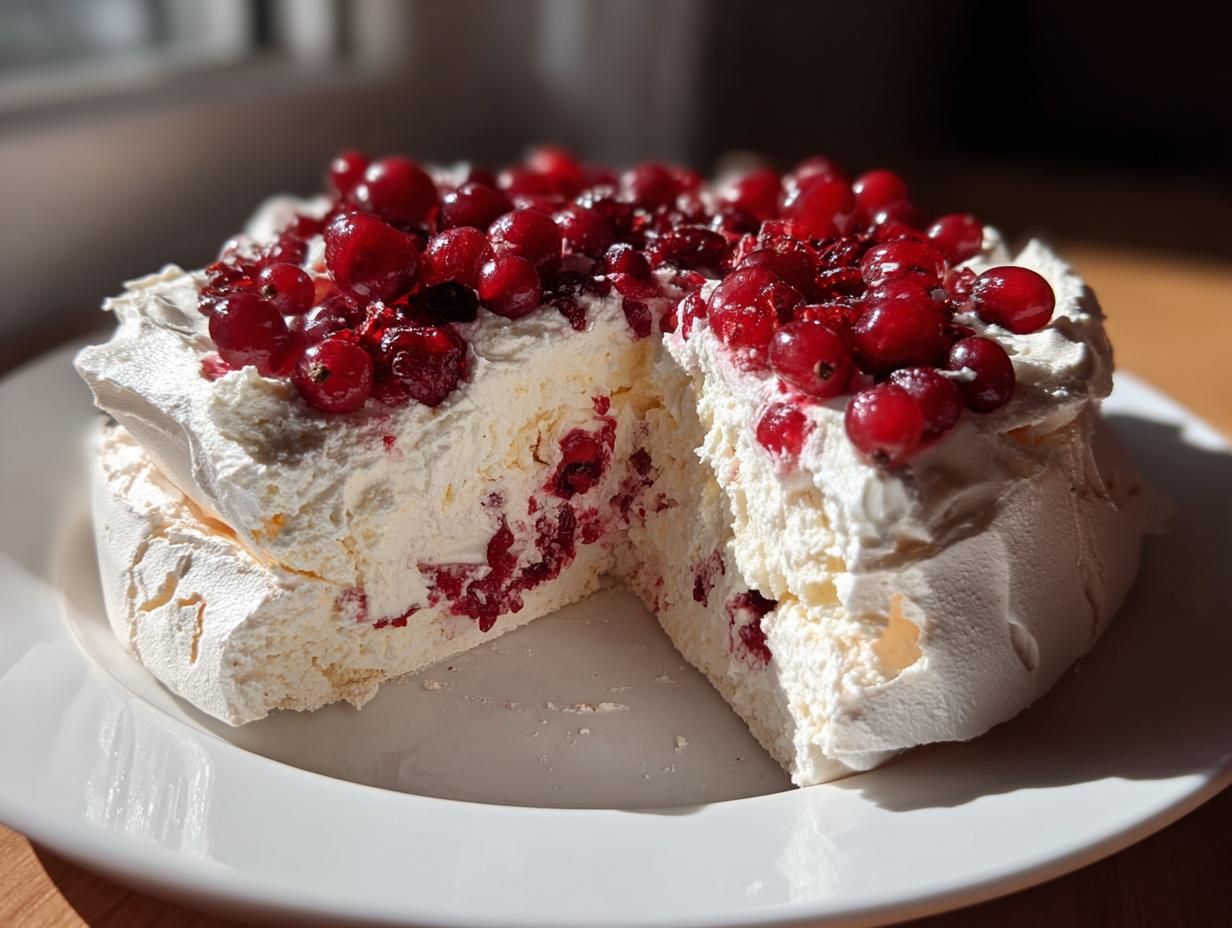
Nothing says holiday magic quite like a gorgeous cranberry pavlova sitting proudly on your dessert table. That crisp-yet-chewy meringue base piled high with billowy whipped cream and jewel-bright cranberries? Absolute perfection. I first fell in love with this dessert when my aunt brought it to Thanksgiving years ago – one bite of that cloud-like texture with the tart pop of berries, and I was hooked.

Now it’s my go-to showstopper for festive gatherings. What I adore most is how something so impressive-looking comes together with such simple ingredients. The contrast between the crunchy exterior and marshmallowy center gets me every time. And those ruby-red cranberries? They’re not just pretty – their zingy flavor cuts through all the sweetness beautifully. Trust me, once you try this cranberry pavlova, it’ll become your new holiday tradition too.
This cranberry pavlova is pure magic, and here’s why:
- It’s surprisingly easy to make, even if you’re a beginner.
- The presentation is stunning – it’s a showstopper at any gathering.
- The contrast of the crisp meringue, fluffy whipped cream, and tart cranberries is unforgettable.
Ingredients for Cranberry Pavlova
Gathering these simple ingredients is half the battle – and trust me, every single one plays a crucial role:
- 4 large egg whites (room temperature is best!)
- 1 cup granulated sugar
- 1 teaspoon white vinegar (this is our secret weapon)
- 1 teaspoon cornstarch
- 1 cup heavy cream (chilled)
- ½ cup fresh cranberries (none of that frozen stuff!)
- 1 tablespoon powdered sugar
A quick note about the cranberries – if yours are particularly tart, you might want to toss them with a spoonful of sugar while your meringue bakes. The sweetness will balance everything out beautifully.
Equipment You’ll Need
Don’t worry – you probably have most of this already! Here’s what you’ll need:
- Electric mixer (stand or hand – either works)
- Large baking sheet
- Parchment paper
- Spotlessly clean, dry mixing bowl
That last one’s crucial – any grease will sabotage your meringue. I learned that the hard way!
How to Make Cranberry Pavlova
Now for the fun part! Making cranberry pavlova is like conducting a sweet symphony – each step builds on the last to create something magical. Follow these steps carefully, and you’ll have a dessert that’ll wow everyone at your table.
Preparing the Meringue Base
First things first – that bowl better be squeaky clean! Even a speck of grease can ruin your meringue. I like to wipe mine down with lemon juice just to be safe. Beat those egg whites on medium until they form soft peaks – you’ll know they’re ready when the whisk leaves trails. Now comes the patience part: add the sugar gradually, about a tablespoon at a time, letting each addition fully incorporate before adding more. This slow process creates that gorgeous glossy texture. When you add the vinegar and cornstarch at the end, don’t panic – they’re there to stabilize your masterpiece!

Baking and Cooling the Pavlova
Here’s where most people mess up – rushing the cooling process! After baking at 300°F for exactly 1 hour, turn off the oven but leave that door CLOSED. I know it’s tempting to peek, but resist! Letting the pavlova cool slowly in the turned-off oven prevents those heartbreaking cracks. I usually leave mine in there for at least 2 hours – perfect time to clean up and prep the toppings.
Assembling the Cranberry Pavlova
Now for the crowning glory! Whip that chilled cream with powdered sugar until it holds soft peaks – overbeating makes it grainy. Gently spread it over your cooled meringue cloud. As for the cranberries, if you’ve got time, toss them with a spoonful of sugar and let them sit for 30 minutes. They’ll release this gorgeous ruby juice that makes the whole dessert sparkle. Scatter them generously over the cream – the tart pop against the sweet meringue is pure magic!

Tips for Perfect Cranberry Pavlova
Listen, I’ve had my share of pavlova disasters – we’ve all been there! Here are my hard-won tips to guarantee success every time:
- Watch the weather – humidity is meringue’s worst enemy. Pick the driest day you can.
- That parchment paper isn’t optional – it’s your insurance policy against stuck meringue.
- Chill your bowl before whipping cream – cold equals stability.
- Want extra insurance? Add a pinch of cream of tartar to your egg whites.
Oh, and don’t stress little cracks – they add character! Just pile on more whipped cream.
Serving and Storing Cranberry Pavlova
Here’s the best part – digging in! Serve your cranberry pavlova immediately after assembling for that perfect contrast of crisp meringue and pillowy cream. Leftovers? (As if!) They’ll keep in the fridge for up to 2 days, though the meringue will soften. I love adding final touches – a sprinkle of orange zest or fresh mint leaves make it extra festive. Pro tip: slice with a serrated knife in one swift motion to keep those beautiful layers intact.
Cranberry Pavlova Variations
Can’t find fresh cranberries? No sweat! This pavlova is endlessly adaptable – try pomegranate arils for a similar tart crunch. For a citrusy twist, fold orange zest into the whipped cream. Feeling indulgent? Dark chocolate shavings make a decadent addition that’ll have everyone begging for seconds.
Cranberry Pavlova Nutrition Information
Here’s the scoop on what you’re enjoying (because knowledge is power, right?): Each glorious slice has about 250 calories, with 20g sugar and 10g fat. Remember – these are just estimates, and honestly? Worth every bite when you taste that perfect bite of crisp meringue and tart cranberries.
Frequently Asked Questions
I’ve answered every cranberry pavlova question under the sun – here are the big ones that always come up:
Can I use frozen cranberries? Honestly? Fresh is best here. Frozen berries release too much liquid and make your gorgeous pavlova soggy. If you’re stuck, thaw them completely and pat dry with paper towels first.
Why did my pavlova crack? Don’t panic! Most cracks happen from cooling too fast. Next time, leave it in the turned-off oven longer – I’ve left mine overnight before with perfect results.
How do I know when meringue is done? The classic test: your meringue should feel crisp outside but still give slightly when pressed gently. If it sounds hollow when tapped? That’s your golden ticket!
Final Thoughts
I’d love to hear how your cranberry pavlova turns out! Drop a comment below if this recipe becomes your new holiday favorite like it is mine.


Magical Cranberry Pavlova with Crisp 1-Hour Meringue Perfection
- Total Time: 1 hour 20 minutes
- Yield: 6 servings 1x
- Diet: Vegetarian
Description
A light and airy dessert with a crisp meringue base, topped with whipped cream and fresh cranberries.
Ingredients
- 4 large egg whites
- 1 cup granulated sugar
- 1 tsp white vinegar
- 1 tsp cornstarch
- 1 cup heavy cream
- 1/2 cup fresh cranberries
- 1 tbsp powdered sugar
Instructions
- Preheat oven to 300°F (150°C). Line a baking sheet with parchment paper.
- Beat egg whites until stiff peaks form. Gradually add sugar, vinegar, and cornstarch, beating until glossy.
- Spread meringue into a circle on the baking sheet. Bake for 1 hour, then turn off the oven and let it cool inside.
- Whip the heavy cream and powdered sugar until soft peaks form.
- Spread whipped cream over the cooled meringue. Top with fresh cranberries.
- Serve immediately.
Notes
- Ensure the bowl for beating egg whites is completely clean and dry.
- For a sweeter taste, macerate cranberries in sugar before using.
- Store leftovers in the refrigerator for up to 2 days.
- Prep Time: 20 minutes
- Cook Time: 1 hour
- Category: Dessert
- Method: Baking
- Cuisine: Australian
Nutrition
- Serving Size: 1 slice
- Calories: 250
- Sugar: 20g
- Sodium: 40mg
- Fat: 10g
- Saturated Fat: 6g
- Unsaturated Fat: 3g
- Trans Fat: 0g
- Carbohydrates: 35g
- Fiber: 1g
- Protein: 3g
- Cholesterol: 30mg