Oh my gosh, let me tell you about my obsession with fried pickles! The first time I tried them at a county fair years ago, I swear I heard angels singing. That perfect crunch giving way to tangy pickle goodness? Absolute snacking magic. Now I make them at home whenever friends come over – they disappear faster than I can fry them!
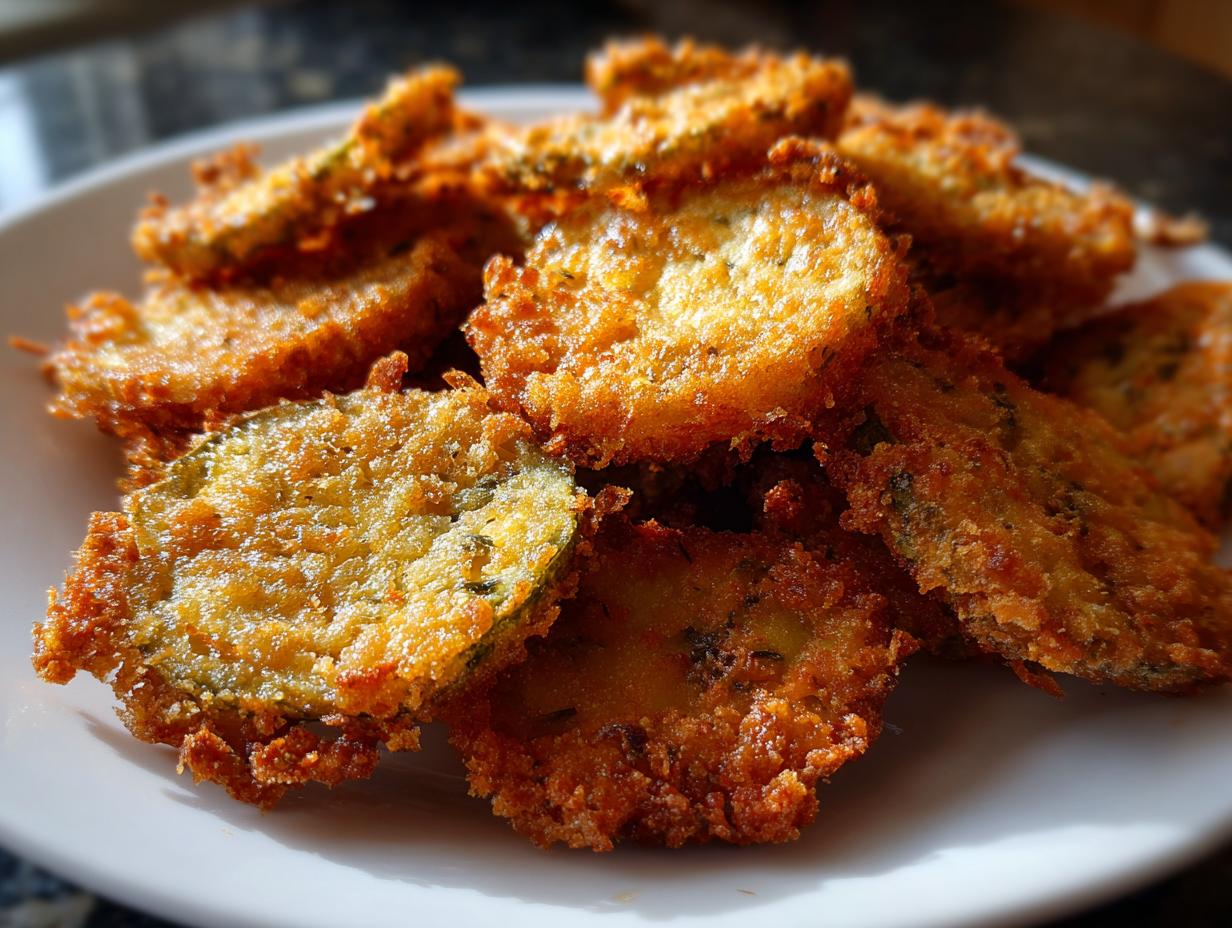
These crispy little bites are seriously the easiest party food ever. Just dunk some dill pickle slices in seasoned batter and fry them up golden. The contrast between the hot, crunchy coating and cool, vinegary pickle inside is what dreams are made of. Trust me, once you try homemade fried pickles, you’ll never look at appetizers the same way again.

Why You’ll Love Fried Pickles
Let me count the ways these crispy little bites will steal your heart:
- Crazy quick to make – Seriously, we’re talking 20 minutes from fridge to plate. Perfect when snack cravings hit hard.
- That addictive crunch – The golden batter shatters to reveal that cool, tangy pickle inside. It’s texture heaven!
- Party superstar – I bring these to every gathering and they’re always the first to disappear. Even pickle skeptics become converts.
- Endlessly customizable – Spice them up with cayenne, go gluten-free, or try different pickle varieties. Your snack, your rules!
Honestly, I could eat these every day and never get tired of them. And neither will you!

Fried Pickles Ingredients
Here’s everything you’ll need to make my perfect fried pickles – and yes, every single one of these ingredients matters!
For the pickles:
- 1 cup dill pickle slices (well-drained and patted super dry – soggy pickles are the enemy!)
Dry ingredients:
- 1 cup all-purpose flour (pack it in there nice and tight)
- 1 tsp garlic powder (the secret flavor booster)
- 1 tsp paprika (for that gorgeous golden color)
- 1/2 tsp salt (trust me, you want this)
- 1/2 tsp black pepper (freshly ground if you’ve got it)
Wet ingredients:
- 1 cup buttermilk (ice cold – helps the batter stick better)
- 1 large egg (give it a quick whisk before mixing)
For frying:
- Vegetable or peanut oil (enough for about 2 inches in your pan)
How to Make Fried Pickles
Okay, let’s get frying! I’ve made these so many times I could probably do it in my sleep, but I’ll walk you through each step so yours turn out perfectly crispy every time.
Step 1: Prepare the Pickles
First rule of fried pickles: dry those babies well! I line ’em up on paper towels and gently press another towel on top to soak up every last drop of juice. Wet pickles = sad, soggy batter. Take your time here – I usually let them sit for about 5 minutes while I prep the other ingredients. See those little droplets forming on the paper towel? That’s moisture we don’t want in our oil!
Step 2: Mix the Batter
Now for the magic coating! In one bowl, whisk together all the dry ingredients – that’s your flour, garlic powder, paprika, salt and pepper. In another bowl, beat the egg into the cold buttermilk until it’s completely smooth. Why keep the buttermilk cold? It helps the batter cling to the pickles better when they hit the hot oil. I like to set up my dipping station with the pickles in the middle, dry mix on the left, wet mix on the right – assembly line style!
Step 3: Fry to Perfection
Here’s where the real fun begins! Pour about 2 inches of oil into your heaviest pan (I use my trusty cast iron) and heat it to 375°F – use a thermometer, please! Too cold and they’ll be greasy, too hot and they’ll burn. Working in small batches (don’t crowd the pan!), I dip each pickle slice in the buttermilk, then coat it thoroughly in the flour mixture before gently lowering it into the oil. They’ll sizzle immediately – music to my ears! Fry for 2-3 minutes until they’re that perfect golden brown, then transfer to a paper towel-lined plate. Warning: the hardest part is waiting for them to cool enough to eat!

Tips for the Best Fried Pickles
After making approximately a million batches (okay, maybe just hundreds), here are my can’t-live-without tips for perfect fried pickles every single time:
- Thermometer is non-negotiable – That oil needs to stay at a steady 375°F. I keep mine clipped to the pan the whole time. Guesswork leads to greasy or burnt pickles, and we don’t want either!
- Fry in small batches – I know it’s tempting to dump them all in, but overcrowding drops the oil temp fast. Give each pickle some space to achieve maximum crispiness.
- Serve immediately – These beauties start losing their crunch fast, so have your dipping sauce ready and plates out before you even start frying. No one gets seconds until everyone gets firsts!
- Change your oil often – After 2-3 batches, the oil gets too flavorful (and sometimes bitter). Fresh oil means better tasting pickles. Worth the extra effort!
Follow these and you’ll be the fried pickle hero at every party. You’re welcome!
Fried Pickles Variations
Once you’ve mastered the classic version, the fried pickle playground is wide open! Here are my favorite ways to mix things up when I’m feeling adventurous:
- Spicy kick – Add 1/2 tsp cayenne to the flour mix or a dash of hot sauce to the buttermilk. My husband swears by adding chopped jalapeños right into the batter!
- Gluten-free magic – Swap the all-purpose flour for your favorite GF blend. The batter might be a touch less crispy, but still delicious.
- Breadcrumb twist – For extra crunch, do a double coat: wet-dry-wet-dry. Panko breadcrumbs make them insanely crispy!
- Pickle power – Try bread & butter pickles for sweeter bites, or spicy garlic pickles if you’re feeling bold. The possibilities are endless!
Really, the only wrong way is not making them at all!

Serving Suggestions
Oh, let’s talk about the best part – dipping and devouring these crispy babies! My absolute must-have is a cool, creamy ranch dressing – the tangy contrast is everything. But don’t stop there! Spicy mayo (just mix sriracha with mayo), comeback sauce, or even blue cheese dressing all make perfect partners. These are perfect for game days, BBQs, or anytime you need a seriously addictive snack. Just be warned – you might want to double the batch!
Storage & Reheating Instructions
Okay, let’s be real – fried pickles are absolute perfection fresh out of the fryer. But if you somehow end up with leftovers (rare in my house!), here’s how to handle them. Store them in a single layer in an airtight container for up to 2 days. When you’re ready for round two, pop them in the air fryer at 375°F for 3-4 minutes to bring back that magical crunch. Microwaving? Don’t even think about it – you’ll end up with sad, soggy pickles. Trust me, I learned that lesson the hard way!
Fried Pickles Nutrition
Let’s keep it real – we’re not eating fried pickles for their health benefits! But here’s the scoop on what you’re biting into: A 1/2 cup serving packs about 180 calories, with most coming from that delicious crispy coating. The sodium adds up fast (around 480mg) thanks to our tangy pickle stars. Pro tip: Nutrition can vary wildly depending on your pickle brand and how much oil those little slices soak up. I always blot mine extra well after frying to keep them crispy, not greasy!
Common Fried Pickles Questions
After years of frying pickles and fielding questions from friends (and random party guests who wander into my kitchen), here are the answers to the most common pickle predicaments:
Can I use pickle spears instead of slices?
Absolutely! I love making both – slices are perfect for snacking, while spears feel more substantial. Just pat them extra dry (more surface area means more moisture) and add 1-2 minutes to the frying time. Watch closely though – that thicker center needs time to heat through without burning the outside.
How do I keep them crispy longer?
Oh honey, this is the million-dollar question! My best trick: place them on a wire rack over a baking sheet instead of paper towels after frying. The air circulation prevents steam from making them soggy. Also – don’t cover them! That trapped moisture is the enemy of crunch.
Why is my batter falling off?
Been there! Usually it’s one of three things: pickles weren’t dry enough, oil wasn’t hot enough, or you moved them too much while frying. Make sure you follow my drying routine, keep that oil at a steady 375°F, and resist the urge to poke and prod them while they cook. Let the magic happen!
Rate This Recipe
Wow, I’d love to hear how your fried pickles turned out! Did they give you that perfect crispy-tangy bite? Leave a quick rating below – it helps other pickle lovers find this recipe and inspires me to share more kitchen secrets!
Print
Crispy Fried Pickles in Just 20 Minutes You’ll Crave
- Total Time: 20 minutes
- Yield: 2 servings 1x
- Diet: Vegetarian
Description
Fried pickles are crispy, tangy snacks perfect for parties or casual dining. You coat dill pickle slices in batter and fry them until golden brown.
Ingredients
- 1 cup dill pickle slices
- 1 cup all-purpose flour
- 1 tsp garlic powder
- 1 tsp paprika
- 1/2 tsp salt
- 1/2 tsp black pepper
- 1 cup buttermilk
- 1 egg
- Oil for frying
Instructions
- Pat pickle slices dry with paper towels.
- Mix flour, garlic powder, paprika, salt, and pepper in a bowl.
- Whisk buttermilk and egg in another bowl.
- Dip pickle slices in buttermilk mixture, then coat with flour mixture.
- Heat oil to 375°F (190°C) in a deep pan.
- Fry pickles for 2-3 minutes until golden brown.
- Drain on paper towels and serve warm.
Notes
- Use cold buttermilk for better batter adhesion.
- Fry in small batches to avoid overcrowding.
- Serve with ranch dressing or spicy mayo.
- Prep Time: 10 minutes
- Cook Time: 10 minutes
- Category: Appetizer
- Method: Frying
- Cuisine: American
Nutrition
- Serving Size: 1/2 cup
- Calories: 180
- Sugar: 2g
- Sodium: 480mg
- Fat: 8g
- Saturated Fat: 1g
- Unsaturated Fat: 6g
- Trans Fat: 0g
- Carbohydrates: 22g
- Fiber: 1g
- Protein: 4g
- Cholesterol: 30mg