Oh my gosh, have you ever had one of those days where only warm, garlicky bread will do? That was me last Tuesday after a crazy workday. I was craving those soft-yet-crispy garlic breadsticks from my favorite Italian spot, but didn’t want to wait for delivery. So I whipped up these Easy Garlic Breadsticks in less time than it takes to watch an episode of Friends! Trust me, once you try homemade, those frozen sticks will never compare. The best part? You probably have all the ingredients in your pantry right now. In 25 minutes flat, you’ll be biting into golden, buttery perfection that’ll make your kitchen smell like an Italian bistro.

Ingredients for Easy Garlic Breadsticks
Here’s the beautiful simplicity of these breadsticks – just seven basic ingredients transform into golden perfection. You’ll need:
- 1 cup all-purpose flour (sifted – trust me, it makes a difference)
- 1 teaspoon baking powder (the magic lift)
- ½ teaspoon salt (I prefer sea salt)
- ½ cup milk (whole milk makes them extra rich)
- 2 tablespoons butter (melted – not softened! We’ll use this later)
- 2 cloves garlic (minced fresh – no jarred stuff here)
- 1 tablespoon fresh parsley (chopped fine)
Ingredient Substitutions
No milk? Almond milk works great. Gluten-free? Swap in your favorite 1:1 flour blend (I’ve had success with Bob’s Red Mill). Vegetarian? You’re already set – these breadsticks are naturally meat-free!
How to Make Easy Garlic Breadsticks
Okay, let’s get baking! First things first – turn that oven to 375°F (190°C). I can’t tell you how many times I’ve started mixing only to realize I forgot to preheat. While that’s warming up, grab a big bowl and whisk together the flour, baking powder, and salt. Now pour in the milk and stir until you’ve got a shaggy dough – don’t overmix! It should come together quickly.
Lightly flour your counter (or just use the bowl if you’re lazy like me sometimes) and pat the dough into a rough rectangle about ½ inch thick. Use a pizza cutter or sharp knife to slice it into strips – I make mine about 1 inch wide because I like that perfect breadstick size. Pop them on a baking sheet with some space between each one – they’ll puff up a bit!

Into the oven they go for 12-15 minutes. You’ll know they’re ready when they turn that gorgeous golden color and your whole kitchen smells like heaven. Now the fun part!
Shaping the Dough
When rolling out your dough, think “playdough snakes” from childhood! I keep my strips about 6 inches long and slightly twist each one as I transfer them to the baking sheet. This gives them that classic breadstick look and helps them cook evenly.
Garlic Butter Coating
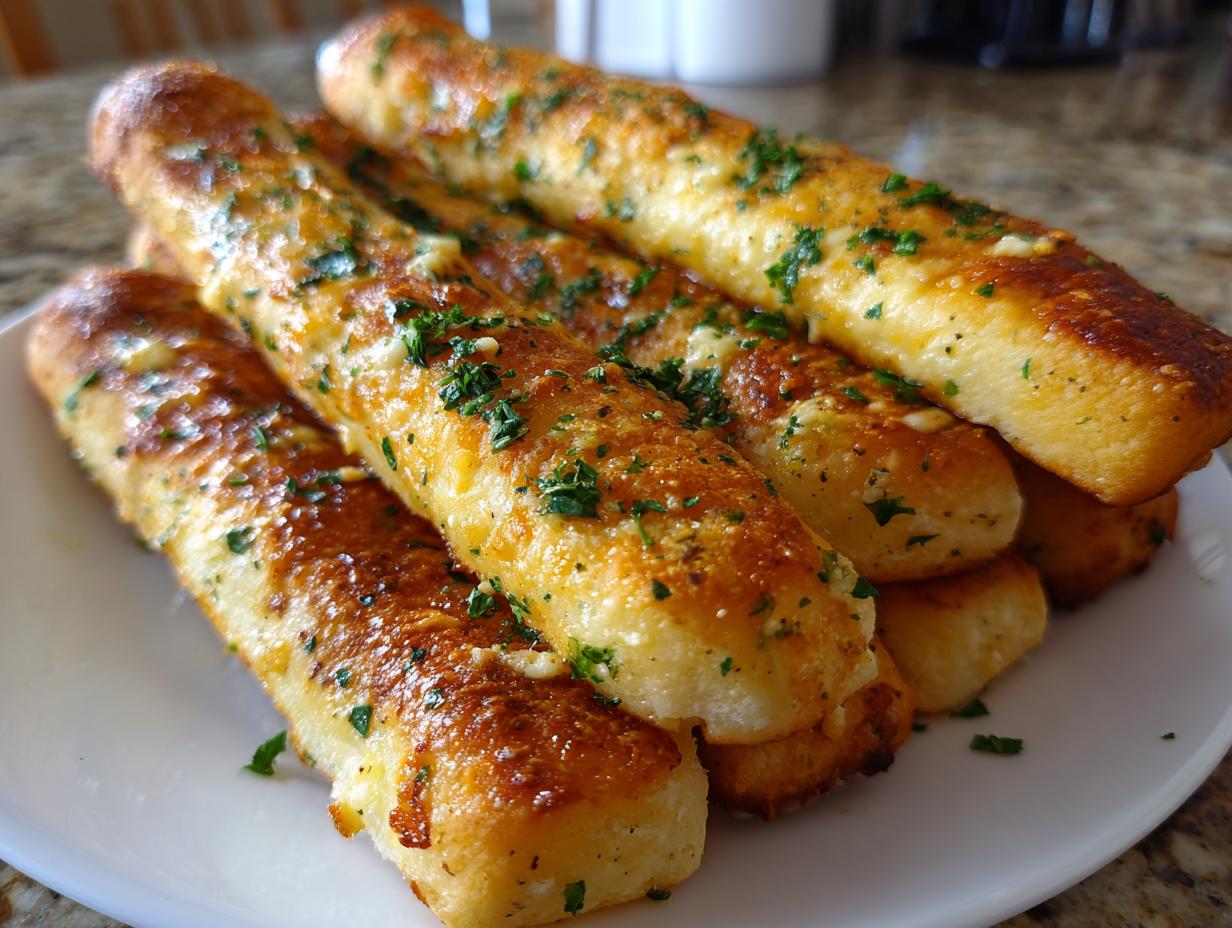
While your breadsticks bake, mix that melted butter with minced garlic and parsley. As soon as they come out of the oven, brush them generously with this garlicky goodness. I use a pastry brush and go over them twice – the first coat soaks in, the second gives that shiny finish. Warning: resisting the urge to eat one right now is nearly impossible!

Tips for Perfect Easy Garlic Breadsticks
After making these dozens of times (okay, maybe hundreds – we’re obsessed!), I’ve learned a few tricks. First, handle that dough gently – overworking it makes tough breadsticks. Second, set a timer for 12 minutes but watch closely – ovens vary and that golden-brown color is your best indicator. My biggest tip? Serve them piping hot! The garlic butter soaks in better when they’re fresh from the oven. If they do cool, a quick 30-second toast brings back that perfect crispiness.
Serving Suggestions for Easy Garlic Breadsticks
Oh, the possibilities! These garlic breadsticks are ridiculously versatile. My absolute favorite? Dunking them in warm marinara sauce – it’s like instant pizza vibes. They’re magical with creamy tomato soup on rainy days, or alongside a crisp Caesar salad for crunch contrast. Last night I served them with spaghetti and the kids went wild! For parties, cut them into shorter sticks and arrange around a bowl of garlicky hummus. Honestly? They disappear so fast I sometimes make a double batch.
Storing and Reheating Easy Garlic Breadsticks
Now, I know the idea of having leftovers is laughable (they usually vanish in my house!), but if you do have some extra breadsticks, here’s how to keep them perfect. Pop them in an airtight container at room temp for up to 2 days. To reheat, 3 minutes in a 350°F oven or 30 seconds in the toaster brings back that just-baked crunch. Pro tip: if they seem dry, give them a quick brush with fresh garlic butter before reheating – it’s like magic!
Nutritional Information for Easy Garlic Breadsticks
Here’s the skinny on these tasty sticks – each breadstick comes in around 120 calories with that perfect garlic buttery goodness. Just remember, these numbers are estimates – your exact counts might dance a little depending on your flour brand or how heavy-handed you are with that garlic butter brush!
Frequently Asked Questions
Q1. Can I freeze the dough for later?
Absolutely! Shape your dough into sticks, place them on a parchment-lined tray, and freeze solid. Once frozen, transfer to a freezer bag. When cravings hit, bake straight from frozen – just add 2-3 extra minutes. The garlic butter still goes on after baking!
Q2. How do I make them extra crispy?
Two tricks: First, roll your dough thinner (about ¼ inch). Second, give them an extra minute or two in the oven – watch for that deep golden color. A light spritz of water before baking creates steam for extra crunch too!
Q3. Can I make these ahead for parties?
You bet! Bake them as usual, let cool completely, then store in an airtight container. Right before serving, pop them in a 350°F oven for 3 minutes to crisp up. Brush with fresh garlic butter and they’ll taste just-made!

25-Minute Easy Garlic Breadsticks That Steal the Show
- Total Time: 25 mins
- Yield: 6 breadsticks 1x
- Diet: Vegetarian
Description
Make crispy garlic breadsticks at home with simple ingredients.
Ingredients
- 1 cup all-purpose flour
- 1 tsp baking powder
- 1/2 tsp salt
- 1/2 cup milk
- 2 tbsp butter, melted
- 2 cloves garlic, minced
- 1 tbsp parsley, chopped
Instructions
- Preheat oven to 375°F (190°C).
- Mix flour, baking powder, and salt in a bowl.
- Add milk and stir until dough forms.
- Roll dough into thin strips and place on a baking sheet.
- Bake for 12-15 minutes until golden.
- Brush with melted butter mixed with garlic and parsley.
- Serve warm.
Notes
- Store leftovers in an airtight container.
- Adjust garlic amount to taste.
- Prep Time: 10 mins
- Cook Time: 15 mins
- Category: Appetizer
- Method: Baked
- Cuisine: Italian
Nutrition
- Serving Size: 1 breadstick
- Calories: 120
- Sugar: 1g
- Sodium: 200mg
- Fat: 5g
- Saturated Fat: 3g
- Unsaturated Fat: 2g
- Trans Fat: 0g
- Carbohydrates: 16g
- Fiber: 1g
- Protein: 3g
- Cholesterol: 10mg