Oh my gosh, do I ever have a spooky-fun recipe for you! Every Halloween, my kitchen turns into a mad scientist’s lab when I whip up batches of these Frankenstein Face Cookies. Last year, my niece and nephew went absolutely wild decorating them – we had green dough everywhere, candy eyes rolling across the counter, and so much giggling you’d think we’d been drinking witch’s brew instead of hot cocoa!
I’ve been baking these adorable monstrosities for years – ever since I stumbled upon the idea at a Halloween potluck. There’s just something magical about transforming simple sugar cookies into grumpy little Frankenstein faces. Whether you’re throwing a Halloween bash or just want to surprise the kids with something special, these cookies are guaranteed to be a hit.
The best part? They’re actually super easy to make. With just a few basic ingredients and some green food coloring, you’ll have the cutest little monsters peeking up from your cookie sheet in no time. Trust me, once you see how these Frankenstein Face Cookies bring out everyone’s inner mad scientist, they’ll become your Halloween tradition too!
Why You’ll Love These Frankenstein Face Cookies
Listen, I know a winning Halloween treat when I see one, and these cookies are absolute showstoppers every single time. Here’s why they’re my go-to:
- Baking magic in minutes: Seriously, the dough comes together faster than you can say “It’s alive!” – just cream, mix, and add that perfect monster-green hue.
- Kid-approved fun: Little hands love pressing on candy eyes and drawing those crooked black stitches (messy fingers mean they’re doing it right!).
- Party perfect: Stack them on a platter and watch them vanish faster than ghosts at sunrise – they’re always the first treats to disappear!
- Your monster, your rules: Go wild with scowls or silly grins – no two Frankensteins need to look alike!
Honestly? The hardest part is keeping them around long enough to show off your handiwork!
Frankenstein Face Cookies Ingredients
Here’s what you’ll need to bring these little monsters to life – and trust me, you probably have most of this in your pantry already! The magic is in how simple ingredients transform into something so delightfully spooky.
- 1 cup unsalted butter, softened – Not melted! Let it sit out until your finger leaves a slight dent. This makes all the difference for perfect cookie texture.
- 1 cup granulated sugar – Just scoop and level, no need to pack it down like brown sugar.
- 1 large egg – Straight from the fridge is fine, but room temp helps everything blend smoother.
- 1 tsp vanilla extract – The good stuff! Imitation vanilla can leave a weird aftertaste.
- 3 cups all-purpose flour – Spoon it lightly into your measuring cup to avoid dense cookies.
- 1/2 tsp baking powder + 1/2 tsp salt – Our little rising agents – don’t skip the salt, it balances the sweetness!
- Green gel food coloring – Not liquid! Gel gives that perfect monster hue without thinning the dough.
- Black decorating icing – The squeeze bottle kind makes drawing those signature stitches foolproof.
- Candy eyes – The bigger, the better – we want these Frankensteins looking at you!
See? Nothing scary here! Just good baking basics ready to become something monstrously fun. Now let’s get mixing!
How to Make Frankenstein Face Cookies
Alright, let’s bring these little monsters to life! I’ve made this recipe so many times I could probably do it in my sleep, but I’ll walk you through every step so your Frankenstein Face Cookies turn out perfectly spooky.
Preparing the Dough
First things first – preheat that oven to 350°F (175°C) and line your baking sheets with parchment paper. Now grab your trusty mixing bowl and let’s cream together that softened butter and sugar until it’s light and fluffy. This takes about 2-3 minutes with a hand mixer – you’ll know it’s ready when the mixture looks almost like pale yellow clouds.
Crack in your egg and splash of vanilla, mixing just until combined. In another bowl, whisk together your flour, baking powder and salt. Gradually add these dry ingredients to your butter mixture – I do it in about three batches, mixing just until the flour disappears each time. Overmixing makes tough cookies, and Frankenstein deserves better than that!
Now the fun part – coloring! Add your green gel food coloring a few drops at a time until you get that perfect monster hue. I usually use about 10 drops for a nice bright green, but adjust to your preference. The dough should look like Frankenstein’s skin – not too neon, not too dull.

Cutting and Baking
Flour your surface lightly and roll the dough to about 1/4-inch thickness. Here’s my trick: use a pizza cutter or sharp knife to cut rectangles about 2×3 inches – they don’t need to be perfect! Imperfect edges actually make them look more “stitched together.”
Space them about 2 inches apart on your prepared sheets – these cookies don’t spread too much. Bake for 8-10 minutes until the edges just start turning golden. They’ll still look soft in the center, but trust me, they’ll firm up as they cool. Let them rest on the baking sheet for 5 minutes before transferring to a wire rack to cool completely.

Decorating Frankenstein Faces
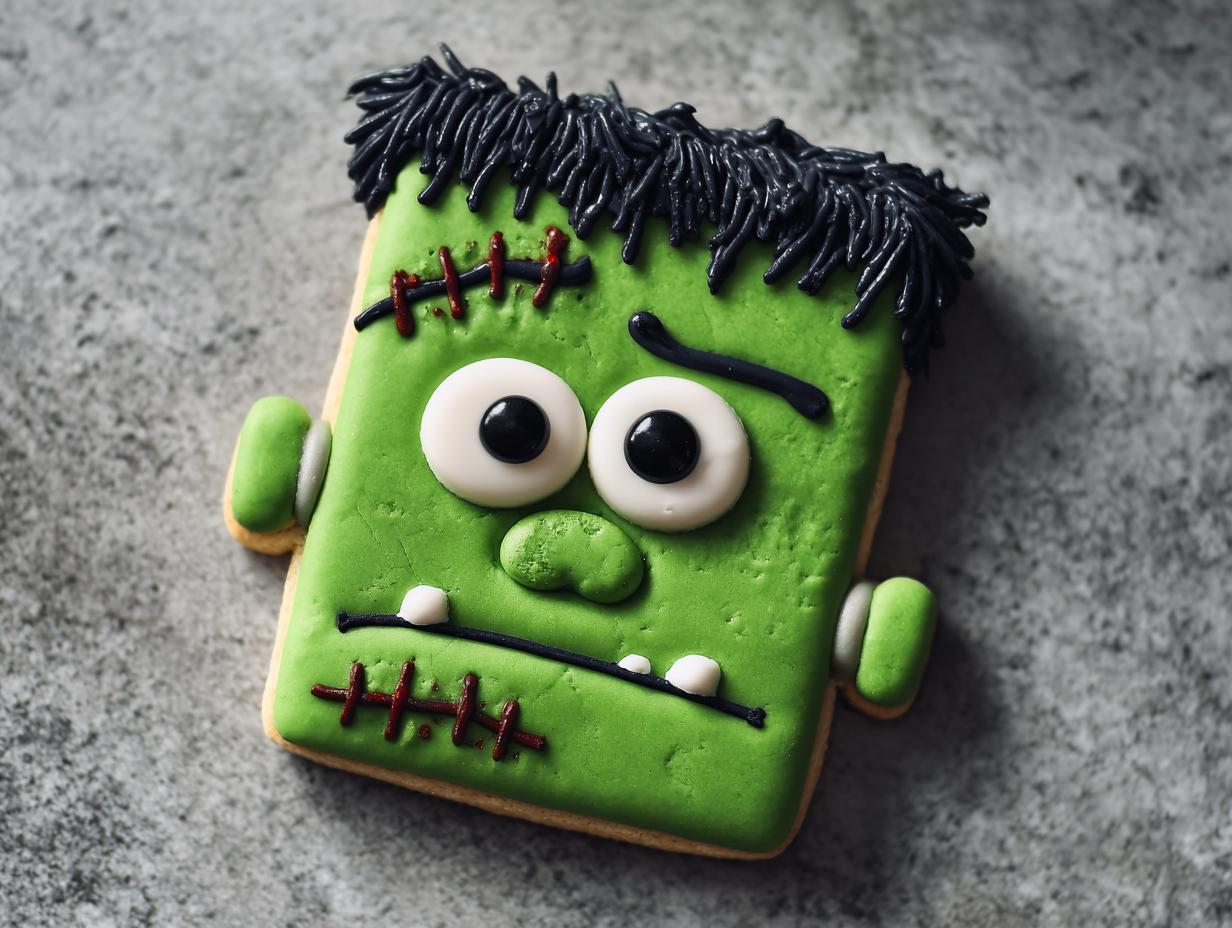
Now for the best part – bringing these cookies to life! Grab your black icing and start with the hair – make a zigzag line across the top of each cookie. Then add those signature stitches – just little diagonal lines along the sides. A crooked mouth completes the grumpy expression!
Finally, press on those candy eyes while the icing is still wet so they stick. Pro tip: if your icing sets too fast, just dab a tiny bit of fresh icing where you want the eyes to go. Step back and admire your handiwork – you’ve just created the cutest little monsters this side of Transylvania!

Tips for Perfect Frankenstein Face Cookies
After making dozens of these little monsters, I’ve picked up some tricks to ensure your Frankenstein Face Cookies come out picture-perfect every time:
- Chill that dough! If it gets too sticky while rolling, pop it in the fridge for 20 minutes. Cold dough holds its shape better when cutting.
- Gel colors win every time – liquid food coloring makes the dough too wet and gives you pale, sad monsters. A little gel goes a long way!
- Keep icing bottles upside down in a glass between uses – this prevents clogged tips when you’re ready to decorate.
- Store undecorated cookies in an airtight container overnight – the flavor actually improves, and they’ll still be fresh for decorating the next day.
Oh, and don’t stress over perfection – those slightly crooked smiles and wonky stitches give these cookies their charming monster personality!
Ingredient Substitutions & Notes
Listen, I get it – sometimes you’re mid-recipe and realize you’re out of something! Here’s how to adapt without losing that Frankenstein magic:
- Butter: Margarine works in a pinch, but real butter gives better flavor and texture. If you must substitute, use stick margarine, not the tub kind.
- Food coloring: No gel? Mix 1 tsp spinach powder with 1 Tbsp water for natural green (the flavor disappears when baked).
- Candy eyes: No eyes? Use white chocolate chips with mini chocolate chip pupils!
Just remember – the original ingredients make the best monsters!
Storing and Serving Frankenstein Face Cookies
These spooky little guys stay fresh for days when stored right! Just pop them in an airtight container with parchment between layers – they’ll keep at room temperature for up to 5 days (if they last that long!). Want to impress? Stack them in a clear treat box tied with black ribbon – makes the perfect Halloween gift that’ll have friends screaming… with delight!
Frankenstein Face Cookies Nutritional Information
Okay, let’s be real – these cookies are Halloween treats, not health food! But since you asked, here’s the nutritional scoop (all values are per cookie and approximate – your ingredients may vary slightly):
- Calories: About 150 per monstrous munch
- Fat: 7g (that butter makes ’em irresistible!)
- Carbs: 20g of sugary deliciousness
- Protein: A spooky 2g
Remember, nutritional values are estimates – your Frankenstein’s sweet tooth might be bigger than mine!
FAQs About Frankenstein Face Cookies
I’ve gotten so many questions about these cookies over the years – here are the ones that pop up most often!
Can I freeze Frankenstein Face Cookies?
Absolutely! Freeze undecorated cookies in airtight containers for up to 3 months. Thaw completely before decorating – frozen cookies make the icing sweat (and nobody wants a sweaty Frankenstein!).
How do I prevent the black icing from smudging?
Let your icing dry completely before stacking – about 1-2 hours. If you’re in a hurry, a quick 10-minute chill in the fridge sets the icing beautifully.
Can I make these cookies ahead of time?
You bet! The dough keeps wrapped in the fridge for 3 days, or bake the cookies up to 2 days before decorating. They actually taste better after resting overnight!
Help! My green color faded after baking!
This happens with some food colorings. Next time, try adding a tiny bit more gel color than you think you need – the color mellows slightly when baked.
What if I don’t have candy eyes?
Get creative! Mini marshmallows with chocolate chip pupils work great, or pipe white icing circles with black dots. Frankenstein wouldn’t judge!
Share Your Spooky Creations
I’d absolutely love to see your Frankenstein masterpieces! Snap a photo of your cookie creations and tag me – nothing makes me happier than seeing all the wonderfully weird variations you come up with. Who knows? Your design might inspire next year’s batch of monsters in my kitchen!
Print
Spooky Frankenstein Face Cookies That Kids Adore
- Total Time: 30 minutes
- Yield: 24 cookies 1x
- Diet: Vegetarian
Description
Fun and spooky Frankenstein face cookies perfect for Halloween. These easy-to-make sugar cookies are decorated to look like Frankenstein’s monster.
Ingredients
- 1 cup unsalted butter, softened
- 1 cup granulated sugar
- 1 large egg
- 1 tsp vanilla extract
- 3 cups all-purpose flour
- 1/2 tsp baking powder
- 1/2 tsp salt
- Green food coloring
- Black decorating icing
- Candy eyes
Instructions
- Preheat oven to 350°F (175°C). Line baking sheets with parchment paper.
- Cream butter and sugar until light and fluffy.
- Beat in egg and vanilla extract.
- Mix flour, baking powder, and salt in a separate bowl.
- Gradually add dry ingredients to wet ingredients, mixing until combined.
- Add green food coloring until desired shade is reached.
- Roll dough to 1/4-inch thickness and cut into rectangles.
- Bake for 8-10 minutes until edges are lightly golden.
- Cool completely before decorating.
- Use black icing to draw Frankenstein’s hair, stitches, and mouth.
- Attach candy eyes to complete the faces.
Notes
- Chill dough for 30 minutes if it becomes too sticky.
- Store cookies in an airtight container for up to 5 days.
- Use gel food coloring for vibrant colors.
- Prep Time: 20 minutes
- Cook Time: 10 minutes
- Category: Dessert
- Method: Baking
- Cuisine: American
Nutrition
- Serving Size: 1 cookie
- Calories: 150
- Sugar: 10g
- Sodium: 50mg
- Fat: 7g
- Saturated Fat: 4g
- Unsaturated Fat: 2g
- Trans Fat: 0g
- Carbohydrates: 20g
- Fiber: 0g
- Protein: 2g
- Cholesterol: 20mg