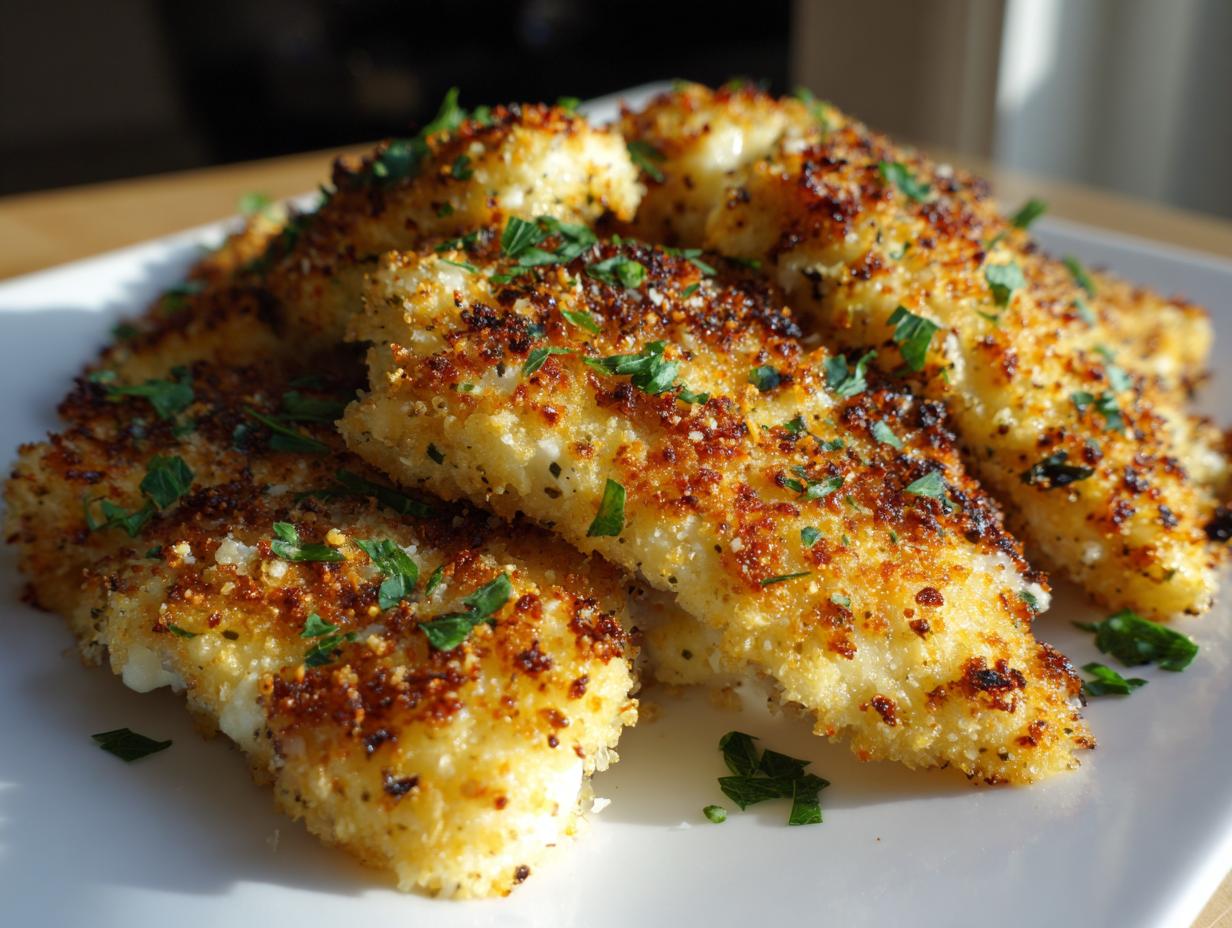
You know those nights when you’re staring into the fridge at 6 PM, wondering how to make something delicious without turning the kitchen into a war zone? That’s when this garlic crusted tilapia swoops in like a weeknight superhero. I’ve made this at least twice a month since discovering how the golden, garlicky crust transforms mild tilapia into something spectacular with just 25 minutes and one baking sheet. As a cooking instructor, I love how this recipe proves healthy eating doesn’t mean sacrificing flavor – the crispy parmesan breadcrumb topping will have everyone asking for seconds. My kids didn’t even realize they were eating fish until I told them!
Why You’ll Love This Garlic Crusted Tilapia
This recipe is my go-to for so many reasons:
- Weeknight magic: Ready in 25 minutes flat – faster than pizza delivery!
- Crispy perfection: That golden breadcrumb crust? Absolute texture heaven.
- Bold flavor: Fresh garlic and parmesan make every bite sing.
- Healthy win: Packed with protein but light on calories.
- One-pan easy: Minimal cleanup means more relaxing after dinner.
I swear by this when I need something impressive but don’t want to fuss – it never lets me down.
Key Ingredients for Garlic Crusted Tilapia
Let’s talk about what makes this dish so darn good. Every ingredient plays a special role in creating that perfect crispy, garlicky crust that hugs our tilapia fillets:
- Fresh tilapia fillets: Look for 6-ounce portions about 1-inch thick – this size cooks evenly.
- Fresh garlic cloves: Minced finely (none of that jarred stuff – trust me, it makes all the difference).
- Good olive oil: Our flavor booster and what helps that crust get golden.
- Breadcrumbs: Measure them packed – I use plain but panko works great too.
- Parmesan cheese: Freshly grated melts into the most delicious salty pockets.
- Paprika: Just a teaspoon gives the perfect warmth without being spicy.
- Fresh parsley: Chopped fine for that bright green finish.

Ingredient Substitutions & Notes
No panko? Regular breadcrumbs work fine. For gluten-free, almond flour makes a great crust. Swap paprika with lemon zest if you prefer citrusy notes. If you’re dairy-free, nutritional yeast adds a similar umami punch to parmesan. And hey – frozen tilapia works too, just thaw it completely and pat dry extra well!
Essential Equipment
Here’s the beautiful part – you probably already have everything you need for this garlic crusted tilapia in your kitchen right now. No fancy gadgets required! Here’s what I grab:
- Rimmed baking sheet: My trusty half-sheet pan works perfectly every time.
- Medium skillet: For toasting that garlicky breadcrumb mixture to golden perfection.
- Mixing bowl: Just a simple one for combining our crust ingredients.
- Spatula: For pressing that delicious crust onto the fish fillets.
That’s it! I don’t even bother with parchment paper here – the tilapia releases beautifully from the pan when it’s done. Now let’s get cooking!
How to Make Garlic Crusted Tilapia
Okay, let’s transform these simple ingredients into something magical! I promise – if you follow these steps exactly, you’ll have the crispiest, most flavorful fish ready before you can say “dinner’s ready!” Here’s exactly how I do it every single time:
Step 1: Prep the Garlic Crust Mixture
First things first – preheat that oven to 375°F (190°C). While it’s heating up, grab your favorite mixing bowl and combine the breadcrumbs, parmesan, paprika, salt, and pepper. Give it a good stir so everything gets friendly with each other.
Now here’s where the magic starts – heat your olive oil in a skillet over medium heat. Add the minced garlic (oh, that smell!) and sauté just until it becomes fragrant, about 30 seconds max. Don’t walk away here – garlic burns faster than you’d think! When you catch that first whiff of garlicky goodness, immediately dump in your breadcrumb mixture. Stir constantly for about 1-2 minutes until it turns a beautiful golden brown. Trust me, this quick toasting step makes ALL the difference in flavor!

Step 2: Coat and Bake the Tilapia
While your crust mixture cools slightly (so you don’t burn your fingers), place the tilapia fillets on a baking sheet. Now get ready to make them beautiful! Take generous spoonfuls of your garlicky breadcrumb mixture and press it firmly onto each fillet. I mean really press it in there – we want every bit of that flavor to stick!
Pop the baking sheet into your preheated oven and bake for 12-15 minutes. The exact time depends on your fillet thickness – you’ll know it’s done when the fish flakes easily with a fork and the crust is gloriously golden. A little trick I use? Gently wiggle the fork – if the flesh separates cleanly into flakes without resistance, you’re golden (literally)!
Right before serving, sprinkle that fresh chopped parsley over top for a pop of color and freshness. Now try not to devour it all before it hits the table!

Tips for Perfect Garlic Crusted Tilapia
After making this recipe dozens of times, here are my foolproof secrets for the best garlic crusted tilapia every single time:
- Fresh is best: That jarred minced garlic can’t compete with freshly minced cloves – the flavor difference is huge!
- Press it good: Really pack that crust mixture onto the fish – it helps create that perfect crispy layer.
- Middle rack magic: Bake in the center of your oven for even cooking (no burnt bottoms or pale tops!).
- Watch the garlic: When sautéing, pull it off heat the second it’s fragrant – burnt garlic ruins everything.
Follow these simple tips and you’ll have restaurant-quality tilapia that’ll wow everyone at your table!
Serving Suggestions
Now that you’ve got this gorgeous garlic crusted tilapia ready, let’s talk about how to make it a complete meal! My favorite part is how versatile this dish is – it plays nicely with so many sides. Here’s how I love to serve it:
For weeknights, I keep it simple with roasted asparagus or garlic butter green beans – they cook right alongside the fish on another baking sheet. When I’m feeling fancy, lemony quinoa or wild rice pilaf makes the perfect base to soak up all those delicious garlicky juices.
Don’t forget the lemon wedges! A squeeze of fresh lemon right before eating brightens everything up. My husband always reaches for extra lemon – it cuts through the richness of the crust beautifully.
For a complete dinner party spread, I’ll add roasted baby potatoes and a simple arugula salad with shaved parmesan. The peppery greens balance the fish perfectly. And if you’ve got crusty bread lying around? Well, let’s just say no garlicky breadcrumb bits will go uneaten!
Storing and Reheating Garlic Crusted Tilapia
Okay, confession time – I rarely have leftovers of this garlic crusted tilapia because we always devour it! But when I do manage to save some, here’s exactly how I keep it tasting almost as good as fresh:
The key is storing it properly right after it cools. Transfer those beautiful crusted fillets to an airtight container (I love my glass ones for this) and pop them in the fridge within 2 hours of cooking. They’ll keep nicely for up to 2 days – any longer and that crispy crust starts to suffer.
Now, reheating is where most people go wrong. Whatever you do, don’t microwave it unless you enjoy soggy breadcrumbs! Here’s my method:
- Preheat your oven to 350°F (175°C)
- Place the tilapia on a baking sheet (no need to grease it)
- Sprinkle just a few drops of water over the fish to keep it moist
- Heat for 8-10 minutes until warmed through
If you’re feeling fancy, you can refresh the crust by broiling for the last minute – just watch it like a hawk! The edges might get extra crispy, and honestly? That’s my favorite part of leftovers.
One last tip – if you want to get ahead, you can prep the garlic breadcrumb mixture up to 2 days in advance and store it separately in the fridge. Then just press it onto fresh fish when you’re ready to bake!
Garlic Crusted Tilapia Nutritional Info
I know we’re all about flavor here, but let’s take a quick look at how this garlic crusted tilapia stacks up nutritionally! These values are estimates based on my recipe testing, but your exact numbers might vary slightly depending on ingredient brands and exact portion sizes.
Per generous serving (one 6-oz fillet with crust), you’re looking at:
- Calories: 220 – perfect for a satisfying but light meal
- Protein: 28g – that’s more protein than a chicken breast!
- Fat: 9g (only 2g saturated) – thanks to heart-healthy olive oil
- Carbs: 8g – mostly from those delicious breadcrumbs
- Sugar: Just 1g – all natural from the fish and garlic
What I love most is how this meal packs serious flavor without weighing you down. The tilapia gives you lean protein while that crispy crust adds just enough indulgence to feel special. It’s my favorite kind of healthy eating – where you don’t even realize you’re being good!
Bonus health perk? All that fresh garlic isn’t just tasty – it’s packed with immune-boosting compounds too. I always joke that this dish tastes so good it should be bad for you, but surprise – it’s actually doing your body good!
Common Questions About Garlic Crusted Tilapia
Over the years, I’ve gotten some great questions about this garlic crusted tilapia recipe. Here are the ones that pop up most often with my tried-and-true answers:
Can I use frozen tilapia fillets?
Absolutely! Just thaw them completely in the fridge overnight and pat them super dry with paper towels before adding the crust. Frozen fish tends to release more moisture, so that extra drying step is key.
How can I make it spicier?
I love adding 1/4 teaspoon cayenne pepper to the breadcrumb mix when we want some heat. A pinch of red pepper flakes works too – just sprinkle them right over the crust before baking for a little kick!
Can I prepare this ahead of time?
You bet! Mix the dry crust ingredients up to 2 days ahead (store in the fridge). Toast the garlic and breadcrumbs right before baking though – that fresh garlic flavor is worth the extra 2 minutes!
What if I don’t have fresh parsley?
No worries! Try 1/2 teaspoon dried parsley mixed into the breadcrumbs, or skip it entirely. A sprinkle of green onions or a squeeze of lemon at the end works great too.
Why is my crust not sticking?
Make sure to press it firmly! If it’s still being stubborn, lightly brush the fish with olive oil first – it gives the crumbs something to grab onto. And don’t overload the topping – a thin, even layer stays put best.
Share Your Feedback
Okay, I’ve shared all my garlic crusted tilapia secrets – now I want to hear from you! Did that golden, crispy crust turn out exactly how you dreamed? Maybe you put your own spin on it with extra spices or a different fish? Drop me a comment below – I read every single one (with my morning coffee, like catching up with an old friend).
If you snapped a photo of your masterpiece (I know that crust is Instagram-worthy), tag me @[YourHandle] so I can see your creation! Nothing makes me happier than seeing my recipes come to life in your kitchens. And if you loved it? A star rating helps other home cooks find this gem too. Now go forth and make more garlicky magic!


25-Minute Garlic Crusted Tilapia That Steals the Show
- Total Time: 25 mins
- Yield: 4 servings 1x
- Diet: Low Calorie
Description
A quick and flavorful garlic crusted tilapia recipe that’s perfect for a healthy weeknight dinner.
Ingredients
- 4 tilapia fillets (about 6 oz each)
- 4 cloves garlic (minced)
- 2 tbsp olive oil
- 1/2 cup breadcrumbs
- 2 tbsp grated Parmesan cheese
- 1 tsp paprika
- 1/2 tsp salt
- 1/4 tsp black pepper
- 1 tbsp fresh parsley (chopped)
Instructions
- Preheat oven to 375°F (190°C).
- Mix breadcrumbs, Parmesan, paprika, salt, and pepper in a bowl.
- Heat olive oil in a skillet over medium heat. Sauté garlic until fragrant (about 30 seconds).
- Add breadcrumb mixture to the skillet. Stir until golden (1-2 minutes).
- Place tilapia fillets on a baking sheet. Press the garlic crust mixture onto each fillet.
- Bake for 12-15 minutes until fish flakes easily with a fork.
- Sprinkle with parsley before serving.
Notes
- Use fresh garlic for best flavor.
- Panko breadcrumbs add extra crunch.
- Substitute lemon zest for paprika if preferred.
- Prep Time: 10 mins
- Cook Time: 15 mins
- Category: Main Dish
- Method: Baking
- Cuisine: American
Nutrition
- Serving Size: 1 fillet
- Calories: 220
- Sugar: 1g
- Sodium: 450mg
- Fat: 9g
- Saturated Fat: 2g
- Unsaturated Fat: 6g
- Trans Fat: 0g
- Carbohydrates: 8g
- Fiber: 1g
- Protein: 28g
- Cholesterol: 70mg