Oh, the holidays! That magical time when we gather around the table, passing dishes and making memories. But let’s be honest—traditional stuffing can be a bit of a mess, right? That’s why I fell in love with these garlic herb stuffing muffins. Picture this: all the cozy, savory flavors of classic stuffing, but in perfectly portioned little cups with crispy edges and soft, herby centers. No more wrestling with a casserole dish at the dinner table!
I’ll never forget the first time I served these at Thanksgiving. My aunt, who usually skips the stuffing (gasp!), went back for seconds. “These are genius,” she said, and I couldn’t agree more. After testing this recipe more times than I can count—tweaking the herb ratios, adjusting the bake time—I’ve landed on what I truly believe is the best version. The secret? Fresh herbs, day-old bread, and just the right amount of garlic to make it sing. Trust me, once you try these, you’ll never go back to scooping stuffing from a dish again.

Why You’ll Love These Garlic Herb Stuffing Muffins
Let me tell you why these little guys are about to become your new holiday staple:
- No more portion guesswork – Each muffin is the perfect single serving (though let’s be real, you’ll want at least two!)
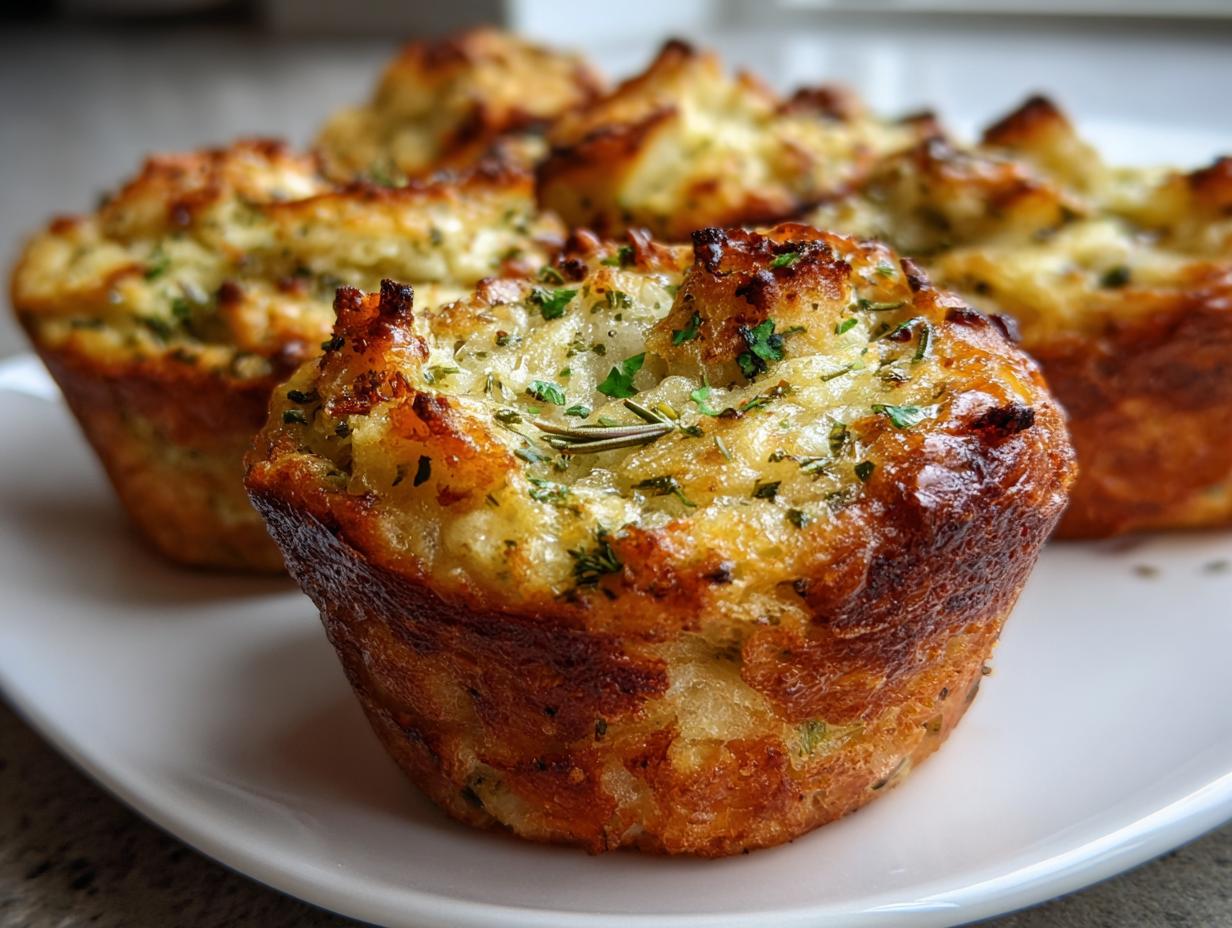
- Crispy edges for days – That golden-brown crust? Absolute perfection compared to mushy casserole stuffing
- Make-ahead magic – Whip them up the day before and just reheat – nobody will know the difference
- Flavor bombs – The garlic and fresh herb combo makes even picky eaters come back for more
- No serving spoon fights – Just grab and go from the muffin tin – hooray for easy entertaining!
Honestly, I don’t know why anyone would make stuffing any other way now.
Ingredients for Garlic Herb Stuffing Muffins
Okay, let’s talk ingredients – and I mean exactly what you’ll need to make these little flavor-packed wonders. I’ve learned through trial and error (and many batches!) that the quality and prep of these ingredients makes all the difference.
- 4 cups day-old bread cubes – About 1/2-inch pieces (trust me, stale bread absorbs the flavors better without turning mushy)
- 1/2 cup butter, melted – The real deal, please! Margarine just won’t give you that rich flavor
- 1/4 cup fresh parsley, chopped – Packed leaves, stems removed (dried parsley? Don’t even think about it!)
- 2 tbsp fresh thyme, chopped – Those tiny leaves pack a punch
- 1 tbsp fresh rosemary, chopped – Finely minced so you don’t get any woody bits
- 3 cloves garlic, minced – Fresh only! The pre-minced jarred stuff just doesn’t compare
- 1/2 cup onion, finely diced – About 1 small onion
- 1/2 cup celery, finely diced – Include those pretty pale inner stalks with leaves
- 1 1/2 cups low-sodium chicken or vegetable broth – This is key for controlling saltiness
- 2 large eggs, beaten – They bind everything together beautifully
- 1 tsp salt – Adjust to taste if using regular broth
- 1/2 tsp black pepper – Freshly cracked if you’ve got it
Vegetarian note: Simply use vegetable broth instead of chicken – they’ll taste just as amazing! I’ve done this for my meat-free friends and nobody could tell the difference.

Essential Equipment
Now, let’s talk tools! You don’t need anything fancy to make these garlic herb stuffing muffins, but having the right equipment makes the process so much smoother. Here’s what I always grab from my kitchen:
- Standard 12-cup muffin tin – This is non-negotiable, friends! The classic size gives you those perfect individual portions. I like to use my well-seasoned metal one – it gives the muffins those gorgeous crispy edges.
- Large mixing bowl – Big enough to comfortably toss all those bread cubes with the herby goodness without making a mess. My favorite is a wide, shallow stainless steel bowl that lets me really get in there with my hands.
- Measuring cups and spoons – For those precise amounts of butter and herbs. I keep two sets handy when I’m cooking – one for dry ingredients, one for wet. No cross

How to Make Garlic Herb Stuffing Muffins
Alright, let’s get to the fun part – making these little flavor-packed wonders! I’ve made this recipe so many times I could probably do it in my sleep, but I’ll walk you through each step carefully. The key is taking your time with the mixing – rushing here leads to uneven flavors or worse, soggy muffins (and nobody wants that!).
Preparing the Bread Mixture
First things first – that bread needs love! Here’s how I get every cube perfectly coated:
- Butter bath time: Pour that melted butter over the bread cubes in your large bowl. Now, here’s my trick – use clean hands to gently toss everything together. The warmth from your hands helps distribute the butter evenly without crushing the bread. You’ll know it’s right when every cube glistens but there’s no pooling butter at the bottom.
- Herb confetti: Add all those gorgeous fresh herbs, garlic, onion, and celery. I like to sprinkle them over the top first so I can see the distribution, then fold them in gently with a rubber spatula. The goal? Every bite should have a little bit of everything!
- Broth magic: Now slowly drizzle in the broth while mixing. This is where patience pays off – add about 1/3 at a time, letting the bread absorb it before adding more. The mixture should look moist but not swimming in liquid. If you press a cube between your fingers, it should hold together without dripping.
- Egg binding: Finally, pour in those beaten eggs and give everything one last gentle mix. The eggs are like the glue that holds our muffin dreams together!
Watch out! Overmixing at this stage can turn your bread cubes into mush. A few dry spots are okay – they’ll hydrate as the muffins bake. I usually stop mixing when about 90% of the liquid is absorbed.
Baking and Serving Tips
Now for the transformation from messy mixture to golden perfection:
- Pack it in: Spoon the mixture into your greased muffin cups, pressing down firmly with the back of a spoon. Really pack it in there – this helps them hold their shape after baking. Fill each cup nearly to the top; they won’t rise much.
- Bake smart: Pop them in the middle rack of your preheated 375°F oven. This position ensures even cooking without over-browning the bottoms. Set your timer for 25 minutes – but start checking at 20. They’re done when the tops are golden brown and crisp-looking.
- Crispy bonus: Want extra crunch? Turn on the broiler for the last 1-2 minutes (watch closely!). This gives them that irresistible toasty top.
- Cooling patience: Let them rest in the pan for 5 minutes before removing. This brief wait lets them firm up so they don’t crumble apart. Use a butter knife to gently loosen the edges if needed.
Pro tip from my many trials: If you’re serving these immediately, pop them under the broiler for that extra crispness right before bringing them to the table. The contrast between the crispy top and soft interior is absolute heaven!
Expert Tips for Perfect Garlic Herb Stuffing Muffins
After making these garlic herb stuffing muffins more times than I can count (my family insists on them at every gathering now!), I’ve picked up some game-changing tricks that’ll take yours from good to “can I have the recipe?” amazing. Here’s everything I wish I knew when I first started making them:
Stale bread secrets
Forgot to leave bread out to stale? No worries! I’ve got two foolproof shortcuts:
- Oven method: Spread fresh bread cubes on a baking sheet and pop them in a 300°F oven for 10-15 minutes until dry but not toasted. They’ll absorb the flavors just like day-old bread!
- Microwave magic: Zap fresh bread cubes in 30-second bursts, flipping between each, until they feel dry to the touch. Takes about 2 minutes total.
My favorite breads to use? A mix of sourdough for tang and French bread for lightness. The combo creates incredible texture!
Herb substitutions that actually work
Ran out of fresh herbs? In a pinch (we’ve all been there!), use these dried herb conversions:
- 1 tbsp dried parsley = 3 tbsp fresh
- 1 tsp dried thyme = 1 tbsp fresh
- 1/2 tsp dried rosemary = 1 tbsp fresh (crush it between your fingers first!)
But here’s my secret – rehydrate dried herbs in warm broth for 10 minutes before adding. It brings back some of that fresh herb vibrancy!
Broth adjustments for perfect texture
The amount of broth can make or break your muffins. Here’s how to nail it every time:
- Too dry? Add broth 1 tbsp at a time until the mixture holds together when pressed.
- Too wet? Mix in an extra handful of bread crumbs or crushed crackers to absorb excess moisture.
I always keep extra broth and bread cubes nearby during mixing – different breads absorb liquid differently!
Testing doneness like a pro
The toothpick test works, but here’s how I really know they’re perfect:
- Insert a toothpick near the center – it should come out with moist crumbs (not wet batter)
- Press lightly on top – the muffin should spring back slightly
- Look for golden edges pulling away from the pan
If they pass all three tests, you’re golden (literally)!
My secret flavor booster
Want to take these up another notch? Add 1/4 cup grated Parmesan to the dry ingredients. It melts into the bread and creates this incredible savory depth that’ll have people begging for your recipe!

Storage and Reheating
Now let me share my tried-and-true methods for keeping these garlic herb stuffing muffins tasting fresh—because let’s face it, you’ll probably have leftovers (unless your family is anything like mine, where they disappear instantly!). Here’s how I store and revive them:
Refrigerator Storage
After they’ve cooled completely (seriously—no cheating here or you’ll get soggy muffins!), pop them in an airtight container with a paper towel lining the bottom. The towel absorbs any excess moisture. They’ll keep beautifully for:
- 3 days in the fridge
- Stack them with parchment paper between layers if you’re short on space
I learned the hard way that plastic wrap alone makes them sweat—the container + paper towel trick is a game changer!
Freezing for Future Feasts
These muffins freeze like a dream! Here’s my foolproof method:
- Cool completely (I can’t stress this enough)
- Wrap each muffin tightly in plastic wrap—get out as much air as possible
- Then wrap again in foil (this double protection prevents freezer burn)
- Pop them in a freezer bag labeled with the date
They’ll stay perfect for up to 2 months this way. Pro tip: Freeze some before the holidays—future you will be so grateful when you’re drowning in prep work!
Reheating Like a Pro
Okay, here’s where most people mess up—microwaving turns them rubbery. Instead:
- Oven method: 350°F for 10-15 minutes (5 minutes if thawed). For extra crispness, unwrap and place directly on the rack for the last 2 minutes.
- Air fryer magic: 325°F for 3-5 minutes—crisps them up beautifully!
- Emergency microwave: If you must, wrap in a damp paper towel and heat in 15-second bursts. Not ideal, but better than cold stuffing!
The secret? Always reheat until piping hot in the center—that’s when the garlic and herbs release their fragrance all over again!
Garlic Herb Stuffing Muffins Variations
One of my favorite things about this recipe is how easily you can tweak it to make it your own! Over the years, I’ve played around with all sorts of add-ins and swaps—some became instant hits, others… well, let’s just say cranberry-pistachio wasn’t my brightest idea. Here are the variations that actually work like a charm:
Mix-Ins That Wow
- Savory sausage: Brown 1/2 pound of breakfast sausage (mild or spicy!), drain well, and fold into the mixture before baking. Adds incredible depth and makes them hearty enough for breakfast!
- Sweet & tangy: 1/3 cup dried cranberries soaked in orange juice for 10 minutes—perfect for Thanksgiving when you want that classic sweet-savory balance.
- Crunch lovers: Toasted pecans or walnuts (about 1/2 cup chopped) add amazing texture. Toss them in with the dry ingredients so they don’t get soggy.
- Cheese please: Fold in 1/2 cup shredded sharp cheddar or Gruyère during the last mix—melts into golden pockets of goodness.
Diet-Friendly Swaps
For my friends with dietary needs, here are the adjustments I’ve tested that still deliver on flavor:
- Dairy-free: Replace butter with 1/3 cup olive oil (the good stuff!) or melted coconut oil. The olive oil version actually gives a lovely Mediterranean twist with the herbs.
- Gluten-free: Use your favorite GF bread cubes—I’ve had great results with sourdough GF loaves. Just check that they’re truly stale before using.
- Egg-free: Mix 1 tbsp ground flaxseed with 3 tbsp water per egg, let sit 5 minutes to gel. They won’t hold quite as firm but still work!
My biggest tip? Write down what you add each time—that way when your uncle begs for “those mushroom ones you made last year,” you’ll actually remember what you did! (Speaking of, sautéed mushrooms are another fantastic add-in…)
Nutrition Information
Okay, let’s talk numbers—but remember, these are estimates based on the exact ingredients I use. Your mileage may vary depending on your bread type, butter brand, or if you add any of those tasty variations we just talked about!
- Serving Size: 1 muffin (about the size of a standard cupcake)
- Calories: 180 (perfect for going back for seconds!)
- Total Fat: 10g (that rich butter flavor has to come from somewhere)
- Saturated Fat: 6g
- Trans Fat: 0g
- Cholesterol: 50mg
- Sodium: 380mg (that’s why I insist on low-sodium broth!)
- Total Carbohydrates: 18g
- Dietary Fiber: 1g
- Sugars: 2g (just from the natural sweetness of the veggies)
- Protein: 4g (thanks to those eggs and bread)
A little nutrition pro tip from me: If you’re watching sodium, you can reduce it to about 250mg per muffin by using unsalted butter and homemade low-sodium broth. But hey—it’s the holidays! Live a little! For more information on general food safety and nutrition guidelines, check out resources from the U.S. Food and Drug Administration.
Common Questions About Garlic Herb Stuffing Muffins
I get asked about these garlic herb stuffing muffins all the time—here are the questions that come up most often, along with my hard-won answers from years of making (and sometimes messing up!) this recipe:
Can I use dried herbs instead of fresh?
You can, but hear me out—fresh really does make a difference here! The flavor is brighter and more vibrant. If you must use dried, remember: 1 tbsp fresh = 1 tsp dried. And please, please crush those dried herbs between your fingers before adding—it helps release their oils. Pro tip: soak dried herbs in warm broth for 10 minutes first to wake them up!
How do I prevent the muffins from sticking to the pan?
Oh boy, learned this the messy way! My triple-protection method never fails:
- Grease every nook with butter (get in those crevices!)
- Use a pastry brush to apply—fingers just smear it unevenly
- For extra security, dust with breadcrumbs after greasing
Let them rest 5 full minutes after baking before removing—that wait makes all the difference!
Can I prepare these the night before?
Absolutely! Here’s how I do it for stress-free entertaining:
- Mix everything except eggs and broth the night before—store covered in fridge
- Next day, add eggs and broth, mix, and bake
- Or bake completely, then reheat at 350°F for 10 minutes before serving
They actually taste better when the flavors mingle overnight!
Are these muffins freezer-friendly?
They freeze like a dream—my freezer stash saves every holiday! Cool completely, then:
- Wrap individually in plastic wrap (tight as can be!)
- Put wrapped muffins in a freezer bag, squeeze out air
- Label with date (they’re good for 2 months)
Reheat frozen muffins at 350°F for 15-20 minutes—they’ll taste freshly baked!
What should I serve with garlic herb stuffing muffins?
Oh, where to begin? They pair with practically everything, but my family’s favorites are:
- Classic roast turkey or chicken (obviously!)
- Honey-glazed ham—the sweetness is magic with the herbs
- Beef tenderloin for fancy dinners
- Just a big green salad for a light meal
- Honestly? They’re amazing with scrambled eggs for breakfast too!
Basically, if it goes on a dinner plate, these muffins will make it better. Trust me!
Print
Irresistible Garlic Herb Stuffing Muffins in 25 Minutes
- Total Time: 45 minutes
- Yield: 12 muffins 1x
- Diet: Vegetarian
Description
Garlic herb stuffing muffins are a flavorful twist on traditional stuffing. These individual portions are perfect for serving at holiday meals or as a side dish.
Ingredients
- 4 cups bread cubes
- 1/2 cup butter, melted
- 1/4 cup fresh parsley, chopped
- 2 tbsp fresh thyme, chopped
- 1 tbsp fresh rosemary, chopped
- 3 cloves garlic, minced
- 1/2 cup onion, diced
- 1/2 cup celery, diced
- 1 1/2 cups chicken or vegetable broth
- 2 eggs, beaten
- 1 tsp salt
- 1/2 tsp black pepper
Instructions
- Preheat oven to 375°F (190°C). Grease a muffin tin.
- In a large bowl, combine bread cubes with melted butter.
- Add parsley, thyme, rosemary, garlic, onion, and celery. Mix well.
- Pour in broth and beaten eggs. Season with salt and pepper.
- Stir until all ingredients are evenly combined.
- Spoon mixture into muffin cups, pressing down lightly.
- Bake for 25-30 minutes until golden brown.
- Let cool for 5 minutes before removing from tin.
Notes
- Use day-old bread for best texture.
- Can be made ahead and reheated.
- For crispier tops, broil for 1-2 minutes before serving.
- Prep Time: 15 minutes
- Cook Time: 30 minutes
- Category: Side Dish
- Method: Baked
- Cuisine: American
Nutrition
- Serving Size: 1 muffin
- Calories: 180
- Sugar: 2g
- Sodium: 380mg
- Fat: 10g
- Saturated Fat: 6g
- Unsaturated Fat: 3g
- Trans Fat: 0g
- Carbohydrates: 18g
- Fiber: 1g
- Protein: 4g
- Cholesterol: 50mg