
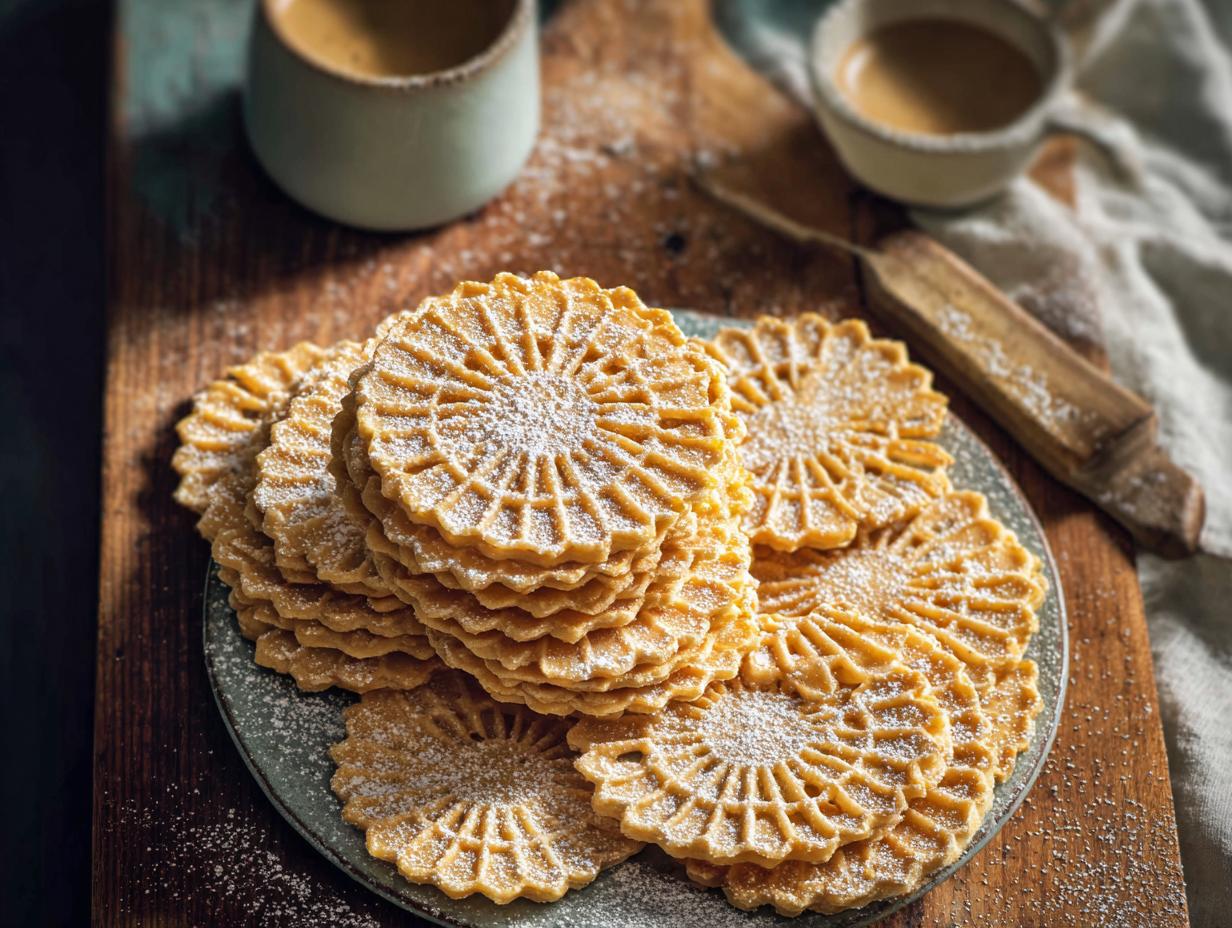
I can still picture my grandmother’s tiny kitchen, the air filled with the warm, sweet scent of anise as she pressed the old pizzelle iron closed. That first batch of Italian pizzelle was always the best—thin, crisp, and impossibly delicate. She’d slide one onto my waiting palm, and I’d watch the intricate snowflake pattern disappear in a few happy bites. That memory is what this recipe is all about: capturing that same perfect crunch and that unmistakable, gentle anise flavor that makes these cookies so special.
Here’s the thing I learned from watching her, though: the iron needs to be screaming hot. If you don’t let it preheat for a solid five minutes, you’ll end up with pale, soft cookies instead of those golden, crisp beauties. Trust me on that one—it’s the difference between a good batch and a great one. So, let’s get that iron heating up, and I’ll show you just how simple it is to bring a little bit of her kitchen into yours.
Why You’ll Love This Italian Pizzelle Recipe
I’m honestly a little obsessed with how easy these are. The batter comes together in one bowl in about 15 minutes flat—no stand mixer needed, no complicated steps. You probably have everything in your pantry already: flour, eggs, sugar, butter, and some extracts. They’re perfect for holiday cookie plates, sure, but I make them for random Tuesday treats too. And here’s a bonus: you can easily swap the flour for a gluten-free blend if you need to. No alcohol, bacon, or ham in this recipe—just pure, simple cookies. What really sets them apart is that delicate anise flavor. It’s not overpowering, just a gentle, nostalgic whisper that makes you reach for another one.
Classic Italian Pizzelle Flavor
Anise extract is the secret to that authentic taste. It’s got this sweet, licorice-like warmth that just screams “Italian cookie.” But don’t worry—if anise isn’t your thing, you can swap in vanilla or almond extract. Either way, the flavor is way more interesting than a plain waffle cookie.
Simple Ingredients for Italian Pizzelle
You only need flour, baking powder, salt, eggs, sugar, butter, and your choice of extracts. That’s it. No fancy equipment beyond the pizzelle iron itself. I love recipes that don’t require a trip to a specialty store.
Ingredients for Italian Pizzelle
Here’s exactly what you’ll need. I keep it simple: 1 3/4 cups all-purpose flour, 1 1/2 teaspoons baking powder, and 1/2 teaspoon salt for the dry stuff. Then 3 large eggs, 3/4 cup granulated sugar, and 1/2 cup unsalted butter—melted and cooled, please, not hot. You’ll also need 1 teaspoon anise extract and 1 teaspoon vanilla extract. I always use unsalted butter so I’m in control of the salt level. Regular volume measures work perfectly here.
Key Ingredient: Anise Extract for Italian Pizzelle
Anise extract is what gives these cookies their signature flavor. It’s consistent and easy to use. If you can’t find it, you can grind anise seeds yourself, but the extract is way more reliable. Don’t worry about alcohol content—most extracts have a tiny amount that cooks off completely. For more information on baking extracts, check out this guide to baking extracts.
Essential Equipment for Making Italian Pizzelle
You really just need one special piece of gear: a pizzelle iron. I use an electric one, but the stovetop versions work great too—just be ready to flip them. Grab some mixing bowls, a whisk, your measuring cups and spoons, and a wire rack for cooling. The iron has to be preheated thoroughly, or the cookies won’t crisp up right. If you’re new to this, don’t worry—once that iron is hot, you’ll be cranking out thin, perfectly crisp pizzelle in no time.
Step-by-Step Instructions for Italian Pizzelle
Alright, let’s get to the fun part. I’ll walk you through each step so you don’t miss a thing. The key is to work quickly once the batter is ready, because that iron needs to be hot and waiting. Don’t overthink it—just follow along, and you’ll have a stack of gorgeous cookies in no time.
Prepare the Batter for Italian Pizzelle
First, whisk the flour, baking powder, and salt together in a small bowl. Set that aside. In a larger bowl, beat the eggs and sugar until they’re thick and pale—takes about 2 to 3 minutes with a hand mixer. Then stir in the melted butter and both extracts. Now gently fold in the dry mixture until just combined. A few streaks are fine; overmixing makes them tough. The batter should be thick but still drop easily off a spoon.
Cook the Italian Pizzelle
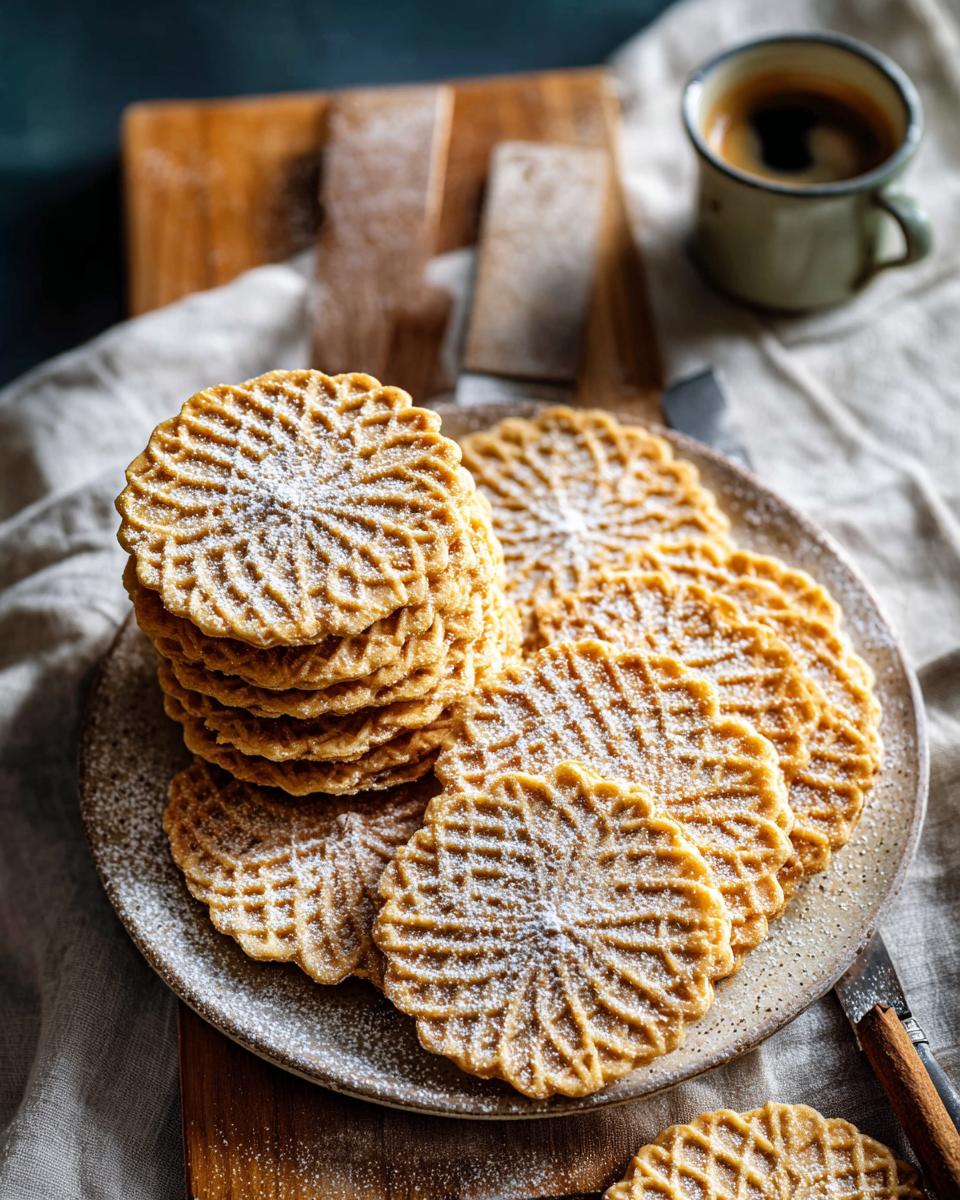
Make sure your pizzelle iron is fully preheated—at least 5 minutes. Give it a light spray of nonstick spray if it’s not well-seasoned. Drop a heaping tablespoon of batter onto each grid. Close the lid firmly and cook for 30 to 45 seconds. You’ll know they’re done when the steam stops and the edges turn a lovely golden brown. Use a thin spatula to lift them off carefully. Transfer them to a wire rack to cool completely—they’ll crisp up as they sit.
Cool and Store Italian Pizzelle
Let the cookies cool flat on a wire rack in a single layer. Don’t stack them while warm, or they’ll trap steam and get soft. Once completely cool, store them in an airtight container at room temperature for up to 2 weeks. They’ll soften a bit over time, but if you want that fresh crunch back, just pop them in a 300°F oven for a couple of minutes. Works like a charm.
Tips for Perfect Italian Pizzelle
I’ve made enough batches to learn a few tricks the hard way, so let me save you the trouble. First, don’t overload the iron—exactly one heaping tablespoon per grid is all you need. Any more and you’ll get a messy overflow. And please, make sure that butter is melted and cooled before you add it to the eggs, or you’ll end up with scrambled bits in your batter. If your batter feels too thick, just stir in a teaspoon of milk. For even color, I rotate my iron halfway through cooking—it helps if yours has hot spots like mine does. And honestly, use a timer the first time. Thirty seconds feels like nothing until you’re staring at a burnt cookie.
Avoid Soggy Italian Pizzelle
The biggest culprit for soggy pizzelle is a cold iron. Make sure it’s fully preheated before you start. Also, never stack hot cookies—they’ll trap steam and turn soft. Cool them in a single layer on a wire rack. If they’re still soft after cooling, pop them in a 300°F oven for 2-3 minutes to crisp them back up.
Delicious Variations of Italian Pizzelle
Once you’ve mastered the classic, you’re going to want to play around. I sure did! The base batter is so forgiving that you can switch up the flavors with almost no extra effort. Here are three of my favorites. They all use the same simple method, so you can mix and match depending on your mood. Oh, and one more thing: after they’re cool, try dipping half of each cookie in melted dark chocolate. It’s a game-changer, I promise.
Almond Italian Pizzelle
This one’s a total crowd-pleaser. Just swap the anise extract for 1 teaspoon of almond extract, and stir in 1/4 cup of finely chopped almonds right into the batter. Bake them exactly the same way. The nutty crunch is incredible.
Citrus Italian Pizzelle
For a bright, sunny twist, add the zest of one whole lemon and 1/2 teaspoon of lemon extract. Leave out the anise entirely. The citrus flavor is so refreshing, and it pairs perfectly with a light dusting of powdered sugar. I love these with a cup of tea.
How to Store and Reheat Italian Pizzelle
Once your cookies are completely cool, pop them in an airtight container with a paper towel tucked inside. That little towel absorbs any extra moisture and keeps them crisp. Store them at room temperature—never in the fridge, or they’ll get sad and soft. If they lose their crunch after a few days, just spread them on a baking sheet and warm them in a 300°F oven for 3 to 4 minutes. Don’t even think about using the microwave; it’ll turn them into rubber. Oh, and these freeze beautifully! Just seal them in a freezer bag and they’ll keep for up to 3 months.
Frequently Asked Questions About Italian Pizzelle
I get asked the same handful of questions every time I share this recipe, so let me clear them up right here. First up: can you make these without a pizzelle iron? Honestly, no. That special iron is what gives them their thin, delicate pattern and that signature crunch. You just can’t replicate it with a waffle maker or a pan.
Another common one: why are my pizzelle soft? Nine times out of ten, it’s because the iron wasn’t hot enough, or you undercooked them. That steam needs to stop completely before you open the lid. Also, if you’re wondering about swapping butter for olive oil—don’t. Butter gives you that rich flavor and sturdy structure. Oil will make them greasy and change the texture entirely. And for sticking? A well-seasoned iron is your best friend, but a generous spray of nonstick spray before each batch never hurts.
Can I freeze Italian Pizzelle?
Absolutely! I do it all the time. Lay them in a single layer on a baking sheet, freeze until firm, then transfer to a freezer bag. They’ll keep for up to 3 months. Just thaw at room temperature and reheat for a few minutes to bring back that crispness.
What is the difference between pizzelle and waffle cookies?
Great question! Pizzelle are much thinner and crispier, almost like a delicate lace cookie. They’re made with a specific iron that imprints that classic snowflake pattern. Waffle cookies, on the other hand, are thicker and have a chewier texture. Totally different experience.
Italian Pizzelle Nutritional Information
Just so you know, here’s the rough nutritional breakdown for one cookie. Each one clocks in at about 120 calories, with 8g of sugar, 80mg of sodium, and 5g of fat (3g of that is saturated). You’re also looking at 17g of carbs, 0g of fiber, 2g of protein, and 35mg of cholesterol. Keep in mind, these are just estimates—they can shift a little depending on the exact brands and ingredients you use. But honestly? I don’t worry too much about it. They’re worth every bite.
Your Turn to Try Italian Pizzelle
Now it’s your turn to fill your kitchen with that amazing anise aroma! I’d love to hear how your batch turns out—drop a comment below and let me know if you tried a fun variation or just stuck with the classic. What’s your favorite flavor? And hey, if you’re loving this recipe, pin it for later or share it with a friend who needs some cookie magic in their life. Happy baking!
Print
Italian Pizzelle 1 Secret for Unforgettable Crisp
- Total Time: 35 minutes
- Yield: 24 cookies 1x
- Diet: Vegetarian
Description
Italian pizzelle are crisp, thin cookies made with a special iron. They have a delicate anise flavor. Enjoy them plain or dusted with powdered sugar.
Ingredients
- 1 3/4 cups all-purpose flour
- 1 1/2 teaspoons baking powder
- 1/2 teaspoon salt
- 3 large eggs
- 3/4 cup granulated sugar
- 1/2 cup unsalted butter, melted
- 1 teaspoon anise extract
- 1 teaspoon vanilla extract
Instructions
- Whisk flour, baking powder, and salt in a bowl.
- Beat eggs and sugar in a large bowl until thick and pale.
- Mix in melted butter, anise extract, and vanilla.
- Add flour mixture and stir until just combined.
- Heat pizzelle iron according to manufacturer’s instructions.
- Drop a heaping tablespoon of batter onto each iron grid.
- Close lid and cook until golden brown, about 30 to 45 seconds.
- Remove pizzelle and cool on a wire rack.
Notes
- Store pizzelle in an airtight container for up to 2 weeks.
- They soften slightly over time.
- You can substitute anise extract with other flavors like almond or lemon.
- Prep Time: 15 minutes
- Cook Time: 20 minutes
- Category: Dessert
- Method: Baking
- Cuisine: Italian
Nutrition
- Serving Size: 1 cookie
- Calories: 120
- Sugar: 8g
- Sodium: 80mg
- Fat: 5g
- Saturated Fat: 3g
- Unsaturated Fat: 2g
- Trans Fat: 0g
- Carbohydrates: 17g
- Fiber: 0g
- Protein: 2g
- Cholesterol: 35mg