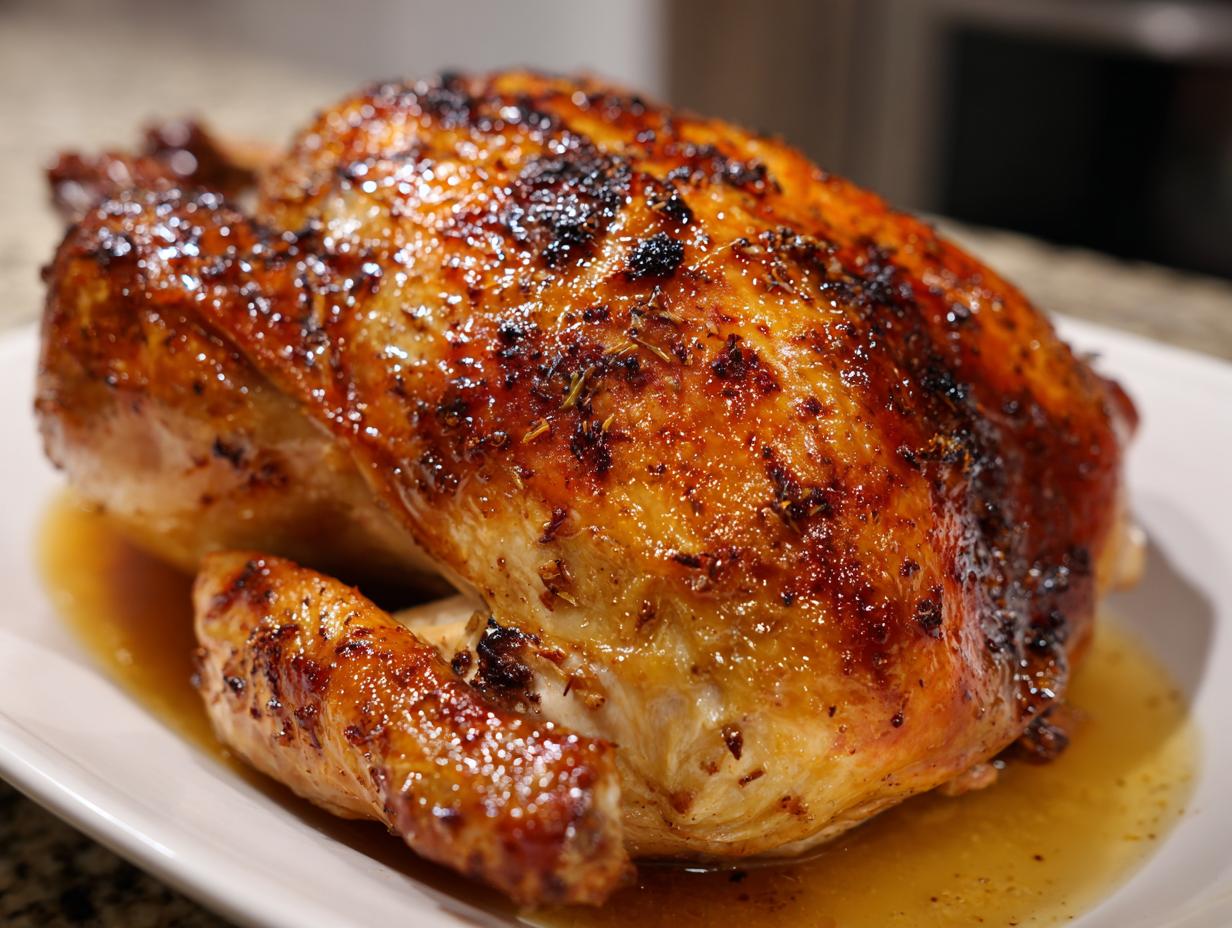
There’s nothing quite like the smell of maple glazed roast turkey filling the house on Thanksgiving morning. I’ll never forget the year I first tried this recipe – my husband peeked into the oven so many times I practically had to shoo him away with a wooden spoon! That gorgeous mahogany-colored skin glistening with sweet maple goodness? Absolute perfection.
After fifteen years of tweaking holiday recipes, this maple glazed version became our family’s must-have centerpiece. The magic happens when sticky-sweet maple syrup meets savory herbs and butter – it’s that irresistible balance that makes everyone sneak pieces of crispy skin before dinner even starts. Trust me, your guests will be hovering around the kitchen just like mine do!
What I love most is how simple yet impressive this roast turkey turns out. While some recipes call for complicated brines or fancy techniques, this one relies on quality ingredients and patience during roasting. That maple glaze caramelizes beautifully while keeping the meat incredibly juicy. Just wait until you see your family’s faces when you bring this golden beauty to the table!
Why You’ll Love This Maple Glazed Roast Turkey
This maple glazed roast turkey is the kind of recipe that makes holiday cooking feel effortless and rewarding. Here’s why it’s a total winner:
- Easy Glaze: The glaze comes together in minutes with just maple syrup, butter, and soy sauce. No fuss, no complicated steps—just sweet, savory perfection.
- Perfect Holiday Centerpiece: That golden, glossy finish? It’s a showstopper. Your turkey will look like it’s straight out of a magazine, and your guests will be in awe.
- Crowd-Pleasing Flavor: The combination of maple’s sweetness with savory herbs and spices is irresistible. Even picky eaters will come back for seconds.
- Crispy Skin: Baking the turkey with a glaze creates that dreamy, crispy skin everyone fights over. It’s the best part, trust me!
Whether it’s your first time roasting a turkey or you’re a seasoned pro, this recipe is foolproof and guaranteed to impress. It’s the kind of dish that makes holiday memories.

Ingredients for Maple Glazed Roast Turkey
Okay, let’s gather our cast of characters! The beauty of this recipe is its simplicity—just a handful of ingredients that do all the heavy lifting. I’m a stickler for a few key things here, learned through (ahem) minor kitchen disasters in years past. Trust me, using the right stuff makes ALL the difference between a good turkey and a “can I have your recipe?” turkey.
- 1 whole turkey (12-14 lbs): Size matters here! A bird in this range will fit in most standard roasting pans and cook evenly. Don’t forget to take the giblets out of the cavity—I’ve definitely forgotten once and, wow, that was a smell.
- 1/2 cup pure maple syrup: Please, please use the real stuff! The imitation pancake syrup will just make everything sickly sweet and won’t give you that deep, caramelized flavor we’re after.
- 1/4 cup unsalted butter, melted: I always use unsalted so I can control the salt level myself. And pro tip: let it cool just slightly after melting so it doesn’t cook the eggs if you’re using the drippings for gravy later.
- 2 tbsp soy sauce (low-sodium if preferred): This is our secret weapon for that savory, umami punch that balances the maple. If you’re watching salt, low-sodium works perfectly.
- 1 tsp each: garlic powder, onion powder, dried thyme: My holy trinity of turkey seasonings! The powders cling to the skin way better than fresh here and create an amazing flavor base.
- Kosher salt and freshly ground black pepper: To taste! Be generous, especially under the skin and inside the cavity.
A quick but CRUCIAL note: Pat that turkey bone-dry with paper towels before you do anything else. I’m talking really get in there. This is the absolute key to getting that skin crispy instead of steamed and soggy. And for the butter, just melt it—no need to bring it to room temperature first since we’re melting it anyway. Now, let’s get cooking!
Essential Equipment
Listen, I know holiday cooking can feel overwhelming with all the gadgets out there, but for this maple glazed turkey, you really only need a few simple tools. These are my non-negotiables – the stuff that makes the difference between struggling through dinner prep and actually enjoying the process!
- Roasting pan with rack: That lifted rack isn’t just for looks – it keeps your turkey out of its own juices so the bottom doesn’t get soggy. If you don’t have one, balled-up aluminum foil under the bird works in a pinch.
- Meat thermometer: Don’t even think about skipping this! That pop-up timer in store-bought turkeys lies. A good instant-read thermometer is worth its weight in gold for hitting that perfect 165°F. Check out this internal temperature chart for more details.
- Basting brush: Silicone is my go-to because the bristles don’t shed into your beautiful glaze like those old-fashioned brushes tend to do. Plus, they’re way easier to clean!
- Aluminum foil: Your best friend for tenting when the skin gets too dark too fast. I always keep extra on hand in case I need to make a quick foil “hat” for the breast.

That’s it! No fancy equipment needed. Just these basics will get you to turkey perfection. Now, who’s ready to make some magic happen?
How to Make Maple Glazed Roast Turkey
Alright, let’s get this show on the road! Making this maple glazed roast turkey is easier than you think, but there are a few key steps to nail for that perfect result. Follow along, and you’ll have a turkey that’s golden, juicy, and full of flavor.
Preparing the Turkey
First things first—preheat that oven to 325°F. While it’s heating up, grab your turkey and pat it completely dry with paper towels. Seriously, don’t skip this step! Dry skin = crispy skin, and that’s what we’re after. Next, season it generously inside and out with salt, pepper, garlic powder, onion powder, and thyme. I like to lift the skin and rub some seasoning directly on the meat for extra flavor. If your turkey has legs tied together with twine, leave it—it helps keep everything neat while roasting.
Making the Maple Glaze
While your oven is heating, let’s whip up that glorious glaze. In a small bowl, whisk together the maple syrup, melted butter, and soy sauce until it’s smooth and shiny. Taste it—trust me, it’s hard not to sneak a spoonful! This glaze is the secret to that beautiful caramelized finish, so don’t skimp on it.
Roasting and Basting
Place your turkey on the rack in the roasting pan, breast side up. Brush half the glaze all over the turkey, making sure to get into every nook and cranny. Pop it in the oven and set your timer for 30 minutes. When it goes off, baste the turkey with the remaining glaze. Repeat this every 30 minutes—it’s like giving your turkey a little spa treatment! If the skin starts to brown too quickly, tent it loosely with aluminum foil. This keeps it from burning while still letting it crisp up.

Checking Doneness
After about 3 hours, it’s time to check if your turkey is done. Grab your meat thermometer and insert it into the thickest part of the thigh, making sure it’s not touching the bone. You’re looking for 165°F. If it’s not there yet, give it another 10-15 minutes and check again. Once it’s done, pull it out and let it rest for at least 20 minutes before carving. This lets the juices redistribute, so every slice is moist and delicious. And there you have it—the perfect maple glazed roast turkey!
Tips for Perfect Maple Glazed Roast Turkey
After years of making this recipe (and yes, a few mishaps along the way), I’ve learned some tricks that guarantee turkey success every time. These little nuggets of wisdom will take your maple glazed roast turkey from good to “can you cater my wedding?” good:
- Use pure maple syrup: That fake pancake syrup stuff? It’ll make your glaze sickly sweet without that deep, caramelized flavor we’re after. The real deal is worth every penny.
- Pat that turkey DRY: I know I’ve said it before, but it’s so important I’m saying it again. Paper towels are your best friend here – get every inch of that skin bone-dry for maximum crispiness.
- Rest before carving: I know it’s tempting to dive right in, but those 20 minutes of resting time let the juices settle back into the meat. Your patience will be rewarded with juicier slices.
- Save those drippings: Don’t you dare pour them out! That golden liquid at the bottom of your pan is liquid gold for making the most incredible gravy.
Follow these simple tips, and you’ll have a turkey that looks as good as it tastes. Promise!

Serving Suggestions
Now for the best part – plating up that gorgeous maple glazed turkey! I always serve mine with classic holiday sides that complement its sweet-savory flavors perfectly. A big scoop of creamy mashed potatoes is non-negotiable in our house – they’re the perfect vehicle for that amazing maple-infused gravy you’ll make from the drippings. Roasted Brussels sprouts with crispy edges add a nice contrast, and a bright scoop of cranberry sauce cuts through the richness. For extra color, I’ll sometimes add roasted carrots with a drizzle of the leftover maple glaze. Oh, and don’t forget warm dinner rolls to sop up every last bit of flavor!
Storing and Reheating
Let’s talk leftovers—because honestly, sometimes they’re the best part! First things first: don’t let that beautiful turkey sit out too long. Once it’s cooled down, carve off the meat and store it in airtight containers within 2 hours. This keeps it safe and fresh for those next-day turkey sandwiches (or, let’s be real, midnight snacks).
When it comes to reheating, here’s my golden rule: always reheat turkey in gravy. Why? Because reheating it dry can turn those juicy slices into something resembling cardboard. Instead, warm up your leftover turkey slices in a saucepan with a little bit of that luscious gravy you made from the drippings. It keeps the meat moist and adds an extra layer of flavor. If you’re feeling fancy, you can even pop it in the oven at 325°F, covered with foil, for about 15-20 minutes. Just keep an eye on it—you don’t want to overcook it!
And hey, if you’ve got a lot of turkey left, don’t stress. It freezes beautifully! Just portion it out, wrap it tightly, and stash it in the freezer for up to 3 months. When you’re ready to use it, let it thaw in the fridge overnight and reheat it the same way. Easy peasy!
Nutritional Information
Okay, let’s talk nutrition – but first, a big ol’ disclaimer! These numbers are estimates based on the ingredients I use, and yours might vary depending on your specific turkey size or brand of maple syrup. That said, here’s what you’re looking at per generous 6-ounce serving:
- Calories: 320
- Protein: 42g (Turkey power!)
- Fat: 12g (6g unsaturated, 4g saturated)
- Carbohydrates: 9g (All that maple goodness)
- Sugar: 8g
- Sodium: 380mg (Use low-sodium soy sauce if you’re watching this)
- Cholesterol: 125mg
Now, if you’re drizzling extra glaze or piling on that homemade gravy (no judgment here!), those numbers will climb a bit. But honestly? Holiday meals are about celebration, not deprivation. This turkey gives you plenty of lean protein to balance out all those delicious sides we talked about earlier. My philosophy? Enjoy every flavorful bite – life’s too short not to!
FAQs About Maple Glazed Roast Turkey
Over the years, I’ve gotten all sorts of questions about this maple glazed turkey recipe – some from nervous first-timers, others from fellow cooking enthusiasts looking to tweak things. Here are the answers to the ones that pop up most often:
Can I use honey instead of maple syrup?
I know it’s tempting to swap in honey if that’s what you’ve got on hand, but honestly? Don’t do it! Honey has a completely different flavor profile that overwhelms the other ingredients. Maple syrup brings this subtle earthiness that complements the turkey perfectly, while honey would just make everything cloyingly sweet. If you’re in a pinch, a dark corn syrup could work in a 1:1 ratio, but trust me – the real maple magic is worth seeking out!
How long should I let the turkey rest before carving?
I always recommend at least 20 minutes – and yes, I know that’s torture when your whole house smells amazing! But here’s why it’s worth the wait: those juices need time to redistribute through the meat. If you cut into it right away, all that precious moisture will just run out onto your carving board, leaving you with dry turkey. Pro tip? Cover it loosely with foil while it rests to keep it warm without steaming the crispy skin we worked so hard for!
Can I prepare the glaze ahead of time?
Absolutely! In fact, I often make the glaze the night before to save time on the big day. Just whisk together the maple syrup, melted butter, and soy sauce, then pop it in an airtight container in the fridge. When you’re ready to use it, let it sit at room temperature for about 30 minutes to loosen up, or give it a quick zap in the microwave (just 10-15 seconds should do it). The flavors actually deepen and meld together beautifully overnight!
Print
Maple Glazed Roast Turkey: A Juicy 3-Hour Holiday Masterpiece
- Total Time: 3 hours 20 minutes
- Yield: 12 servings 1x
- Diet: Low Lactose
Description
A juicy roast turkey glazed with sweet maple syrup for a flavorful holiday centerpiece.
Ingredients
- 1 whole turkey (12–14 lbs)
- 1/2 cup maple syrup
- 1/4 cup butter, melted
- 2 tbsp soy sauce
- 1 tsp garlic powder
- 1 tsp onion powder
- 1 tsp dried thyme
- Salt and pepper to taste
Instructions
- Preheat oven to 325°F.
- Pat turkey dry and season inside and out with salt, pepper, garlic powder, onion powder, and thyme.
- Place turkey on a rack in a roasting pan.
- Mix maple syrup, melted butter, and soy sauce in a bowl.
- Brush half the glaze over the turkey.
- Roast turkey for 3 hours, basting with remaining glaze every 30 minutes.
- Check internal temperature reaches 165°F in the thickest part of the thigh.
- Let turkey rest 20 minutes before carving.
Notes
- Use pure maple syrup for best flavor.
- Tent turkey with foil if skin browns too quickly.
- Save pan drippings for gravy.
- Prep Time: 20 minutes
- Cook Time: 3 hours
- Category: Main Dish
- Method: Roasting
- Cuisine: American
Nutrition
- Serving Size: 6 oz
- Calories: 320
- Sugar: 8g
- Sodium: 380mg
- Fat: 12g
- Saturated Fat: 4g
- Unsaturated Fat: 6g
- Trans Fat: 0g
- Carbohydrates: 9g
- Fiber: 0g
- Protein: 42g
- Cholesterol: 125mg