You know those moments when you need a killer dessert but don’t want to turn on the oven? That’s where these No Bake Oreo Bars come in – my absolute go-to when time’s tight but I still want that “wow” factor. I first made these for my nephew’s birthday party when my oven decided to quit on me, and guess what? The kids went nuts for them, and the adults kept sneaking seconds when they thought no one was looking.
What makes these Oreo bars so magical is how stupidly easy they are. No fancy techniques, no waiting for butter to soften (we’ve all been there), just crushed cookies, a creamy dreamy filling, and a few hours in the fridge. The hardest part? Waiting for them to set up while that amazing Oreo aroma taunts you from the refrigerator. Trust me, I’ve burned more desserts than I care to admit, but these foolproof bars keep my baking reputation intact every time.
These no-bake wonders have saved me more times than I can count – last-minute potlucks, surprise guests, or just those days when chocolate therapy is non-negotiable. The best part? You probably have all the ingredients in your kitchen right now. So grab that sleeve of Oreos and let’s make some magic happen!

Why You’ll Love These No Bake Oreo Bars
Let me count the ways these little squares of joy will become your new dessert bestie:
- No oven required – perfect for summer when you can’t bear to turn on the heat or when your baking skills are… let’s call them “developing”
- 20 minutes active time – from pantry to pan faster than you can preheat an oven
- Crowd-pleasing flavor – that Oreo magic works on everyone from picky kids to fancy foodie friends
- Emergency dessert ace – when surprise guests show up or you forget about the potluck (we’ve all been there)
- Foolproof process – if you can crush cookies and stir filling, you’ve got this in the bag
These bars are the unicorn of desserts – impressive looking but secretly easy as can be. Just try not to eat all the filling with a spoon before it makes it to the crust (no judgment here).
Ingredients for No Bake Oreo Bars
Here’s what you’ll need to create these ridiculously easy treats:
- 36 Oreo cookies (that’s about 1 standard package) – crushed into fine crumbs (cream filling and all!)
- 1/4 cup melted butter – unsalted works best so you control the saltiness
- 8 oz cream cheese – softened to room temperature (this is crucial!)
- 1 1/2 cups powdered sugar – sifted if you’re feeling fancy (I usually don’t bother)
- 1 tsp vanilla extract – the real stuff makes a difference here
- 1 1/2 cups whipped topping – like Cool Whip or homemade whipped cream
Ingredient Notes & Substitutions
Let me share my hard-earned Oreo bar wisdom:
Cream cheese must be soft – I leave mine out for at least an hour. Trying to beat cold cream cheese leads to lumpy sadness. If you’re in a pinch, microwave it in 10-second bursts at 50% power.
Whipped topping swaps: Cool Whip works great, but homemade whipped cream (just heavy cream + 2 tbsp powdered sugar whipped to stiff peaks) gives a fresher taste. Just know it’ll make the filling a bit softer.
Oreo alternatives: Any sandwich cookie works – I’ve used mint Oreos for a fun twist. Just keep the total cookie weight about the same (about 14 oz).
Equipment You’ll Need for No Bake Oreo Bars
Here’s the short and sweet list of what you’ll grab before starting:
- 9×9 inch baking pan – square makes pretty bars
- Food processor or rolling pin – for crushing those Oreos to perfection
- Mixing bowls – one for crust, one for filling
- Hand mixer or stand mixer – makes the filling silky smooth
- Spatula – for scraping every last bit of that delicious filling
- Parchment paper – trust me, you’ll thank me later when removing the bars
That’s it! No fancy gadgets needed – just basics you probably already have in your kitchen.
How to Make No Bake Oreo Bars
Alright, let’s get to the fun part – turning those simple ingredients into irresistible Oreo bars! I’ll walk you through each step with all my tried-and-true tips. The process is so easy you could practically do it with your eyes closed (but maybe don’t try that with the food processor running).
Step 1: Prepare the Oreo Crust
First, let’s tackle that addictive Oreo base. Grab your food processor (or a ziplock bag and rolling pin if you’re going old-school) and pulse those Oreos until they’re fine crumbs. We’re talking powder-fine here – you shouldn’t see any big chunks. If you’re using a bag, channel your inner frustration and go to town on those cookies!
Now, pour the crumbs into a bowl and drizzle in that melted butter. Mix it up until it looks like wet sand and holds together when you pinch it. Line your 9×9 pan with parchment paper (seriously, this makes life so much easier later) and dump in the mixture. Here’s my pro tip: use the bottom of a measuring cup to press it down firmly and evenly. You want it packed tight so your bars hold their shape when cut. Pop this in the fridge while you make the filling – it helps set the crust.
Step 2: Make the Creamy Filling
Time for the luscious part! In a mixing bowl, beat that softened cream cheese until it’s completely smooth – no lumps allowed! This usually takes me about 2 minutes with my hand mixer. Scrape down the sides, then gradually add the powdered sugar with the mixer on low (unless you want a sugar snowstorm in your kitchen). Mix until fully incorporated, then beat in the vanilla.
Now, gently fold in the whipped topping. I use a spatula and big sweeping motions to keep it light and fluffy. Taste test? Okay, maybe just one little spoonful… or two. The filling should be thick but spreadable – if it’s too stiff, you can fold in an extra tablespoon or two of whipped topping.
Step 3: Assemble and Chill
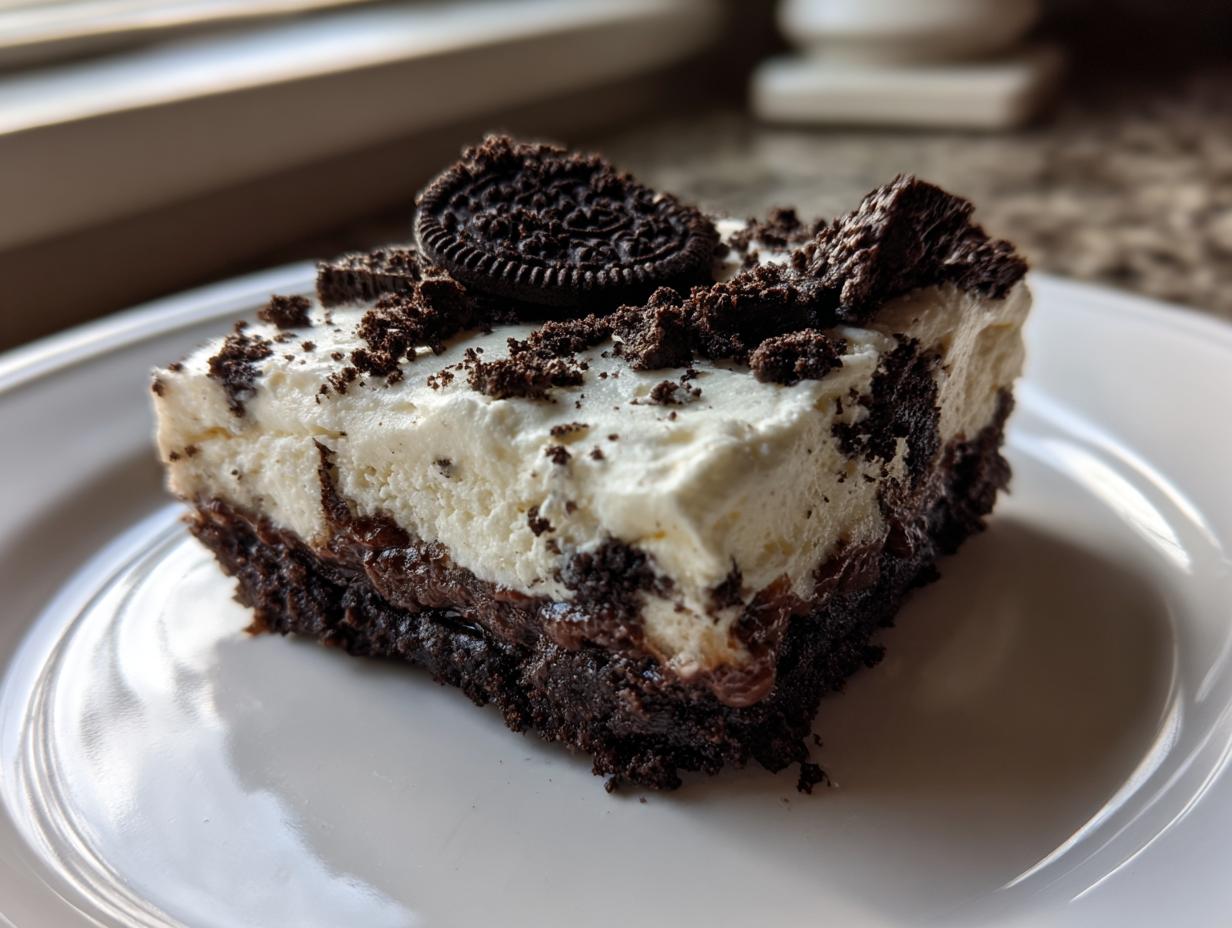
Pull your crust from the fridge and spread the filling evenly over the top. I like to use an offset spatula for this, but a regular spatula or even the back of a spoon works fine. Smooth it right to the edges – we’re going for bakery-perfect presentation here.
Here comes the hard part: patience. Cover the pan and chill for at least 4 hours, though overnight is even better. I know, I know – the waiting is torture! But trust me, this chilling time is what gives you those clean-cut bars that hold their shape. When you’re ready to serve, lift the whole slab out using the parchment paper and cut into squares with a sharp knife (wiping it clean between cuts makes prettier bars).
Now try not to eat them all in one sitting – I dare you!

Tips for Perfect No Bake Oreo Bars
After making these bars more times than I can count, I’ve learned a few tricks for Oreo bar perfection:
- Parchment paper is your best friend – it lets you lift the whole slab out in one beautiful piece for easy cutting
- Don’t overmix the filling – gentle folds keep it light and fluffy instead of dense
- Chill adequately – I know it’s tempting, but 4 hours minimum gives you clean cuts
- Warm your knife – run it under hot water and dry it for super smooth slices
- Layer flavors – try adding mini chocolate chips between crust and filling for extra texture
My biggest tip? Make a double batch – these disappear faster than you’d believe!
Serving and Storing No Bake Oreo Bars
Ready to serve these beauties? Here’s how I do it: I pull the whole slab out using those handy parchment paper “handles” and place it on a cutting board. A sharp chef’s knife dipped in hot water (and dried!) gives me those picture-perfect clean cuts. They’re best served chilled straight from the fridge – that creamy filling holds its shape better when it’s cold.
Got leftovers? (Unlikely, but just in case!) Store them in an airtight container in the fridge for up to 5 days. The crust might soften a tiny bit, but they’ll still taste amazing. I don’t recommend freezing them – the texture of the filling gets a bit weird after thawing. Though honestly, in my house, they’ve never lasted long enough to test that theory!
No Bake Oreo Bars Variations
Once you’ve mastered the basic recipe (which is crazy delicious as-is), it’s time to play! Here are my favorite ways to shake up these Oreo bars:
- Chocolate overload – melt some chocolate chips with a splash of coconut oil and drizzle artfully over the top before chilling
- Minty fresh – swap the vanilla extract for peppermint extract (just 1/2 tsp – it’s potent!) for a cookies-and-cream mint sensation
- Peanut butter dream – swirl 1/4 cup creamy peanut butter into the filling mixture before spreading
- Birthday party style – mix rainbow sprinkles into the filling for a festive look
- Salted caramel twist – drizzle store-bought or homemade caramel sauce over the chilled bars and sprinkle with flaky sea salt
The possibilities are endless – just don’t tell my nephew I messed with “his” original recipe!
No Bake Oreo Bars FAQs
I get asked about these Oreo bars ALL the time – here are the questions that pop up most often with my tested answers:
Can I freeze No Bake Oreo Bars?
Technically yes, but I don’t recommend it. The texture gets a bit grainy after thawing. If you must freeze, wrap individual bars tightly in plastic wrap first, then store in an airtight container for up to a month. Thaw in the fridge overnight.
Can I use different cookies?
Absolutely! Any sandwich cookie works great. I’ve had success with Golden Oreos, mint Oreos, and even those birthday cake ones. Just keep the total weight about the same (around 14 oz including fillings). Gluten-free sandwich cookies work too if needed.
Why is my filling lumpy?
Two likely culprits: 1) Your cream cheese wasn’t soft enough (room temp is key!), or 2) You didn’t beat it long enough before adding other ingredients. Next time, beat the cream cheese alone for a full 2 minutes until completely smooth.
How long do they last in the fridge?
About 5 days in an airtight container. The crust softens slightly over time but they still taste amazing. Pro tip: If making ahead, wait to cut them until serving for freshest texture.
Can I make these in a different pan?
Sure! A 9×13 pan makes thinner bars (reduce chilling time to 3 hours). For thicker bars, use an 8×8 pan – you might need to extend chilling to 5 hours. Just adjust your expectations for serving size accordingly!
Nutrition Information
Here’s the scoop on nutrition for these irresistible bars (because yes, I’ve been asked!): Each serving contains about 280 calories. Remember, these are estimates based on standard ingredients – actual values may vary depending on your specific brands and any customizations you make. Enjoy in moderation… or not – I won’t tell!
Print
Irresistible No Bake Oreo Bars Ready in Just 20 Minutes
- Total Time: 4 hours 20 minutes
- Yield: 12 bars 1x
- Diet: Vegetarian
Description
Easy no-bake dessert bars made with Oreo cookies and creamy filling.
Ingredients
- 36 Oreo cookies
- 1/4 cup melted butter
- 8 oz cream cheese, softened
- 1 1/2 cups powdered sugar
- 1 tsp vanilla extract
- 1 1/2 cups whipped topping
Instructions
- Crush Oreos into fine crumbs
- Mix crumbs with melted butter
- Press mixture into lined pan
- Beat cream cheese until smooth
- Add powdered sugar and vanilla
- Fold in whipped topping
- Spread filling over crust
- Chill for 4 hours
- Cut into bars
Notes
- Use food processor for quick crushing
- Keep refrigerated until serving
- Add chocolate drizzle for extra flavor
- Prep Time: 20 minutes
- Cook Time: 0 minutes
- Category: Dessert
- Method: No Bake
- Cuisine: American
Nutrition
- Serving Size: 1 bar
- Calories: 280
- Sugar: 24g
- Sodium: 180mg
- Fat: 14g
- Saturated Fat: 8g
- Unsaturated Fat: 5g
- Trans Fat: 0g
- Carbohydrates: 36g
- Fiber: 1g
- Protein: 3g
- Cholesterol: 25mg