I’ll never forget the summer my neighbor Mrs. Thompson introduced me to the magic of homemade no-churn ice cream cups. After years of watching my parents struggle with bulky ice cream machines (and more failed batches than I can count), her simple mason jar method blew my mind. These creamy, dreamy cups require just three main ingredients and zero fancy equipment – which is perfect because my kitchen looks like a tornado hit it most days. Whether you’re craving a midnight snack or need an impressive-but-easy dessert for guests, these no-churn ice cream cups deliver rich, silky perfection every time. My kids love decorating their own with sprinkles and crushed Oreos, while I’m partial to a drizzle of salted caramel. Best part? You probably have everything you need in your fridge right now.

Why You’ll Love These No-Churn Ice Cream Cups
Trust me, once you try this method, you’ll never go back to complicated ice cream recipes! Here’s why these cups rock:
- No machine required – just a bowl and whisk
- Ready in minutes (plus freezing time, of course)
- Endless flavor options – your imagination’s the limit!
- Perfect portion control in cute individual cups
- Kids can help – mine love being “ice cream scientists”
Seriously, it’s foolproof – even my most kitchen-challenged friends ace this recipe!
Ingredients for No-Churn Ice Cream Cups
Gather these simple staples:
- 2 cups cold heavy cream (straight from fridge)
- 1 can (14 oz) sweetened condensed milk
- 1 tsp pure vanilla extract
- Pinch of salt (trust me, it balances the sweetness)
Ingredient Notes
Full-fat cream is non-negotiable here – it whips up fluffier and holds air better than low-fat versions. For dairy-free friends, canned coconut milk works surprisingly well (just chill overnight first). And that condensed milk? It’s the magic that keeps our ice cream scoopably soft straight from the freezer! For more on the science behind creamy frozen desserts, check out this guide to the science of ice cream.
How to Make No-Churn Ice Cream Cups
Okay, let’s get mixing! I promise it’s easier than you think – just follow these simple steps:
- Whip it good: Grab your coldest mixing bowl (I pop mine in the freezer for 10 minutes first) and beat the heavy cream on medium-high until stiff peaks form. You’ll know it’s ready when the cream holds its shape when you lift the beaters.
- Sweet talk: In another bowl, whisk together the sweetened condensed milk, vanilla, and that pinch of salt. This is where I usually sneak a spoonful – quality control, you know?
- Gentle does it: Now the magic happens! Using a rubber spatula, gently fold the whipped cream into the milk mixture. I do this in three batches, rotating the bowl as I go. Stop when just combined – overmixing deflates all that air we worked so hard to whip in.
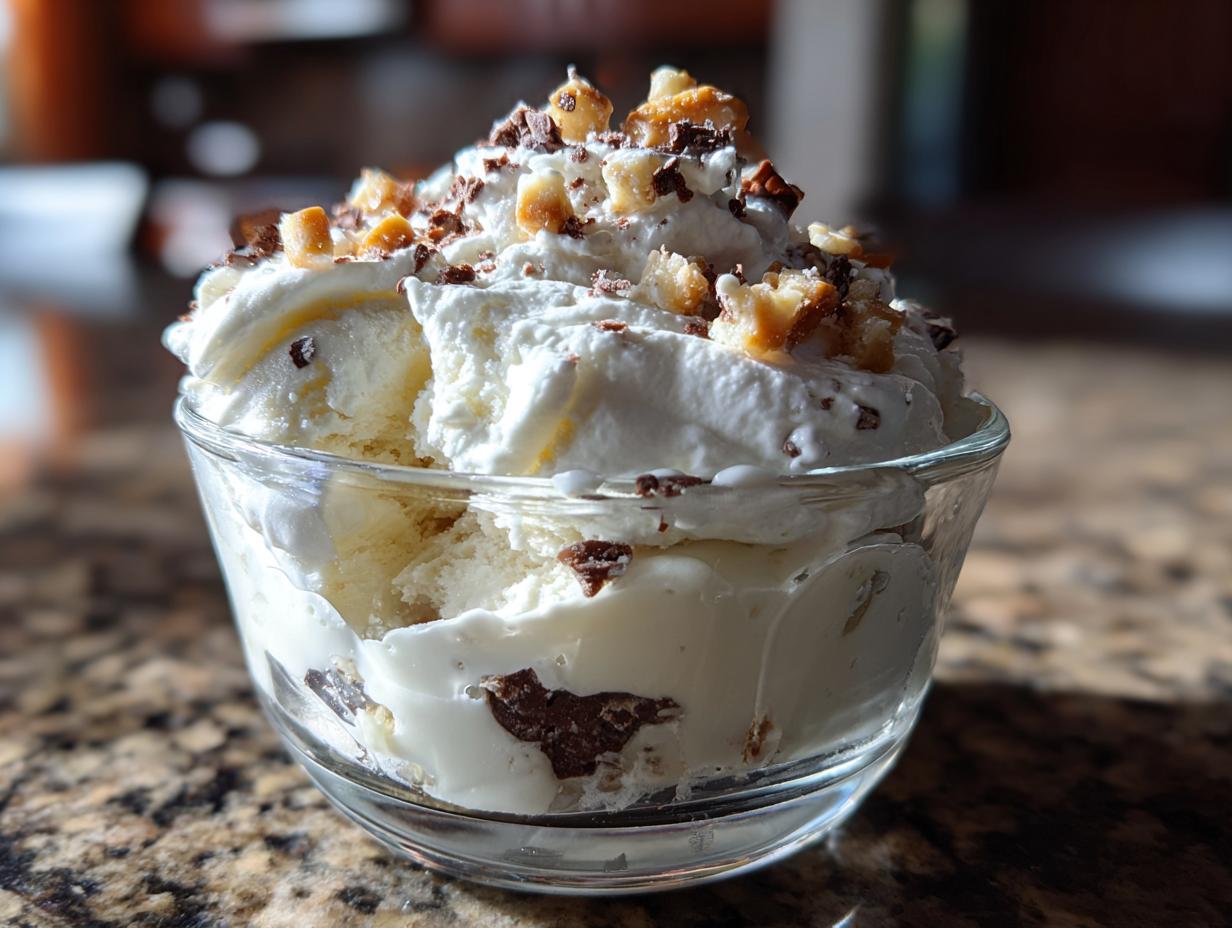
- Get creative: Spoon the mixture into your cups (I use 6-oz mason jars because they’re adorable), leaving room for toppings. Layer in crushed cookies, swirl in fruit jam, or sprinkle chocolate chips between layers for extra texture. Try adding caramel cheesecake cookies for a delicious twist!
- Patience is a virtue: Pop them in the freezer for at least 6 hours, but overnight is best. The wait kills me every time, but that first creamy bite? Totally worth it!

Pro Tips for Perfect Texture
Here’s my hard-won wisdom: Chill everything – bowl, beaters, even the condensed milk can. When folding, pretend you’re handling a cloud – gentle strokes keep it light. And if your mixture looks grainy? A tablespoon of vodka (it won’t freeze) fixes everything without any boozy taste!
Delicious Variations of No-Churn Ice Cream Cups
The beauty of these ice cream cups? You can dress them up a million ways! My family’s obsessed with these combos:
- Cookies & Cream: Fold in crushed Oreos and top with extra chunks – the contrast of creamy and crunchy is unreal!
- Strawberry Swirl: Layer fresh strawberry puree between clouds of vanilla ice cream for pretty pink ribbons.
- Mocha Chip: Stir espresso powder into the base and stud with dark chocolate shards – coffee lovers will swoon. Try our tahini iced coffee for a different coffee treat.
See? You’re basically an ice cream artist now!

Serving and Storing No-Churn Ice Cream Cups
These little cups keep beautifully in your freezer for up to 2 weeks – though mine never last that long! When serving, I let them sit at room temperature for about 5 minutes first. That quick thaw makes them scoop-perfect rather than rock-hard straight from the freezer. Pro tip: Layer parchment between stacked cups to prevent sticking!
Nutritional Information
Now, let’s talk nutrition – but remember, these numbers can change based on your mix-ins and brands! Here’s the scoop for a basic vanilla version (per cup):
- Calories: 320
- Fat: 20g (12g saturated)
- Carbs: 30g
- Sugar: 25g
- Protein: 5g
Adding chocolate or cookies? Those numbers will climb a bit. But hey – it’s homemade happiness, not a diet food! Enjoy in moderation (or not, I won’t judge).
Frequently Asked Questions
Let me answer the burning questions I get asked most about these no-churn ice cream cups:
Can I use evaporated milk instead of sweetened condensed milk?
Oh honey, no! These might look similar in the can, but evaporated milk hasn’t been sweetened – your ice cream would turn out bland and icy. Stick with the sticky-sweet condensed milk (that glorious sugar content prevents crystallization). In a pinch? Make your own by simmering evaporated milk with sugar until reduced by half!
How long will my homemade no-churn ice cream keep?
Properly stored in airtight containers, these cups stay dreamy-creamy for up to 2 weeks in the freezer. After that, they might start developing ice crystals or tasting “freezer burnt” (though mine never last that long – we devour them within days!). Pro tip: Press plastic wrap directly on the surface before freezing to prevent ice crystals from forming.
Why did my ice cream turn grainy/crystallized?
Most likely culprit? Your cream wasn’t cold enough when whipping, or you overmixed the base. Always start with fridge-cold ingredients and stop folding as soon as no streaks remain. Adding 1 tbsp corn syrup or vodka helps too – their anti-freeze properties keep textures silky smooth!
Share Your No-Churn Ice Cream Cups Experience
I’d love to hear your creations! What wild flavor combos did you dream up? Drop your favorite variations in the comments – you might inspire my next batch! For more dessert inspiration, check out our dessert recipes.
Print
3-Ingredient No-Churn Ice Cream Cups You’ll Crave Daily
- Total Time: 6 hours 10 mins
- Yield: 6 cups 1x
- Diet: Vegetarian
Description
Easy no-churn ice cream cups made with simple ingredients, perfect for a quick dessert.
Ingredients
- 2 cups heavy cream
- 1 can (14 oz) sweetened condensed milk
- 1 tsp vanilla extract
- Optional toppings: chocolate chips, crushed cookies, fruit
Instructions
- Whip the heavy cream until stiff peaks form.
- Fold in sweetened condensed milk and vanilla extract until combined.
- Layer mixture into small cups or jars.
- Add desired toppings.
- Freeze for at least 6 hours or overnight.
- Serve chilled.
Notes
- Use full-fat heavy cream for best texture.
- Customize with your favorite mix-ins.
- Store covered in the freezer for up to 2 weeks.
- Prep Time: 10 mins
- Cook Time: 0 mins
- Category: Dessert
- Method: No-Churn
- Cuisine: American
Nutrition
- Serving Size: 1 cup
- Calories: 320
- Sugar: 25g
- Sodium: 80mg
- Fat: 20g
- Saturated Fat: 12g
- Unsaturated Fat: 6g
- Trans Fat: 0g
- Carbohydrates: 30g
- Fiber: 0g
- Protein: 5g
- Cholesterol: 70mg