
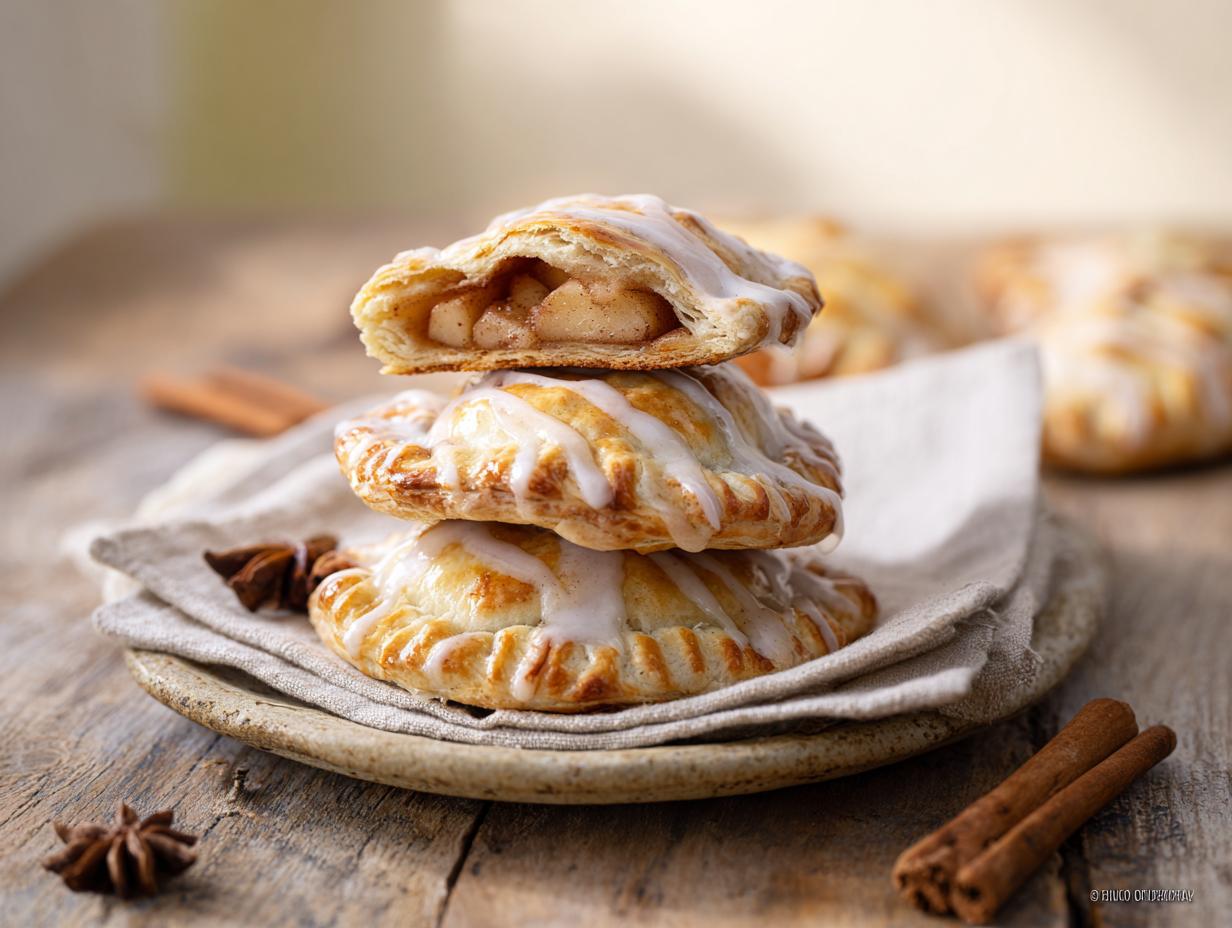
Let me tell you about my latest obsession: Apple Cinnamon Roll Hand Pies. These little pockets of joy combine everything I love about two classic treats – the flaky, buttery crust of a perfect hand pie and that irresistible gooey cinnamon-sugar swirl we all crave. I first made them on a chilly autumn Sunday when I couldn’t decide between baking apple pie or cinnamon rolls. Why choose, right? The first batch came out of the oven golden and puffed, and the smell of cinnamon and baked apples filled my whole kitchen. My kids were hovering before I could even get them on the cooling rack. What I love most is how the filling stays tender and spiced, while the pastry gets all crisp and flaky. Trust me, your kitchen is about to smell amazing.
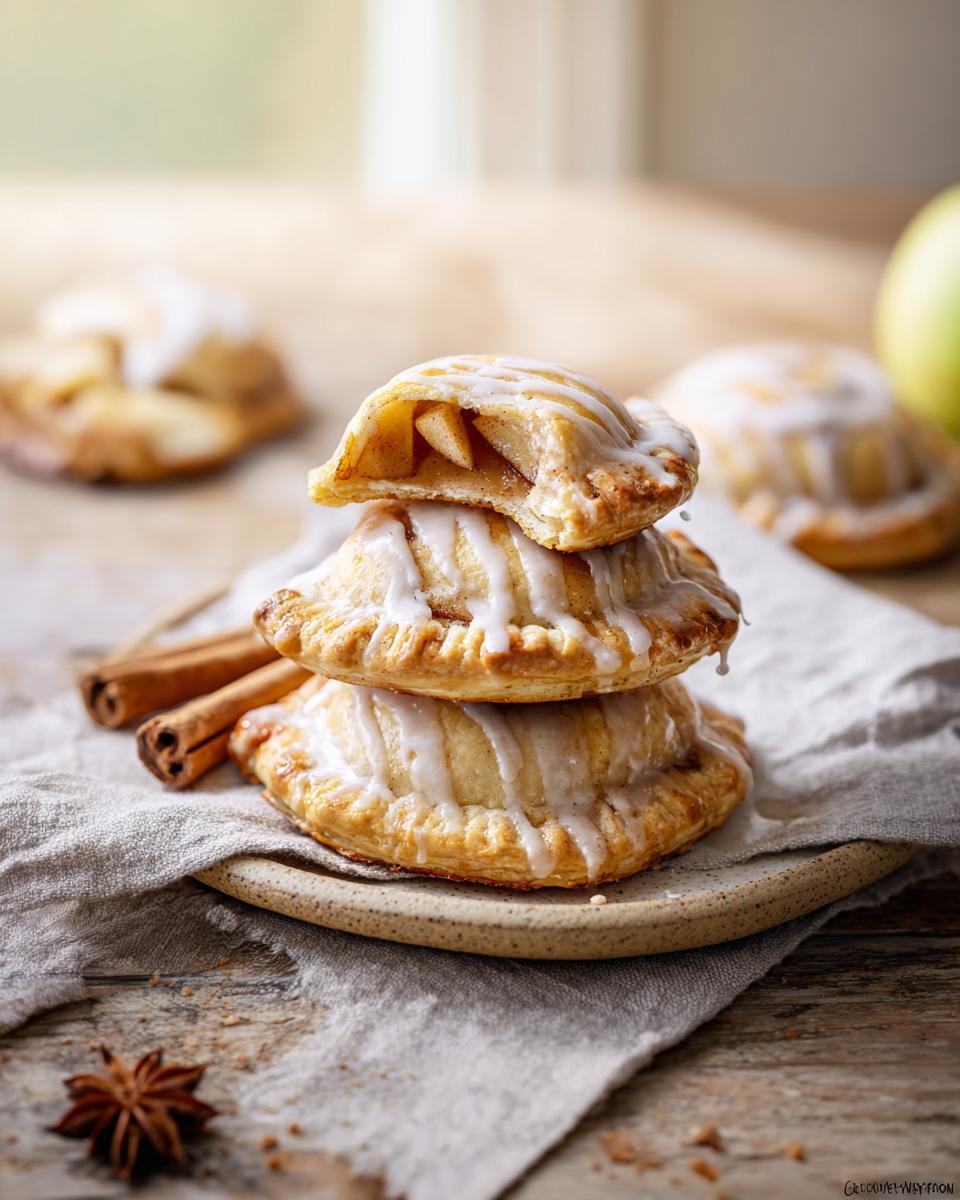
Why You’ll Love These Apple Cinnamon Roll Hand Pies
They come together fast. I’m all for a project bake now and then, but sometimes you just want something special without a lengthy production. These hand pies are ready in about an hour, and most of that is hands-off chilling time. The dough is dead simple – just flour, salt, butter, and ice water – and the filling takes minutes. You can even prep everything the night before and assemble the next morning if that’s your style.
The ingredient list is short and honest. No weird extracts, no obscure flours. Just pantry staples you probably already have: apples, brown sugar, cinnamon, butter, flour. I love a recipe that doesn’t require a special trip to the store. It’s real food, made with real ingredients – exactly the kind of baking my grandmother would approve of.
They’re perfect for breakfast or dessert. Honestly, I’ve eaten them for both in the same day. The apple-cinnamon filling feels cozy and comforting in the morning with a hot cup of coffee, and it’s just as satisfying after dinner with a scoop of vanilla ice cream. They don’t scream “dessert only” – they’re versatile and welcome anytime.
Portable and practically mess-free. Unlike a slice of cake or a sticky cinnamon roll, these hand pies travel beautifully. I pack them for picnics, road trips, and lunchboxes. The flaky crust holds everything together, so you don’t end up with filling all over your fingers. Well, maybe a little crumb – but that’s the best part.
You can make them your own. The base recipe is a fantastic starting point, but I love how easy it is to tweak. Add a handful of chopped walnuts or pecans to the filling, swap in pears when apples aren’t in season, or drizzle with a cream cheese glaze if you’re feeling extra fancy. The cinnamon roll swirl inside gives them that signature look, but you can adjust the spice level or sugar to suit your taste. It’s your kitchen – you’re the boss.
Ingredients for Apple Cinnamon Roll Hand Pies
Let me walk you through what you’ll need. For the dough, you’ll want 2 cups of all-purpose flour – just the regular stuff, not self-rising – and 1 teaspoon of salt. The star here is 1 cup of unsalted butter, and it absolutely has to be cold and cubed. I throw mine in the freezer for ten minutes after cutting it up, because warm butter is the enemy of flaky pastry. You’ll also need about half a cup of ice water – and when I say ice water, I mean water with ice cubes floating in it. Get it nice and frigid before you start.
For the filling, grab 2 large apples. I’m partial to Granny Smith for that tartness that balances the sweet brown sugar, but Honeycrisp works beautifully too. Peel them and dice them into small, even pieces – think pea-sized or a bit bigger, so they cook through without turning to mush. You’ll need 1/4 cup of brown sugar (pack it in, folks), 1 teaspoon of ground cinnamon, 1/4 teaspoon of ground nutmeg, and 1 tablespoon of lemon juice to keep the apples from browning and add a little zing.
Don’t forget 1 large egg, beaten, for the egg wash – that’s what gives the pies that gorgeous golden sheen. And for the glaze: 1/2 cup of powdered sugar, 1 to 2 tablespoons of milk (start with one and add more if you need), and 1/2 teaspoon of vanilla extract. That’s it – simple, honest ingredients that come together into something truly special.
Equipment List
You really don’t need much for these hand pies, and that’s half the fun. Here’s what I pull out of my drawers and cabinets before I start. Nothing fancy, I promise.
- A large mixing bowl. I use my favorite ceramic one for the dough, but anything big enough to get your hands in works just fine.
- A pastry cutter or a sturdy fork. The pastry cutter makes quick work of cutting cold butter into flour, but two forks crossed in an X motion do the exact same thing. I’ve used both plenty of times.
- A rolling pin. A standard rolling pin is perfect. If yours tends to stick, just give it a light dusting of flour before you start.
- A 4-inch round cutter. This is the size I find just right – not too big, not too small. If you don’t have one, a clean soup can or a glass of the same diameter works beautifully. No need to buy anything special.
- A baking sheet and parchment paper. Always, always line your sheet with parchment. It makes cleanup so much easier, and it keeps the bottoms from browning too fast.
- A wire rack. For cooling the pies once they come out of the oven. This little step keeps the bottoms nice and crisp instead of getting steamy.
- A small whisk. For the glaze. Honestly, a fork works too – I’ve done it that way more times than I can count. Whichever you grab, it’ll do the job.
Ingredient Notes and Substitutions for Apple Cinnamon Roll Hand Pies
Let me share a few things I’ve learned after making these hand pies more times than I can count. Some ingredients are non-negotiable for the best results, but others are flexible depending on what you have in your pantry or what your family needs.
Apples: Firm and tart is the way to go
My absolute favorite apples for these pies are Granny Smith. They hold their shape beautifully during baking and that tartness cuts through the sweet brown sugar and cinnamon perfectly. Honeycrisp works great too – they’re a touch sweeter but still firm enough to not turn into applesauce. Whatever you do, avoid soft, mealy apples like Red Delicious. They’ll break down and make your filling watery, and nobody wants a soggy hand pie. I also recommend dicing them small – about a quarter-inch – so they cook through fully without needing extra time and making the pastry overbake.
Butter: Keep it cold, keep it real
I cannot stress this enough: cold butter is the secret to flaky pastry. When I say cold and cubed, I mean cut your butter into small pieces and pop them in the freezer for ten minutes before you start cutting them into the flour. Those little cold butter lumps create steam pockets as they melt in the oven, and that’s exactly what gives you those beautiful, shatteringly flaky layers. If your butter starts to warm up and get greasy while you’re working, just slide the bowl into the fridge for a few minutes. Trust me, it makes all the difference.
Gluten-free option: A simple swap
I’ve made these for friends who don’t eat gluten, and a good gluten-free all-purpose flour blend (one that contains xanthan gum) works wonderfully. I’ve had the best luck with Cup4Cup and King Arthur Measure for Measure. The dough might feel a little more delicate and less elastic, so handle it gently and don’t reroll the scraps too many times. The filling stays exactly the same – no changes needed there. Just be aware the pastry won’t puff up quite as dramatically, but it’ll still be tender and delicious.
Dairy-free adaptation
If you need these dairy-free, swap the butter for cold, solid coconut oil or a good-quality vegan butter (I like Miyoko’s or Country Crock Plant Butter). Cut it into the flour the same way you would butter. Just make sure whatever you use is cold and firm – if your coconut oil is at all melty, the dough will be a mess. The glaze is easy to adjust too: just use a non-dairy milk like oat or almond instead of regular milk. I usually need a bit less liquid because non-dairy milks can be thinner, so add it drop by drop.
Lower sugar tweaks
I get it – sometimes you want a slightly less sweet treat. For the filling, you can swap the brown sugar for a granulated monk fruit sweetener or erythritol blend that measures like sugar. Just be aware that sugar adds moisture and helps the apples soften, so the filling might be a little less syrupy. For the glaze, you can use a powdered sugar alternative (Swerve makes a good one) and adjust with a tiny splash of milk or water. The pies themselves will still be plenty sweet from the apples and cinnamon, so I think these modifications work really well.
How to Prepare Apple Cinnamon Roll Hand Pies
Alright, now for the really fun part – bringing these little beauties to life. I’ll walk you through every step, just like we’re standing side by side in my kitchen. Don’t worry if you’ve never made hand pies before; they’re way easier than they look, and I promise the payoff is huge.
Make the Dough
Start by whisking your flour and salt together in a large bowl. Simple enough, right? Now comes the most important part: add that ice-cold butter. I cannot emphasize this enough – cold butter is the single biggest secret to flaky pastry. Drop your cubed butter into the flour and use a pastry cutter or two forks to cut it in. You’re looking for a coarse, shaggy mixture with some pea-sized butter pieces still visible. Those little lumps are what create the magical steam pockets that give you those gorgeous flaky layers.
Slowly drizzle in your ice water, a tablespoon at a time. Toss everything gently with a fork after each addition. The dough is ready when it just holds together when you squeeze a handful in your palm. It should look rough and shaggy – that’s perfect. Do not knead it or overwork it, or you’ll end up with tough pastry. Turn it out onto a lightly floured surface, bring it together into a disc, wrap it in plastic, and pop it in the fridge for at least 30 minutes. This rest is crucial. It lets the gluten relax and rechills the butter, which means you’re setting yourself up for success. It’s a great time to make the filling.
Prepare the Apple Filling
This part could not be easier. Grab a medium bowl and toss together your diced apples, brown sugar, cinnamon, nutmeg, and lemon juice. That lemon juice isn’t just for show – it keeps the apples from browning while you work and adds a little brightness that balances all that warm spice. I like to leave the filling a bit chunky, so don’t go crazy mashing things up. You want distinct little pockets of tender apple in every bite, not applesauce. Just give everything a gentle toss until the apples are fully coated. The smell at this point is absolutely intoxicating. Set it aside while the dough finishes its chill time. Honestly, the hardest part here is not sneaking a spoonful.
Assemble the Hand Pies
Okay, dough is rested, filling is ready – let’s get rolling. Lightly flour your work surface and your rolling pin. Roll the dough out to about 1/8-inch thickness. Not paper thin, but thin enough that it bakes up nice and crisp. Use your 4-inch round cutter to stamp out as many circles as you can. Gather up the scraps gently, reroll them, and cut out a few more. Just don’t go overboard rerolling too many times, or the dough gets tough.
Place a generous spoonful of the apple mixture on one half of each circle, leaving a little border around the edge. I cannot stress this enough: do not overfill. I learned that lesson the hard way with my first batch, which turned into a sticky, burnt mess all over my baking sheet. Overfilling is the number one cause of leaky hand pies. Fold the other half over to form a half-moon shape. Press the edges with a fork to seal them really well – go ahead and give it a good crimp all the way around. This keeps all that delicious filling inside where it belongs. Place them on a parchment-lined baking sheet. Brush the tops with your beaten egg for that gorgeous golden sheen. Work quickly so the dough stays nice and cold. If your kitchen is warm, pop the whole sheet in the fridge for ten minutes before baking.
Bake and Glaze
Preheat your oven to 375°F (190°C) while you’re finishing up the assembly. Bake the hand pies for 20 to 25 minutes, until they are puffed up, deeply golden, and absolutely irresistible. Your kitchen will smell like the best bakery you’ve ever walked into. I’m not exaggerating. Let them cool on a wire rack for at least 15 minutes before you even think about glazing them. I know it’s torture, but the filling gets lava-hot straight out of the oven, and you don’t want to burn your mouth. Plus, the glaze will just slide right off if the pies are too warm.
While they cool, make the glaze. Whisk together the powdered sugar, one tablespoon of milk, and the vanilla extract. Keep whisking until it’s smooth and thick, but still pourable. If it’s too stiff, add another tiny splash of milk. Too thin? Add a bit more powdered sugar. Drizzle the glaze generously over the slightly warm or completely cooled pies. Go ahead and let it drip a little – that’s what makes them look like they came straight from a farmhouse bakery. That combination of flaky, buttery pastry, tender spiced apples, and sweet vanilla glaze? Pure heaven.
Tips for Perfect Apple Cinnamon Roll Hand Pies
After making these hand pies more times than I can count (and learning a few hard lessons along the way), I’ve got a handful of tricks that make all the difference between a beautiful, golden pie and a leaky mess. Trust me, I’ve been there. My very first batch looked like a crime scene – apple filling oozing everywhere, burnt sugar stuck to the pan, and a few pies that basically exploded in the oven. So let me save you the same headache. Here’s what I’ve learned.
Keep that dough cold, cold, cold. This is the number one rule of flaky pastry. If your butter warms up before it hits the oven, you’ll lose all those beautiful layers and end up with a dense, greasy crust. I’ll even pop my assembled pies on a baking sheet and stick them in the freezer for ten minutes before baking if my kitchen is warm. That extra chill ensures the butter stays solid until it starts melting in the heat, creating those perfect steam pockets. Don’t skip it.
Don’t be too generous with the filling. I know it’s tempting to pile it on because the apple mixture smells so good, but trust me – less is more. A heaping tablespoon per pie is plenty. If you overfill, the edges won’t seal properly and the filling will bubble out during baking. That’s exactly what happened to my first batch. I thought I was being clever by using more apples, but all I got was a sticky, burnt mess across my baking sheet and a few deflated pies. Stick to the amount I recommended, and you’ll thank me later.
Crimp those edges like you mean it. Use a fork and press firmly all the way around each pie. I like to go over it twice to be sure. The tines create a tight seal that locks the filling inside. If you’re worried about leaks, you can even brush a little water along the edge before folding – that acts like a glue. I always give the crimp an extra check before I brush on the egg wash. Better safe than sorry.
Line your baking sheet with parchment paper. Even if you crimp perfectly, a tiny amount of sugar might still leak out. Parchment paper catches any drips and makes cleanup a breeze. Plus, it helps the bottoms of the pies bake evenly without burning. I never bake hand pies directly on an unlined sheet – it’s just not worth the scrubbing.
Let the pies cool completely before glazing. I know the smell is intoxicating and you want to dive in, but patience here is key. If you drizzle the glaze while the pies are still warm, it will melt right off and pool into a puddle. You’ll end up with a sad, sticky mess instead of those beautiful white ribbons. Wait until they’re at room temperature – or just barely warm – then go wild with the glaze. That’s the moment they look like they came from a fancy bakery, and it’s so worth the wait.
Variations for Apple Cinnamon Roll Hand Pies
One of my favorite things about this recipe is how easily it adapts to whatever you have on hand or whatever you’re craving. I’ve experimented with a bunch of different versions over the years, and honestly, I’ve never met a hand pie I didn’t like. Here are some of my go-to twists when I want to shake things up a little.
Add raisins or chopped nuts to the filling
This is probably the simplest change you can make, and it adds such a lovely texture. I’ll toss in a handful of golden raisins (soaked in warm water for about ten minutes so they plump up and stay juicy) or some chopped pecans or walnuts that I’ve toasted lightly in a dry skillet. The nuts add this wonderful crunch that contrasts with the soft apple filling, and the raisins bring little bursts of sweetness. My mom always added walnuts to her apple pies, so this variation feels like a little hug from her kitchen. Just fold them into the apple mixture before you fill the pies – no other changes needed. I usually use about a quarter cup of whichever add-in I’m using, but you can adjust to your taste.
Swap pears for apples when they’re in season
Late summer and early fall, when pears are at their peak, I love making these hand pies with firm Bosc or Bartlett pears instead of apples. They have this delicate, buttery sweetness that pairs beautifully with the cinnamon and nutmeg. Peel and dice them the same way you would apples, and add a tablespoon of lemon juice to keep them from browning. One thing to watch out for – pears can be a little softer than apples, so don’t overmix the filling or you’ll end up with mush. Gently fold everything together and you’re good to go. The texture is slightly more tender, almost melt-in-your-mouth, and it feels like a totally new dessert.
Add a pinch of cardamom or ginger for warmth
I’m a spice lover, and I can’t resist playing around with the warm flavors in this filling. A generous pinch of ground cardamom – just an eighth of a teaspoon or so – adds this fragrant, almost floral note that makes the hand pies feel a little exotic. If you’re a ginger fan, try adding a quarter teaspoon of ground ginger along with the cinnamon and nutmeg. The ginger gives the filling a gentle, warming kick that’s especially nice on a cold morning. I sometimes do a combination of all three – cinnamon, cardamom, and ginger – and it’s absolutely heavenly. Just don’t go overboard. These spices are potent, and you want them to complement the apples, not overpower them.
Make a cream cheese glaze for extra indulgence
On the days when I want these hand pies to feel truly decadent, I swap the simple vanilla glaze for a cream cheese glaze. It’s so easy and takes everything to the next level. Beat four ounces of softened cream cheese with two tablespoons of softened butter until smooth and fluffy. Then add about a cup of powdered sugar, a splash of vanilla, and a tiny pinch of salt. Thin it out with milk, a teaspoon at a time, until it’s pourable but still thick. The tanginess of the cream cheese cuts through the sweetness of the brown sugar and makes the whole thing taste like a fancy bakery creation. My family goes absolutely crazy for this version, especially when I serve them for brunch.
Use puff pastry for a quick shortcut
If you’re short on time or just don’t feel like making your own dough, frozen puff pastry is a fantastic shortcut. I’ve done this more times than I’d like to admit, and I’m not ashamed. Thaw a sheet of puff pastry according to the package directions, then roll it out just a little to smooth the seams. Cut it into squares or circles, fill them, fold them, and seal with a fork. The bake time is about the same – 20 to 25 minutes at 375°F – but puff pastry puffs up even more dramatically than my homemade dough. The texture is lighter and more delicate, almost like a little pastry pillow. Just be warned: puff pastry can be a bit more fragile, so handle it gently and don’t overfill. It’s a lifesaver for last-minute baking emergencies or when you want to impress someone without spending all afternoon in the kitchen.
Serving Suggestions for Apple Cinnamon Roll Hand Pies
I’m a big fan of eating these hand pies both ways – hot from the oven when the filling is still a little molten and the pastry is at its crispiest, or at room temperature when the flavors have settled and the apple filling is slightly firmer. Honestly, they’re delicious no matter what. My personal favorite is to wait just until they’re cool enough to handle and then dive in with a fork. There’s something magical about that first bite of warm, spiced apple and flaky crust.
Now, about pairings. A scoop of vanilla ice cream alongside a warm hand pie is basically a religious experience. The cold, creamy vanilla melts into the warm cinnamon-sugar filling, and oh my goodness. If you don’t have ice cream on hand, a generous dollop of freshly whipped cream does the trick beautifully. And for a morning treat? These hand pies are the perfect companion to a strong cup of coffee or a chai latte. I’ve lost count of how many Saturday mornings I’ve sat on my porch with one hand pie and a mug of hot coffee, just taking it all in.
These little pies are incredibly versatile for any occasion. I bring them to brunch potlucks all the time, and they disappear faster than anything else on the table. They’re also my go-to for picnics – they travel well, don’t need refrigeration, and everyone can grab one without a plate or fork. Around the holidays, I love arranging them on a pretty platter for Thanksgiving dessert or Christmas morning. They look so festive with that white glaze drizzled over top. Whether you’re serving them for a cozy family breakfast or a fancy dessert spread, these hand pies always steal the show.
Storing and Reheating Hand Pies
One of the best things about these Apple Cinnamon Roll Hand Pies is how well they keep. I’ve made big batches for holiday weekends and enjoyed them for days afterward without any drop in quality. Here’s what I’ve figured out after plenty of trial and error.
If you’re planning to eat them within a couple of days, just pop them in an airtight container at room temperature. They’ll stay fresh and delicious for about two days. I’ve left them on my counter in a sealed container, and they’re still flaky and wonderful the next morning with my coffee. Just don’t stack them too high or the glaze might get a little smudged.
For longer storage, I stick them in the refrigerator. They’ll keep for up to five days in a sealed container there. The pastry does get a tiny bit less crisp after refrigeration, but that’s easily fixed with a quick reheat. I always let them come to room temperature first if I’m not reheating – cold pastry just isn’t as nice. The filling stays perfectly moist, though, so you’re still in for a treat.
Now let’s talk reheating. My preferred method is the oven at 350°F for 5 to 7 minutes. That gentle heat revives the flaky, buttery layers and warms the apple filling through without drying anything out. The smell that fills your kitchen is almost as good as the first time around. If I’m in a hurry or just want one pie, I’ll use the microwave for 15 to 20 seconds. It won’t be as crisp, but it’s warm and comforting in a pinch. Just be careful not to overdo it, or the filling gets lava-hot and the pastry turns tough.
Freezing these hand pies is an absolute game-changer. I do this all the time when I want to have a stash ready for guests or busy mornings. Here’s my method: arrange the unbaked pies on a parchment-lined baking sheet and pop them in the freezer until they’re solid – about an hour or two. Then transfer them to a freezer-safe bag or container. They’ll keep for up to three months. When you’re ready to bake, there’s no need to thaw. Just put them on a baking sheet straight from the freezer, add about 5 extra minutes to the bake time, and you’re golden. The crust comes out just as flaky as fresh. I’ve done this dozens of times, and it never fails. If you plan to glaze them, wait until after baking. Freezing with the glaze on can make it turn sticky and weird. Trust me, I learned that one the hard way.
Nutritional Information for Apple Cinnamon Roll Hand Pies
I know not everyone thinks about nutrition when they’re staring down a warm, glazed hand pie fresh from the oven. I certainly don’t. But I also know some of you like to keep an eye on these things, and I totally respect that. So I want to be upfront about what’s in each of these little beauties.
Based on the standard ingredients I use – all-purpose flour, real unsalted butter, granulated sugar, Granny Smith apples, and the simple vanilla glaze – each hand pie has about 350 calories. That’s not bad at all for something that feels this indulgent. You’re getting 18 grams of fat, with 11 grams being saturated (mostly from all that wonderful butter that gives the crust its flaky magic). There’s 55 milligrams of cholesterol per pie, which comes from the butter and the egg wash.
On the carbohydrate front, you’re looking at 43 grams total, with 2 grams of fiber and 18 grams of sugar. The sugar comes from the brown sugar in the filling plus the powdered sugar in the glaze. The 4 grams of protein are modest but not nothing – mostly from the flour and a tiny bit from the egg wash. Sodium clocks in at 220 milligrams, which is reasonable for a baked good of this size.
Now, I want to be really clear here: these are estimates. I’m not a nutritionist, and the exact numbers will shift depending on the specific brands you use, the size of your apples, whether you go with the cream cheese glaze or skip the glaze entirely, and a hundred other tiny variables. If you’re swapping in gluten-free flour or using a sugar substitute, the numbers will be different. I always recommend plugging your exact ingredients into a nutrition calculator if you need precise values for dietary planning. But for most of us, these numbers give a pretty good ballpark of what you’re working with. And honestly? For a homemade pastry filled with real fruit and real butter, I think these are pretty respectable numbers. Enjoy every single bite without a second thought.
Frequently Asked Questions About Apple Cinnamon Roll Hand Pies
Can I use store-bought dough?
Absolutely – and I’ve done it plenty of times when I’m short on time or just not in the mood to make pastry from scratch. A sheet of frozen puff pastry works like a charm. Just thaw it according to the package, roll it out a little to smooth the seams, and cut out your circles or squares. The bake time stays about the same (20–25 minutes at 375°F), but you’ll get an even more dramatic puff. Just be careful: puff pastry is more delicate than my homemade dough, so handle it gently and don’t overfill. If you want something closer to my flaky crust, a refrigerated pie crust works too. You’ll end up with a slightly shorter, more tender texture – still delicious, just different. I like using store-bought dough on busy weeknights when I’m craving that apple‑cinnamon flavor but don’t have the energy to make the dough from scratch.
How do I prevent a soggy bottom?
Oh, I’ve wrestled with soggy bottoms more times than I care to remember. Here’s what I’ve learned: the main culprit is moisture from the filling soaking into the pastry before it has a chance to crisp up. My fixes are simple. First, keep the dough cold – cold butter creates steam pockets that help the crust stay flaky and dry. I pop my assembled pies in the freezer for ten minutes before baking. Second, don’t overfill – too much apple juice will make the bottom soggy no matter what. Stick to that heaping tablespoon per pie. Third, use parchment paper on your baking sheet; it helps the bottoms brown evenly without trapping steam. And finally, bake at a high enough temperature (375°F is perfect) so the crust sets quickly. If I’m really worried, I’ll also brush the inside of the dough with a beaten egg white before adding the filling – that acts like a waterproof barrier. It works like a charm.
Can I make them ahead?
Yes! This is one of my favorite things about these hand pies. You have two great options. Make the dough and filling a day ahead and assemble them the next morning. Just wrap the dough disc in plastic wrap and keep the filling in a sealed container in the fridge. Then roll, fill, and bake when you’re ready. Freeze the unbaked pies for even more convenience – arrange them on a parchment-lined baking sheet, freeze until solid, then transfer to a freezer bag. They’ll keep for up to three months. Bake straight from frozen, adding about 5 minutes to the bake time. I’ve done this for holiday mornings and it’s a lifesaver. Just don’t glaze them before freezing – wait until after they come out of the oven.
Why did my pies leak?
Been there, done that, and my first batch looked like a sugary volcano exploded. Leaks usually happen for three reasons. First, overfilling – that’s the most common. The filling expands as it heats, and if there’s too much, it forces its way out. Stick to the amount I suggest. Second, edges not sealed well – you need to really press those tines of the fork into the dough. I go over the crimp twice, and I sometimes brush a little water along the edge before folding to help the dough stick. Third, the dough got too warm – if the butter starts to melt before baking, the crust won’t hold together. That’s why I always chill the assembled pies for a few minutes. If a tiny bit of filling does escape, don’t sweat it. The pies still taste amazing, and a little caramelization on the pan is just bonus flavor. But to avoid a mess, follow those tips and you’ll be leak-free.
Can I use other fruits?
Absolutely! This recipe is super flexible. I’ve made these hand pies with pears (firm Bosc or Bartlett work best) – just peel and dice them the same way, and add a little lemon juice to prevent browning. Peaches are wonderful in summer, though you might want to reduce the sugar a bit since they’re naturally sweeter. Fresh or frozen berries are also fantastic – use a mix of blueberries, raspberries, and blackberries, and toss them with a tablespoon of cornstarch to thicken the juices. For stone fruits like nectarines or plums, pit and dice them. Just remember that different fruits have different moisture levels, so you might need to adjust the bake time slightly. If the fruit is very juicy, let the filling sit in a strainer for a few minutes before spooning it into the dough. The spice blend can stay the same – cinnamon and nutmeg go with almost everything – or you can swap in ginger or cardamom to match the fruit. Get creative, and let me know what you come up with!
Your Turn to Make These Hand Pies
Alright, now it’s your turn. I’ve shared all my secrets, my mishaps, and my absolute favorite ways to make these Apple Cinnamon Roll Hand Pies. The only thing missing is you in your kitchen, getting your hands a little floury and filling your home with that incredible cinnamon-apple smell. I really hope you give them a try – whether it’s for a cozy weekend breakfast, a holiday treat, or just because you’re craving something warm and flaky.
When you do make them, I’d love to hear how they turn out. Seriously. Nothing makes my day like a comment from someone who tried one of my recipes. Let me know what you thought – did the filling stay put? Did you sneak in some extra walnuts or swap in pears? Did the kids ask for a second batch before the first one was even cool? Drop a comment below and tell me about your experience. I read every single one.
And if you’re feeling extra generous, give the recipe a rating – it helps other home cooks find it and gives me a little boost to keep sharing more of my family’s favorites. You can also tag me in your photos on social media. I absolutely love seeing your creations come to life. There’s something so special about knowing these hand pies are being made in kitchens all over, bringing a little bit of warmth and sweetness to someone’s day. So go on, preheat that oven, and make some magic. I’m cheering for you.
Print
Apple Cinnamon Roll Hand Pies: Irresistible 1-Hour
- Total Time: 55 minutes
- Yield: 8 hand pies 1x
- Diet: Vegetarian
Description
Apple Cinnamon Roll Hand Pies are flaky pastry pockets filled with spiced apples and a cinnamon roll-inspired swirl. They are easy to make and perfect for breakfast or dessert.
Ingredients
- 2 cups all-purpose flour
- 1 teaspoon salt
- 1 cup unsalted butter, cold and cubed
- 1/2 cup ice water
- 2 large apples, peeled and diced
- 1/4 cup brown sugar
- 1 teaspoon ground cinnamon
- 1/4 teaspoon ground nutmeg
- 1 tablespoon lemon juice
- 1 egg, beaten (for egg wash)
- 1/2 cup powdered sugar
- 1–2 tablespoons milk
- 1/2 teaspoon vanilla extract
Instructions
- Mix flour and salt in a large bowl.
- Cut in butter until mixture resembles coarse crumbs.
- Add ice water gradually, stirring until dough forms.
- Shape dough into a disc, wrap in plastic, and refrigerate for 30 minutes.
- Combine apples, brown sugar, cinnamon, nutmeg, and lemon juice in a bowl.
- Preheat oven to 375°F (190°C).
- Roll out dough on a floured surface to 1/8-inch thickness.
- Cut circles using a 4-inch round cutter.
- Place a spoonful of apple mixture on one half of each circle.
- Fold dough over and press edges with a fork to seal.
- Brush tops with beaten egg.
- Bake for 20-25 minutes until golden brown.
- Let cool on a wire rack.
- Whisk powdered sugar, milk, and vanilla for glaze.
- Drizzle glaze over cooled pies.
Notes
- Use firm apples like Granny Smith for best results.
- Keep dough cold for flaky texture.
- You can freeze unbaked pies for later.
- Adjust glaze thickness with more or less milk.
- Prep Time: 30 minutes
- Cook Time: 25 minutes
- Category: Dessert
- Method: Baking
- Cuisine: American
Nutrition
- Serving Size: 1 hand pie
- Calories: 350
- Sugar: 18g
- Sodium: 220mg
- Fat: 18g
- Saturated Fat: 11g
- Unsaturated Fat: 6g
- Trans Fat: 0g
- Carbohydrates: 43g
- Fiber: 2g
- Protein: 4g
- Cholesterol: 55mg