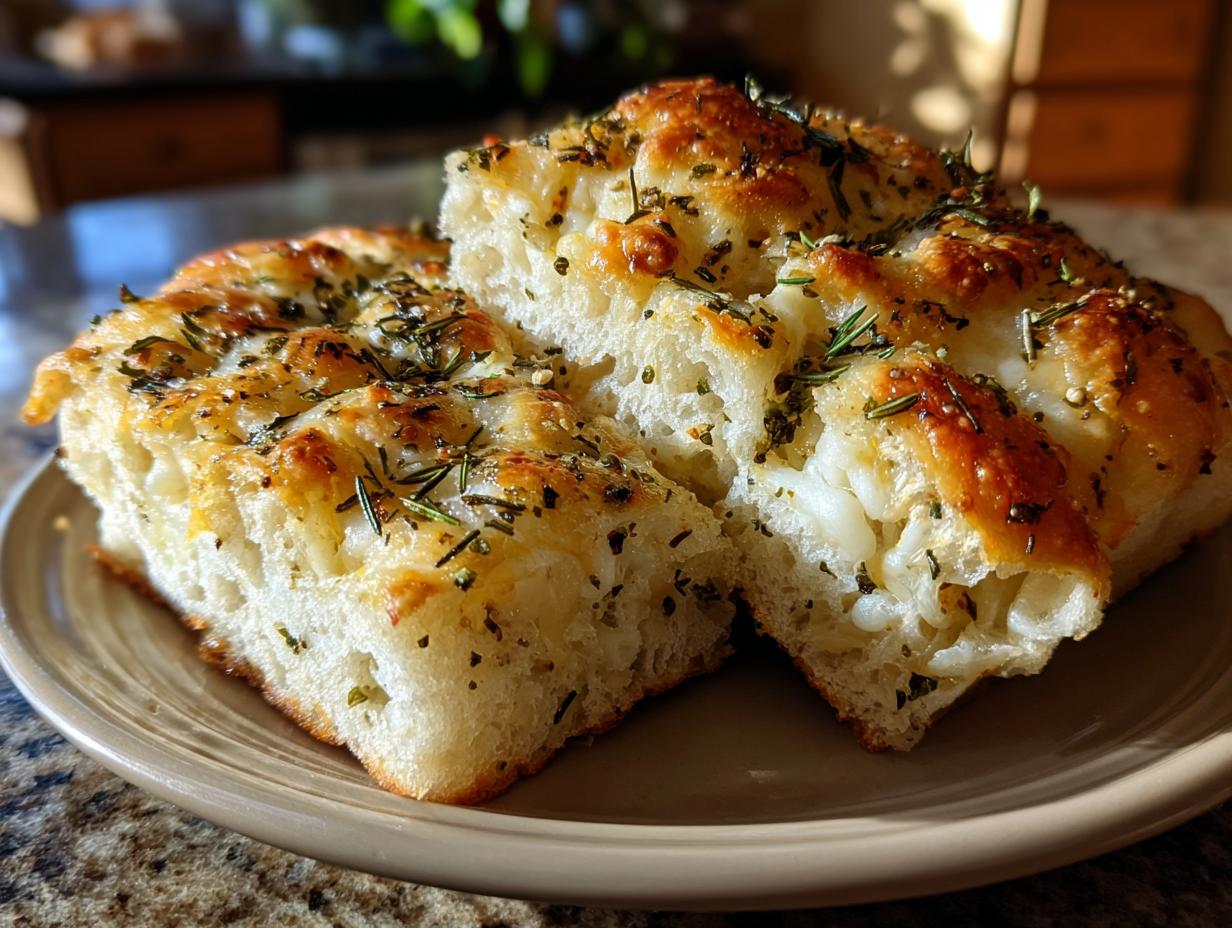
There’s something magical about pulling a warm, golden focaccia out of the oven—especially when it’s loaded with melty cheese, fragrant garlic, and fresh herbs. My cheesy garlic herb focaccia is my go-to when I want to impress guests (or just treat myself). The dough bakes up soft and pillowy, with crispy edges and pockets of garlicky goodness in every bite. It’s the kind of bread that disappears fast, whether you’re serving it alongside pasta or tearing off chunks straight from the pan. Trust me, once you try this version, you’ll never go back to store-bought focaccia again.
Why You’ll Love This Cheesy Garlic Herb Focaccia
This isn’t just any bread—it’s the kind that’ll make you feel like a baking superstar with minimal effort. Here’s why it’s my favorite:
- Foolproof dough: Even if you’re new to yeast breads, this simple dough comes together beautifully every time.
- Bursting with flavor: That garlic-herb-cheese combo? Absolute perfection. Your kitchen will smell amazing.
- Crowd-pleaser: I’ve never brought this to a gathering without getting recipe requests.
- Endlessly customizable: Swap in your favorite cheeses or herbs—it’s hard to mess up!
- So satisfying: There’s nothing like tearing into that first warm, cheesy piece right from the oven.
Ingredients for Cheesy Garlic Herb Focaccia
Alright, let’s gather our cast of characters! I’ve made this focaccia enough times to know that quality ingredients make all the difference. Here’s everything you’ll need, organized so you can grab-and-go as you prep:
For the Dough
- 3 cups (360g) all-purpose flour – spooned and leveled, not packed (trust me, this matters!)
- 1 teaspoon fine sea salt – none of that clumpy table salt
- 1 tablespoon granulated sugar – just enough to feed the yeast
- 1 packet (2¼ tsp) active dry yeast – check the expiration date!
- 1 cup (240ml) warm water (110°F) – I use a thermometer; too hot kills yeast, too cold won’t wake it up
- 2 tablespoons good olive oil – plus extra for greasing the bowl and pan
For the Topping
- 3 cloves fresh garlic, minced (about 1 tablespoon) – none of that jarred stuff here
- ½ cup shredded mozzarella – whole milk melts best
- 2 tablespoons fresh rosemary, chopped – stems removed
- 1 tablespoon fresh thyme leaves – no woody stems
- Flaky sea salt for finishing – that crunch is everything
Pro tip from my many trials: Measure your flour correctly (I fluff it, spoon it, then level it) and use fresh garlic and herbs. These small details take your focaccia from good to “Oh my god, can I have the recipe?” territory.
Equipment Needed
You don’t need fancy gadgets for this focaccia – just a few basics from your kitchen:
- Large mixing bowl (I use my trusty ceramic one)
- 9×13 inch baking pan (metal gives the crispiest edges)
- Measuring cups and spoons
- Wooden spoon or rubber spatula
- Clean kitchen towel (for covering the rising dough)
That’s it! Now let’s get to the fun part – making that dough.
How to Make Cheesy Garlic Herb Focaccia
Okay, let’s dive in! This is the fun part—where flour, water, and a little patience transform into something magical. I’ll walk you through each step just like I do when teaching my best friend (who still swears I’m a bread wizard).
Preparing the Dough
First, whisk together your flour, salt, and sugar in that big mixing bowl. Now, here’s my little trick: make a well in the center and sprinkle the yeast over the warm water (test it on your wrist like baby’s milk—just warm, not hot). Let it sit for 5 minutes until it gets foamy. That’s your yeast saying “I’m alive and ready to work!” Stir in the olive oil, then pour this liquid gold into the flour mixture.
Mix with a wooden spoon until it comes together—it’ll be shaggy and sticky, and that’s perfect! Turn it onto a lightly floured surface and knead for 3-5 minutes until smooth. Don’t overdo it—we want tender focaccia, not tough bread. The dough should still feel slightly tacky (not dry) when you poke it.
First Rise
Grease that mixing bowl lightly with olive oil, plop your dough ball in, and turn it to coat. Cover with a damp kitchen towel—not a dry one, or the surface might crust over. Find the warmest spot in your kitchen (near the oven works great) and let it rise for 1 hour. You’ll know it’s ready when it’s doubled in size and jiggles like a happy bread cloud when you gently shake the bowl.
Shaping and Topping
Generously grease your baking pan—I mean really go for it, because nobody wants stuck-on cheese. Gently punch down the dough (so satisfying!), then press it into the pan with your fingertips. Don’t roll it—this isn’t pizza! Use your fingers to create those signature dimples across the surface. Now the fun part: sprinkle evenly with minced garlic, followed by cheese (watch it disappear into the dimples!), then herbs. Finish with a drizzle of olive oil and flaky salt.

Baking the Focaccia
Pop it into a preheated 375°F oven and resist the urge to open the door! Bake for 20-25 minutes until the top is golden brown and the cheese is bubbling at the edges. The smell will drive you crazy—that’s how you know it’s working. Let it cool just long enough that you won’t burn your mouth, then slice and devour. That first bite of crispy-chewy perfection? Worth every minute.

Tips for Perfect Cheesy Garlic Herb Focaccia
After making this recipe more times than I can count, here are my hard-won secrets for focaccia that’ll have everyone begging for your secrets:
- Yeast check: Always test your yeast in warm water first – if it doesn’t foam within 5 minutes, start over. Dead yeast means flat bread.
- Fresh is best: Dried herbs just don’t give the same vibrant flavor as fresh rosemary and thyme. Trust me, it’s worth the extra trip to the produce aisle.
- Don’t skimp on oil: That generous coating in the pan isn’t just for non-stick – it gives the bottom that irresistible golden crunch.
- Watch the clock: Overbaking dries it out. Pull it when the top is golden and the cheese bubbles – it’ll keep cooking slightly as it cools.
- Dimple deep: Really press those fingertips in to create pockets that’ll hold all the garlicky, cheesy goodness in every bite.

Variations for Cheesy Garlic Herb Focaccia
One of my favorite things about this recipe? How easily you can tweak it based on what’s in your fridge or what flavors you’re craving. Here are some of my go-to twists when I want to mix things up:
- Cheese swaps: Swap mozzarella for parmesan (so nutty!), sharp cheddar, or even gouda. I’ve used crumbled feta in a pinch – the salty tang is amazing!
- Herb hacks: Out of fresh herbs? Use 1 tsp dried rosemary and ½ tsp dried thyme instead. Add them right to the dough for deeper flavor.
- Garlic lovers: Roast the garlic first for a mellower taste, or add garlic powder to the dough itself for extra punch.
- Veggie-loaded: Toss in some sun-dried tomatoes or sautéed mushrooms before baking – they add moisture and texture.
- Spicy kick: Sprinkle red pepper flakes over the top with the cheese if you like heat (my husband’s favorite version).
The beauty of focaccia is that it’s like a blank canvas – once you’ve mastered the dough, the topping possibilities are endless. Just remember: whatever you add, keep the amounts modest so you don’t weigh down that perfect fluffy texture we worked so hard for!
Serving Suggestions
Oh, the possibilities! I love tearing into this focaccia still warm from the oven – it’s heavenly with a bowl of tomato soup or a crisp green salad. Cut it into squares for an easy appetizer at parties (watch them vanish!), or serve alongside pasta for the ultimate carb-on-carb indulgence. My favorite? A big piece dunked in olive oil and balsamic while it’s still too hot to handle properly.
Storing and Reheating Cheesy Garlic Herb Focaccia
Listen, I know the idea of having leftover focaccia seems crazy when it’s this good, but if you somehow manage to resist eating the whole pan in one sitting (no judgment if you don’t), here’s how to keep it tasting fresh:
Storing: Let it cool completely first – trapping steam makes it soggy. Then wrap it tightly in foil or stash it in an airtight container at room temperature. It’ll stay delicious for about 2 days, though the cheese won’t be quite as melty after day one. For longer storage, I freeze slices wrapped individually in foil, then toss them straight into the toaster oven when cravings hit.
Reheating: The microwave is the enemy of good focaccia – it turns that perfect texture into rubber! Instead, pop slices in a 350°F oven for 5 minutes or until warmed through. If you’re feeling fancy, brush the top with a little olive oil first to revive the crust. My secret weapon? A quick 30-second toast under the broiler to make the cheese bubbly again – just watch it like a hawk!
Pro tip: If your focaccia seems a tad dry when reheating, sprinkle a few drops of water on the foil before wrapping – it’ll steam slightly and bring back that soft interior.
Nutritional Information
Alright, let’s talk numbers – because even though this cheesy garlic herb focaccia tastes indulgent, it’s actually pretty reasonable as far as homemade breads go! Just remember: these values are estimates based on the exact ingredients I use (like whole milk mozzarella and good olive oil), so your mileage may vary a bit depending on your specific brands and measurements. Here’s the breakdown per generous slice:
- Calories: 220 – perfect for when you want to enjoy bread without overdoing it
- Total Fat: 8g (2g saturated) – that good olive oil does its thing
- Carbohydrates: 32g – slow rise means easier digestion
- Fiber: 1g – every little bit helps!
- Sugar: 2g – just enough to feed the yeast
- Protein: 6g – thank you, mozzarella!
- Sodium: 300mg – easy to reduce if you’re watching salt
Now, if you’re anything like me, you’re probably thinking “Who cares about numbers when it tastes this good?” But it’s nice to know that something so delicious can still fit into a balanced diet. The way I see it, homemade always beats store-bought when it comes to both flavor and knowing exactly what’s going into your food!
Frequently Asked Questions
I’ve gotten so many questions about this focaccia over the years – here are the ones that pop up most often from friends and readers trying the recipe for the first time:
Can I use instant yeast instead of active dry?
Absolutely! Instant yeast works great here – just skip the proofing step and mix it right in with the dry ingredients. You’ll need about 25% less (about 1¾ tsp per packet). The rise time might be slightly faster, so keep an eye on your dough.
How can I prevent a soggy bottom?
Oh, I’ve battled this one! Three tricks: 1) Make sure your pan is well-greased (I’m talking pools of olive oil in the corners), 2) Bake on the middle rack – too low and the bottom overcooks before the top browns, and 3) Let it cool in the pan for just 5 minutes before transferring to a rack – any longer and steam gets trapped.
Can I freeze the baked focaccia?
Yes! Freeze slices individually wrapped in foil, then pop them straight into a 350°F oven for 10-15 minutes when you’re ready. The texture won’t be quite as perfect as fresh, but it’s still miles better than store-bought. Pro tip: Freeze before adding any fresh herb toppings – they don’t hold up well.
Why didn’t my dough rise properly?
Usually it’s one of three things: 1) Your yeast was old (always check expiration dates!), 2) The water was too hot and killed the yeast (110°F max!), or 3) Your rising spot wasn’t warm enough. Next time, try placing the bowl in your oven with just the light on – it creates the perfect cozy environment.
Can I make the dough ahead?
You bet! After the first rise, punch it down, cover tightly, and refrigerate overnight. The cold actually develops more flavor! Just let it come to room temp for about 30 minutes before shaping and baking. The dough might rise slightly in the fridge – that’s normal.
Now that you’re armed with all my best tips and tricks, I can’t wait for you to try this cheesy garlic herb focaccia! Snap a pic of your golden masterpiece and tag me – I love seeing your bread victories!


Cheesy Garlic Herb Focaccia: 5 Secrets to Perfect Bread Every Time
- Total Time: 1 hour 40 mins
- Yield: 8 servings 1x
- Diet: Vegetarian
Description
A soft and fluffy focaccia bread topped with melted cheese, garlic, and fresh herbs.
Ingredients
- 3 cups all-purpose flour
- 1 tsp salt
- 1 tbsp sugar
- 1 packet active dry yeast
- 1 cup warm water
- 2 tbsp olive oil
- 3 cloves garlic, minced
- 1/2 cup shredded mozzarella cheese
- 2 tbsp fresh rosemary
- 1 tbsp fresh thyme
Instructions
- Mix flour, salt, sugar, and yeast in a bowl.
- Add warm water and olive oil, then knead into a dough.
- Let the dough rise for 1 hour.
- Press the dough into a greased baking pan.
- Top with minced garlic, cheese, and herbs.
- Bake at 375°F for 20-25 minutes.
- Slice and serve warm.
Notes
- Use fresh herbs for best flavor.
- Let the dough rise in a warm place.
- Adjust baking time based on your oven.
- Prep Time: 1 hour 15 mins
- Cook Time: 25 mins
- Category: Bread
- Method: Baked
- Cuisine: Italian
Nutrition
- Serving Size: 1 slice
- Calories: 220
- Sugar: 2g
- Sodium: 300mg
- Fat: 8g
- Saturated Fat: 2g
- Unsaturated Fat: 5g
- Trans Fat: 0g
- Carbohydrates: 32g
- Fiber: 1g
- Protein: 6g
- Cholesterol: 5mg