
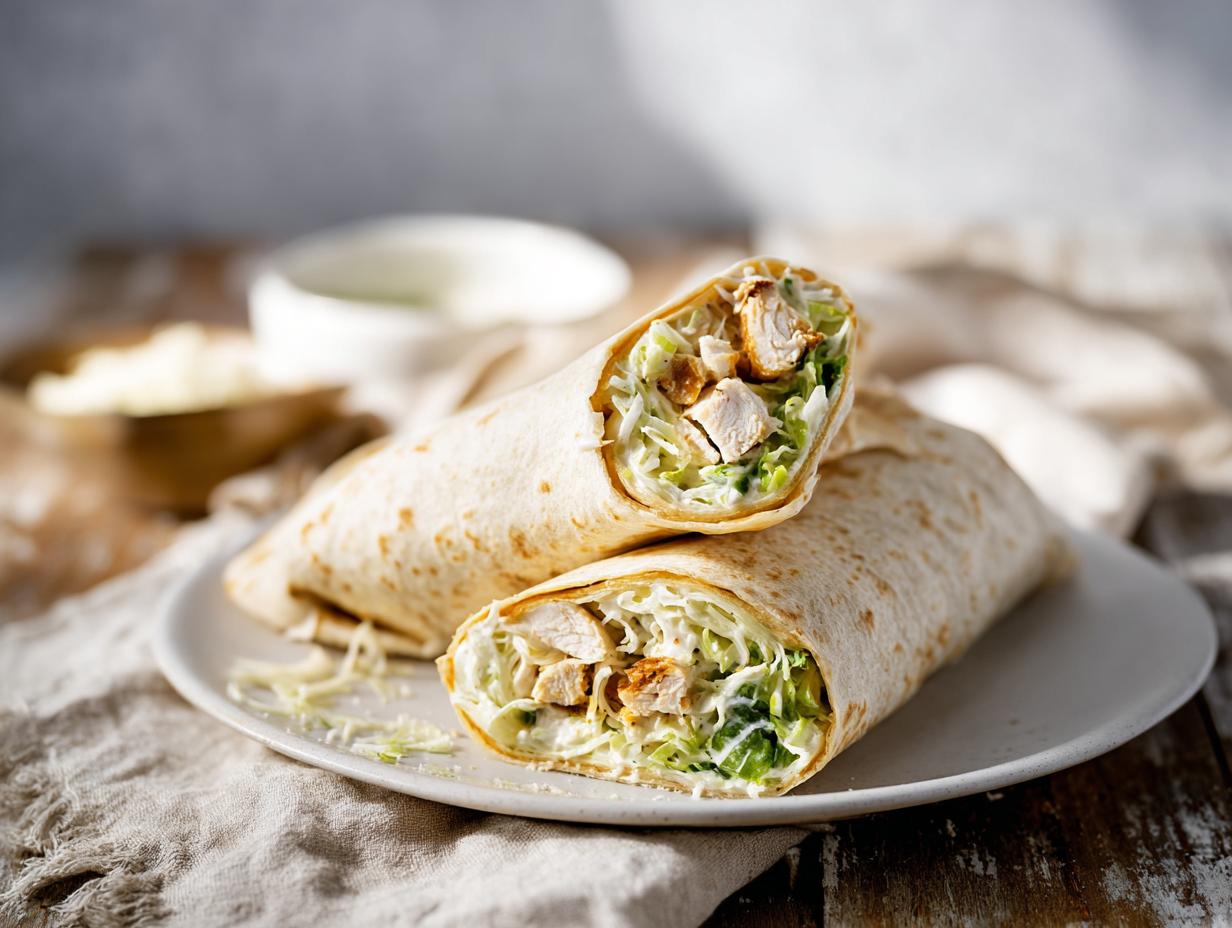
I still remember the day I stumbled onto these Crispy Cabbage Caesar Chicken Wraps. I was staring into my fridge, hungry and out of ideas, with half a head of cabbage staring back at me. Caesar salad sounded good, but I wanted something more substantial—and that’s when it hit me: why not combine the crunch of sautéed cabbage with the creamy, tangy Caesar flavors I love? The first bite was pure magic. The cabbage gets beautifully browned and crispy in the skillet, then mingles with tender chicken and that irresistible Parmesan dressing. It’s like a Caesar salad got a warm, satisfying upgrade. I’ve made these wraps dozens of times since, tweaking the heat and timing until they’re just right. Trust me, once you try this combo, you’ll never look at cabbage the same way again. Ready to see what all the fuss is about?
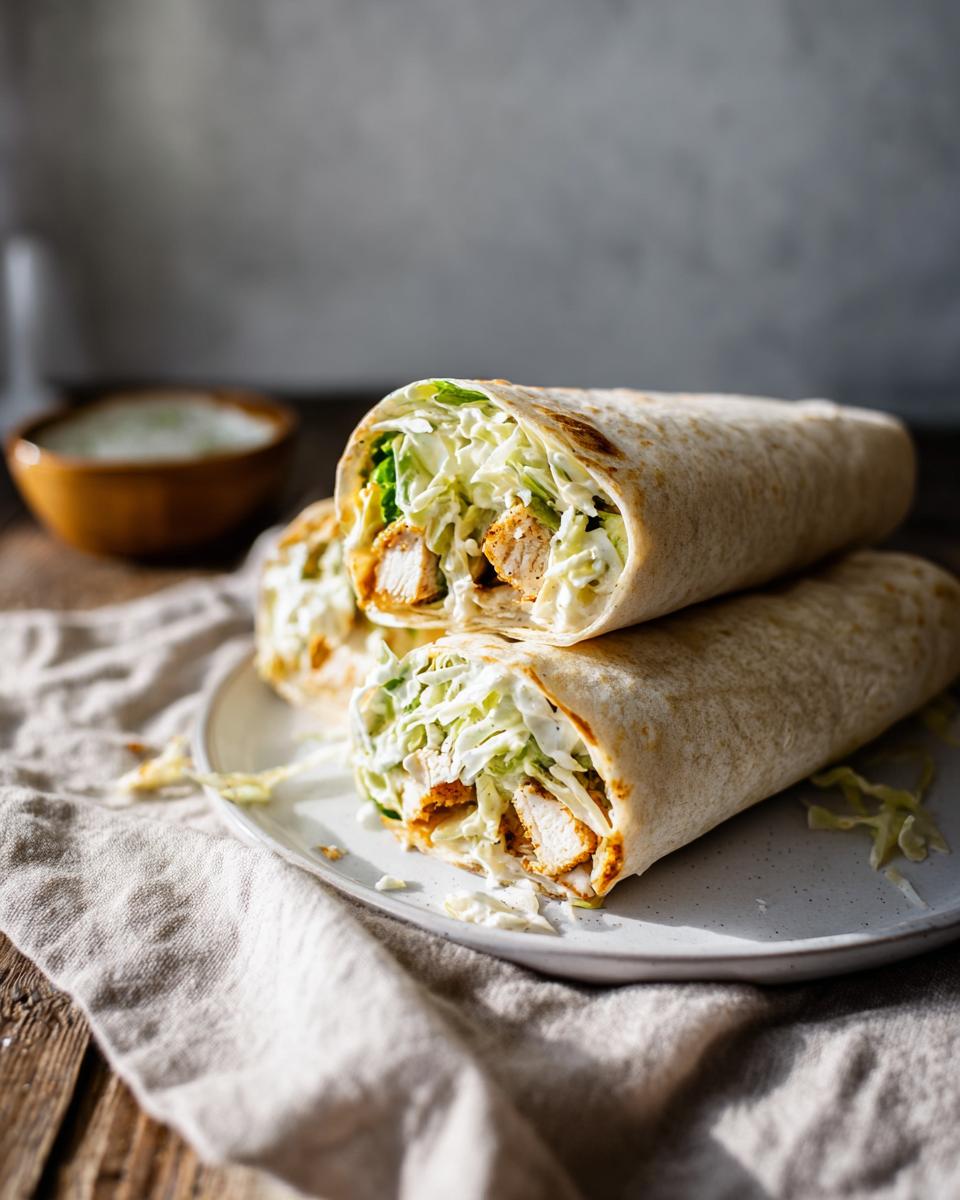
Why You’ll Love These Crispy Cabbage Caesar Chicken Wraps
- Ready in under 30 minutes. Seriously, from fridge to table in about 18 minutes flat. Perfect for those nights when you’re hangry and need something fast.
- That incredible crunch. The cabbage gets all caramelized and crispy on the edges, then you wrap it up with tender chicken and creamy dressing. It’s a texture party in your mouth.
- Light but satisfying. Each wrap clocks in at just 320 calories, so you can feel good about what you’re eating. No heavy, greasy feeling afterward.
- Rotisserie chicken to the rescue. I almost always use a store-bought rotisserie chicken for these. It makes the whole thing feel like cheating, but in the best way.
These wraps have become a weekly staple in my house. My kids actually ask for them, which is basically a parenting win. I love that I can throw them together with stuff I usually have on hand, and they never disappoint. You’re going to love how easy and delicious these are.
Ingredients for Crispy Cabbage Caesar Chicken Wraps
Here’s what you’ll need to make these wraps sing. Nothing fancy, I promise.
- 2 cups shredded green cabbage – the star of the show. Grab a head and shred it yourself for the best crunch.
- 1 cup cooked chicken breast, shredded – rotisserie chicken works like a dream here. Just pull it apart with forks.
- 1/4 cup Caesar dressing – store-bought is fine, or whip up your own if you’re feeling fancy.
- 1/4 cup grated Parmesan cheese – that salty, nutty goodness we all love.
- 1/2 teaspoon garlic powder – for a little punch without the fuss of fresh garlic.
- 1/4 teaspoon black pepper – plus more to taste.
- 4 large flour tortillas – or lettuce wraps if you’re keeping it low-carb.
- 1 tablespoon olive oil – for getting that cabbage beautifully crispy.
- Salt to taste – don’t skip it, it brings everything together.
Equipment You’ll Need for Crispy Cabbage Caesar Chicken Wraps
You won’t need any fancy gadgets for this one—just the basics you probably already have in your kitchen.
- Large skillet (non-stick works great)
- Mixing bowl
- Spatula or wooden spoon
- Measuring spoons
- Chef’s knife and cutting board
That’s it! Nothing complicated, just simple tools for a simple, delicious meal.
Ingredient Notes and Substitutions for Crispy Cabbage Caesar Chicken Wraps
Let me walk you through a few of my favorite swaps and tips for these wraps. I’ve tested them all, so you don’t have to.
- Shredded cabbage is the key. I use green cabbage because it holds up beautifully when cooked—it gets tender but still has that satisfying crunch. Pre-shredded coleslaw mix works in a pinch, just cook it a minute less so it doesn’t turn mushy.
- Chicken options galore. Rotisserie chicken is my go-to for speed, but grilled chicken breasts or even leftover roasted chicken work perfectly. Just shred it or chop it small so every bite gets some.
- Lighten up the dressing. If you’re watching calories, swap regular Caesar dressing for a Greek yogurt-based version. It’s still creamy and tangy, just a bit lighter. I do it all the time and honestly can’t tell the difference.
- Gluten-free? No problem. Swap the flour tortillas for large lettuce wraps—butter lettuce or romaine leaves work beautifully. Just skip the warming step and roll gently so they don’t tear.
- Extra crunch, please. Toss in some crushed croutons or chopped almonds or walnuts right before rolling. It adds that little something extra that makes these wraps unforgettable.
How to Make Crispy Cabbage Caesar Chicken Wraps
Alright, let’s get cooking! These wraps come together so fast you’ll barely have time to make a mess. I’ll walk you through each step so you nail it on your first try.
Step 1: Cook the Cabbage for Crispy Cabbage Caesar Chicken Wraps
Heat that olive oil in your large skillet over medium-high heat. You want it shimmering but not smoking. Toss in the shredded cabbage and let it cook undisturbed for about a minute—that’s how you get those gorgeous crispy edges. Then stir it around and cook for another 2–3 minutes, stirring occasionally, until it’s softened but still has some bite. Season with the garlic powder, black pepper, and a pinch of salt. Here’s my best tip: don’t overcrowd the pan. If your skillet is too full, the cabbage will steam instead of getting crispy. Work in batches if you need to. Once it’s done, take the skillet off the heat and let the cabbage cool for about 2 minutes. This little rest keeps it from wilting the dressing later.
Step 2: Mix the Chicken and Caesar Dressing
While the cabbage cools, grab a mixing bowl and toss in your shredded chicken, Caesar dressing, and Parmesan cheese. Give it a good stir until everything’s nicely coated. I like to add an extra pinch of black pepper here, but that’s totally up to you. This step is so simple you could do it with your eyes closed—which is perfect because it means you can prep it while the cabbage sits. The chicken soaks up all that creamy, tangy goodness, and the Parmesan adds that salty kick we all crave.
Step 3: Assemble the Crispy Cabbage Caesar Chicken Wraps
Now for the fun part! Warm your tortillas in a dry skillet for about 10 seconds per side, or pop them in the microwave for 10 seconds each. You just want them pliable so they don’t crack when you roll. Divide the cabbage-chicken mixture evenly among the tortillas, placing it in the center. Fold in the sides first, then roll tightly from the bottom up, like you’re wrapping a burrito. Don’t overstuff or they’ll burst—learned that one the hard way! Serve immediately for the crispiest experience, or wrap them in foil and refrigerate for a grab-and-go lunch. If you’re using lettuce wraps, skip the warming step and roll gently so the leaves don’t tear. Easy peasy!
Tips for Perfect Crispy Cabbage Caesar Chicken Wraps
I’ve made these wraps more times than I can count, and I’ve definitely learned a few things the hard way. Here are my top tips to make sure yours turn out perfect every single time.
- Pat that cabbage dry. I know it seems fussy, but take a clean kitchen towel or paper towels and really blot the shredded cabbage before it hits the pan. Extra moisture is the enemy of crispiness. The first time I made these, I skipped this step and ended up with soggy, steamed cabbage. Never again!
- Crank up the heat. Medium-high is your friend here. You want that cabbage to sizzle and brown, not just sit there and get sad. Don’t be shy—let it get some color. Those dark, caramelized edges are where all the flavor lives.
- Let the filling cool before rolling. I learned this one the messy way. If you pile hot filling onto a warm tortilla and roll it up, you’ll end up with a steamy, soggy mess. Give the cabbage that 2-minute rest, and let the chicken mixture sit for a minute too. Your wraps will stay crisp and won’t fall apart.
- Press the wraps for a golden crust. This is my secret weapon. After you roll each wrap, place it seam-side down in that same hot skillet for about 1–2 minutes per side. The outside gets beautifully golden and toasty, and the inside stays warm and melty. It takes the wraps from good to absolutely irresistible.
Variations of Crispy Cabbage Caesar Chicken Wraps
One of the best things about this recipe is how easy it is to mix things up. I’ve played around with it quite a bit, and here are a few of my favorite twists.
- Add some color with red bell pepper. I’ll toss in about half a cup of thinly sliced red bell pepper along with the cabbage. It adds a pop of color, a little sweetness, and even more crunch. My family loves this version for a little extra veggie power.
- Make it vegetarian with chickpeas. Swap the chicken for a can of drained and rinsed chickpeas. Just mash them lightly with a fork before mixing them with the Caesar dressing and Parmesan. They soak up all that creamy flavor and give you a hearty, protein-packed wrap that even my meat-loving husband approves of.
- Turn up the heat with spicy Caesar dressing. If you like a little kick, use a spicy Caesar dressing or stir in a teaspoon of hot sauce or red pepper flakes. It pairs so well with the cool, crisp cabbage. I do this when I’m craving something with a little more oomph.
- Add creamy avocado slices. Right before rolling, lay a few slices of ripe avocado on top of the filling. It adds a buttery richness that takes these wraps to a whole new level. Just be gentle when rolling so the avocado stays put.
Serving Suggestions for Crispy Cabbage Caesar Chicken Wraps
These wraps are honestly a full meal on their own, but if you’re looking to round things out, here are a few of my favorite pairings.
- Roasted sweet potato wedges. The sweetness of the potatoes is a perfect match for the tangy Caesar filling. Toss them in a little olive oil and paprika, roast at 400°F for 20 minutes, and you’ve got a killer combo. See crispy honey roasted sweet potatoes for a great side.
- A simple tomato soup. Dipping these wraps into a warm, creamy tomato soup is pure comfort food. It’s like a cozy hug on a plate.
- A crisp green salad. If you want something lighter, a simple side salad with a lemon vinaigrette keeps things fresh and bright. It’s the perfect counterpoint to the rich, savory wrap.
Storage and Reheating for Crispy Cabbage Caesar Chicken Wraps
I’ll be honest—these wraps are so good I rarely have leftovers. But if you do (or you’re meal prepping), here’s how to keep them tasting fresh.
- Wrap them tight. Once the wraps are cool, wrap each one individually in foil or plastic wrap. Pop them in the fridge for up to 2 days. The key is keeping air out so the tortillas don’t dry out.
- Pan-sear for the win. When you’re ready to eat, unwrap and place the wrap seam-side down in a hot skillet over medium heat. Cook for 2–3 minutes per side until the outside is golden and crispy again. It’s way better than the microwave—trust me.
- Microwave in a pinch. If you’re in a hurry, microwave for about 30 seconds. The tortilla will be soft rather than crispy, but the flavor is still there. Just don’t overdo it or the cabbage gets mushy.
- Lettuce wraps? Eat them fresh. Sorry, but lettuce wraps just don’t store well. The leaves get soggy and sad. If you’re using lettuce, I’d recommend making them right before serving and skipping the leftovers altogether.
Nutritional Information for Crispy Cabbage Caesar Chicken Wraps
Here’s the breakdown for one wrap, based on the ingredients I typically use. Keep in mind these are just estimates—your exact numbers might shift a bit depending on the brands you grab or if you swap things around.
- Calories: 320
- Fat: 16g (Saturated: 4g, Unsaturated: 10g, Trans: 0g)
- Cholesterol: 55mg
- Sodium: 480mg
- Carbohydrates: 28g (Fiber: 3g, Sugar: 4g)
- Protein: 22g
Pretty solid for a wrap that tastes this good, right? I love that I can enjoy something so satisfying without feeling heavy afterward.
Frequently Asked Questions about Crispy Cabbage Caesar Chicken Wraps
I get a ton of questions about these wraps, so I figured I’d answer the most common ones right here. Hope this helps!
- Can I use pre-shredded coleslaw mix? Sure, you can! Just keep in mind it’s usually finer than hand-shredded cabbage, so it’ll cook faster—about 2 minutes instead of 3–4. Keep an eye on it so it doesn’t turn mushy.
- Can I make these chicken Caesar wraps ahead of time? Absolutely, but I’d recommend storing the filling and tortillas separately. Assemble them right before eating so the wraps stay nice and crispy. The filling keeps in the fridge for up to 2 days.
- Is there a dairy-free option for these crispy cabbage wraps? Yes! Use a dairy-free Caesar dressing (lots of great options at the store) and skip the Parmesan or swap it for nutritional yeast. It’s still super tasty, I promise.
- Can I freeze these wraps? I wouldn’t recommend it, honestly. The texture of the cabbage gets really sad and watery when thawed. These are best fresh or just refrigerated for a day or two.
- What if I don’t have Caesar dressing? No worries! Ranch dressing works beautifully, or you can whisk together some olive oil, lemon juice, garlic, and a little Parmesan for a quick homemade lemon-garlic dressing. It’s actually one of my favorite swaps.
Share Your Feedback on These Crispy Cabbage Caesar Chicken Wraps
I’d love to hear how these turned out for you! Did you try any of the variations, or come up with your own twist? How did you serve yours? Drop a comment below, give the recipe a rating, or tag me in your photos on social media—I can’t wait to see your crispy creations!
Print
Crispy Cabbage Caesar Chicken Wraps in 18 Minutes
- Total Time: 18 minutes
- Yield: 4 wraps 1x
- Diet: Low Calorie
Description
This wrap combines crispy cabbage, tender chicken, and Caesar flavors for a crunchy, satisfying meal. You can make it in under 30 minutes. Perfect for a quick lunch or dinner.
Ingredients
- 2 cups shredded green cabbage
- 1 cup cooked chicken breast, shredded
- 1/4 cup Caesar dressing (store-bought or homemade)
- 1/4 cup grated Parmesan cheese
- 1/2 teaspoon garlic powder
- 1/4 teaspoon black pepper
- 4 large flour tortillas (or lettuce wraps for low-carb)
- 1 tablespoon olive oil
- Salt to taste
Instructions
- Heat olive oil in a large skillet over medium-high heat.
- Add shredded cabbage and cook for 3-4 minutes, stirring occasionally, until slightly softened and crispy on edges.
- Season cabbage with garlic powder, black pepper, and salt.
- Remove skillet from heat and let cabbage cool for 2 minutes.
- In a bowl, mix the cooked chicken, Caesar dressing, and Parmesan cheese.
- Add the cooked cabbage to the bowl and stir well.
- Warm the tortillas in a dry pan or microwave for 10 seconds each.
- Divide the filling evenly among the tortillas.
- Fold in the sides, then roll tightly to form wraps.
- Serve immediately, or wrap in foil and refrigerate for later.
Notes
- For extra crunch, add crushed croutons or chopped nuts to the filling.
- You can use rotisserie chicken to save time.
- If you prefer a gluten-free option, use corn or lettuce wraps.
- Prep Time: 10 minutes
- Cook Time: 8 minutes
- Category: Main Course
- Method: Stovetop
- Cuisine: American
Nutrition
- Serving Size: 1 wrap
- Calories: 320
- Sugar: 4g
- Sodium: 480mg
- Fat: 16g
- Saturated Fat: 4g
- Unsaturated Fat: 10g
- Trans Fat: 0g
- Carbohydrates: 28g
- Fiber: 3g
- Protein: 22g
- Cholesterol: 55mg