
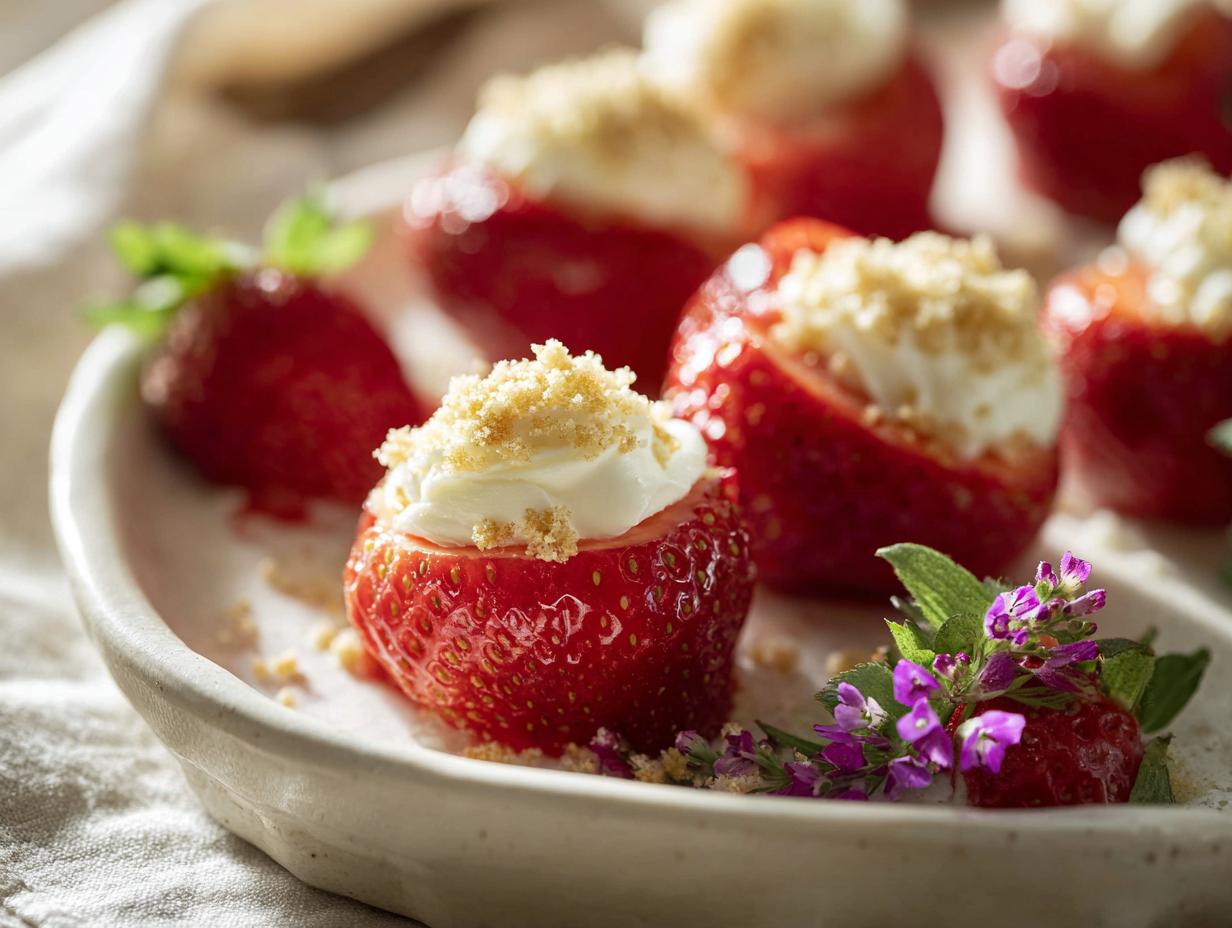
I know, the name sounds a little funny, right? Deviled Strawberries. It makes you think of something spicy or savory, but trust me, these are pure, sweet indulgence. I first made a batch for a friend’s baby shower, and they vanished in minutes. People couldn’t get over how something so simple could look so elegant and taste so amazing. Honestly, I’ve been making no-bake desserts for years, and these are my go-to when I need a showstopper without turning on the oven. They’re creamy, fresh, and come together in about 20 minutes of actual work. Deviled Strawberries are the perfect little bite for any occasion.
Why You’ll Love These Deviled Strawberries
Seriously, what’s not to love? These little gems check all the boxes for a perfect dessert, and I’ll tell you why.
- No oven required. It’s a no-bake wonder, which means you can whip them up even on the hottest summer day without breaking a sweat.
- Ready in 20 minutes. Twenty minutes of hands-on time, then just a quick chill in the fridge. You can have a stunning dessert ready before anyone even asks what’s for dinner.
- Kid-friendly and fun. My little ones love helping me hollow out the berries and sprinkle on the crumbs. It’s a great way to get them in the kitchen.
- Fresh and vibrant. You get that pop of juicy, ripe strawberry in every single bite. It feels light, not heavy.
- Totally customizable. Swap the graham crackers for crushed cookies, add a little lemon zest, or drizzle with chocolate. You can make them your own in a hundred ways.
Ingredients for Deviled Strawberries
The beauty of this recipe is how few things you need. Grab yourself 12 large fresh strawberries—size really matters here, because you need room to stuff them. You’ll want 4 ounces of cream cheese, softened to room temperature so it blends silky smooth. For sweetness, 2 tablespoons of powdered sugar (give it a quick sift if it’s lumpy, trust me). A little 1/2 teaspoon of vanilla extract—pure if you’ve got it—and 1 tablespoon of heavy cream (or whole milk in a pinch) to loosen the filling. Finally, 1/4 cup of graham cracker crumbs, nice and fine, for that perfect crunchy top. That’s it! Simple, right?
Ingredient Notes and Substitutions for Deviled Strawberries
Let’s talk about what makes each ingredient tick, because a little knowledge goes a long way. And hey, if you’re missing something, I’ve got you covered with swaps that actually work. Just a heads up—no alcohol, bacon, or ham in this version. We’re keeping it classic and family-friendly!
Choosing the Best Strawberries for Deviled Strawberries
You want big, firm, and ripe—not mushy or bruised. Look for berries that are deep red all over, with fresh green tops if they’re still attached. The size matters because you need enough room to hollow them out without the walls collapsing. Trust me, flimsy berries are a headache.
Cream Cheese and Dairy Options for Deviled Strawberries
Full-fat cream cheese is my go-to. It gives the filling that rich, velvety texture you’re after. You can use reduced-fat, but the filling won’t be quite as luscious. For a dairy-free version, vegan cream cheese works surprisingly well—just make sure it’s softened. And don’t even think about using granulated sugar here; powdered sugar is essential for that smooth, lump-free finish.
Crumb Topping Alternatives for Deviled Strawberries
Graham crackers are classic, but feel free to mix it up! Crushed vanilla wafers or shortbread cookies add a buttery twist. Want something bolder? Try crushed Oreos or chocolate graham crackers. For a pop of color, crushed freeze-dried strawberries are gorgeous. Whatever you pick, make sure the crumbs are fine—they stick better and give a nice, even coating.
How to Prepare Deviled Strawberries
Alright, let’s get to the fun part! These come together so fast, and once you get the hang of hollowing out the berries, you’ll be a pro in no time. Just take it slow, be gentle, and remember—we’re going for cute little cups, not strawberry soup. Here’s how I do it.
Step 1 – Wash and Hollow the Strawberries for Deviled Strawberries
First things first, give those berries a good rinse and pat them completely dry. Moisture is the enemy here! Then, grab a sharp knife and slice off the tops, plus a tiny sliver from the bottom so they can stand up straight. Now for the fun part—use a small melon baller or a paring knife to scoop out the center. Go slow and leave about a 1/4-inch wall so they don’t break. You’ve got this!
Step 2 – Make the Cream Cheese Filling for Deviled Strawberries
In a medium bowl, toss in your softened cream cheese, powdered sugar, vanilla, and heavy cream. Beat it all together with a hand mixer until it’s completely smooth and fluffy. Stop and scrape down the sides of the bowl—you don’t want any sneaky lumps hiding in there. It should look like a thick, dreamy frosting. That’s your signal that it’s ready.
Step 3 – Fill and Top the Deviled Strawberries
Now, grab a piping bag (or a sturdy zip-top bag with the corner snipped off) and pipe that creamy filling into each hollowed berry. Don’t overstuff them! A little swirl on top looks gorgeous. Then, gently dip the filled tops into your graham cracker crumbs. Arrange them on a pretty plate and pop them in the fridge for at least 30 minutes. That chill time lets everything set up perfectly.
Tips for Perfect Deviled Strawberries
After making these more times than I can count, I’ve picked up a few tricks that make all the difference. First off, chill your strawberries for about 15 minutes before you start hollowing them out. Cold berries are firmer and less likely to crack or tear when you’re scooping out the centers. Also, once you hollow them, pat the insides dry with a paper towel. That little step stops the filling from getting watery and runny.
For the prettiest presentation, use a piping bag fitted with a star tip. It gives you that beautiful, bakery-style swirl. And don’t overfill! A little goes a long way, and you want the strawberry to still shine. If you do get a messy top, just smooth it with a small offset spatula before adding the crumbs. You can even make the filling a day ahead and keep it in the fridge—just give it a quick stir before piping. Oh, and one more thing—keep it family-friendly! No alcohol or bacon in this version. Trust me, these are perfect just the way they are.
Variations on Deviled Strawberries
Once you’ve mastered the basic recipe, the fun really begins. I love playing around with different flavors, and these little bites are so forgiving. Try adding a teaspoon of lemon zest to the filling—it adds a bright, fresh pop that pairs beautifully with the strawberries. Feeling chocolatey? Swap the plain cream cheese for chocolate cream cheese, or stir a tablespoon of cocoa powder into the vanilla filling. For the topping, skip the graham crackers and dust with cocoa powder instead. A drizzle of melted white chocolate over the finished berries makes them look extra fancy, and for holidays, a sprinkle of colored sprinkles is always a hit. Oh, and if you want a subtle twist, replace the vanilla extract with almond extract—just a little goes a long way. All these variations are still no-bake and just as easy!
Serving Suggestions for Deviled Strawberries
These little beauties are so versatile, you’ll find yourself making them for everything. I serve them as a fancy appetizer at parties, a sweet addition to brunch, or just a light dessert after a heavy meal. They pair beautifully with a glass of champagne or even just sparkling water with a twist of lemon. For a pretty platter, I arrange them on a plate with a few fresh mint leaves—it makes them look so elegant. And because they’re best served cold and hold up well, they’re actually pretty portable. I’ve toted them to picnics and potlucks without a problem. Just keep them chilled until you’re ready to show them off!
Storing and Reheating Deviled Strawberries
These little guys are best enjoyed fresh, but if you have leftovers (unlikely in my house!), just pop them in an airtight container and stash them in the fridge. They’ll stay good for up to two days. Whatever you do, don’t freeze them—strawberries get all mushy and sad when thawed. And reheating? No need at all. They’re meant to be served cold. One pro tip: if you’re making them ahead, wait to add the graham cracker crumbs until right before serving. That way they stay nice and crunchy, not soggy.
Nutritional Information for Deviled Strawberries
Here’s the breakdown if you’re curious. For a serving of two strawberries, you’re looking at about 120 calories, 8 grams of fat, 11 grams of carbs, and 2 grams of protein. Just keep in mind, these numbers are estimates—they can shift a bit depending on the exact brands and ingredients you use. But hey, for a treat this good, it’s pretty reasonable, right?
Frequently Asked Questions about Deviled Strawberries
I get asked these questions all the time, so let me clear them up for you. Whether you call them deviled strawberries, stuffed strawberries, or cream cheese strawberries, the answers are the same. This no-bake dessert is pretty forgiving, but a few little tricks make all the difference.
Can I make Deviled Strawberries ahead of time?
Absolutely! You can make them up to 24 hours in advance. Just wait to add the graham cracker crumbs until right before you serve them. That way, the topping stays nice and crunchy instead of getting soft and sad.
How do I keep Deviled Strawberries from getting soggy?
The secret is drying everything out. Pat the hollowed strawberries dry with a paper towel before filling them. Also, make sure your cream cheese is properly softened but not watery. And don’t let them sit around for more than a day—fresh is best!
Can I use frozen strawberries for Deviled Strawberries?
Nope, I wouldn’t recommend it. Frozen strawberries release a ton of water as they thaw, and they turn into a mushy mess. You need firm, fresh berries that can hold their shape when you hollow them out. Save the frozen ones for smoothies.
Are Deviled Strawberries gluten-free?
They can be! The filling is naturally gluten-free, so you just need to swap the graham cracker crumbs. Look for gluten-free graham crackers or use crushed gluten-free cookies, like shortbread or vanilla wafers. Always double-check the labels to be safe.
Share Your Deviled Strawberries Creation
I absolutely love hearing how these turn out in your kitchen! Drop a comment below and let me know if you made them for a party, a lazy Sunday, or just because. And hey, if you came up with a fun twist on the filling or topping, I want to hear about it. Don’t forget to rate the recipe if you loved it—it helps other folks find it too. Happy snacking!
Print
Deviled Strawberries 5 Easy Steps
- Total Time: 50 minutes
- Yield: 12 deviled strawberries 1x
- Diet: Vegetarian
Description
Deviled strawberries are a sweet and creamy treat. They combine fresh strawberries with a smooth filling. This dessert is quick and easy to make.
Ingredients
- 12 large fresh strawberries
- 4 ounces cream cheese, softened
- 2 tablespoons powdered sugar
- 1/2 teaspoon vanilla extract
- 1 tablespoon heavy cream
- 1/4 cup graham cracker crumbs
Instructions
- Wash and dry the strawberries. Cut off the tops and a small slice from the bottom so they stand upright.
- Use a small knife or melon baller to hollow out the center of each strawberry.
- In a bowl, beat the cream cheese, powdered sugar, vanilla, and heavy cream until smooth.
- Pipe or spoon the filling into each strawberry.
- Dip the tops in graham cracker crumbs.
- Refrigerate for 30 minutes before serving.
Notes
- Use a piping bag for a clean look.
- You can swap graham crackers for crushed cookies.
- Prep Time: 20 minutes
- Cook Time: 0 minutes
- Category: Dessert
- Method: No-bake
- Cuisine: American
Nutrition
- Serving Size: 2 deviled strawberries
- Calories: 120
- Sugar: 8g
- Sodium: 75mg
- Fat: 8g
- Saturated Fat: 5g
- Unsaturated Fat: 2g
- Trans Fat: 0g
- Carbohydrates: 11g
- Fiber: 1g
- Protein: 2g
- Cholesterol: 25mg