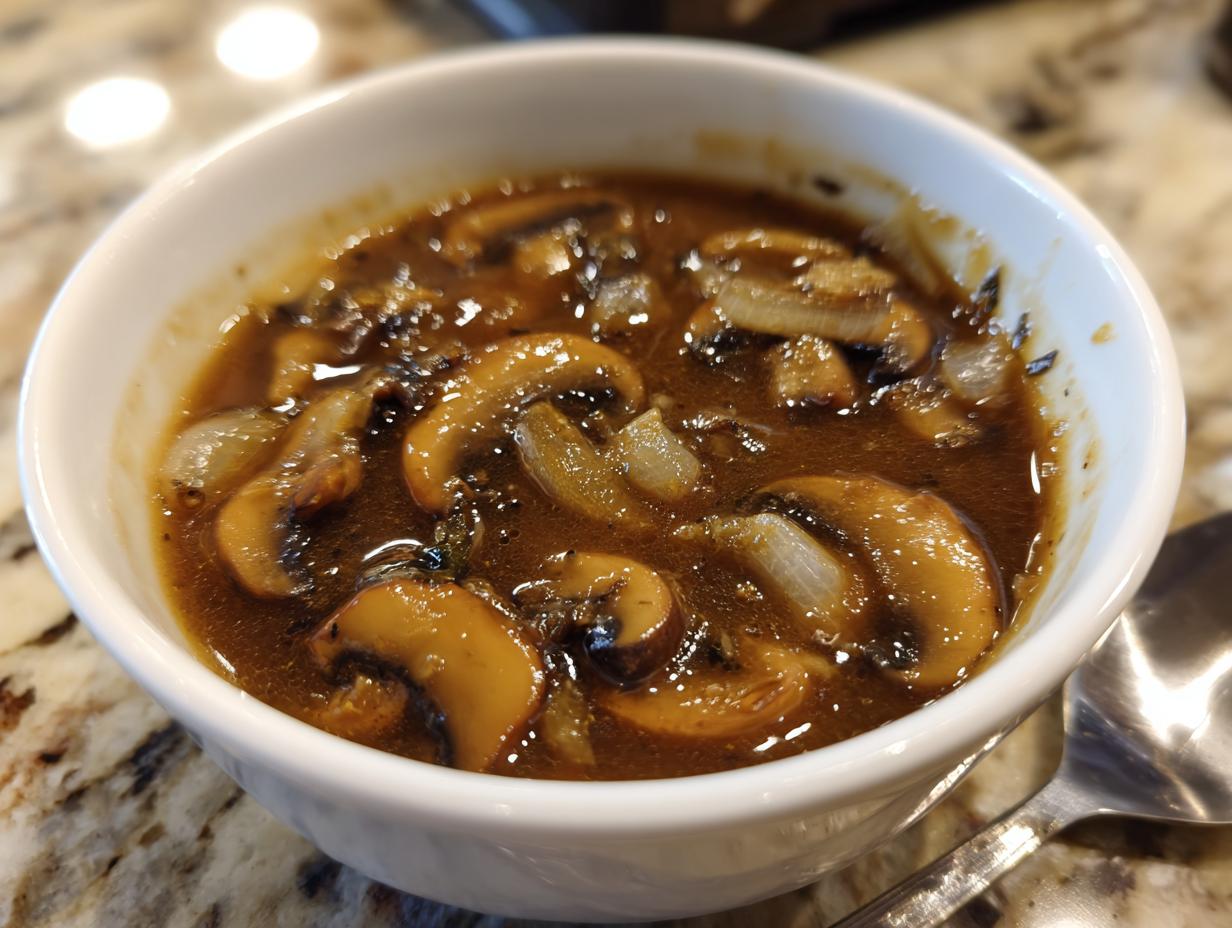
There’s something magical about a rich, homemade mushroom gravy that turns an ordinary meal into something extraordinary. I still remember Sunday dinners at my grandma’s house, where her mushroom gravy was the star—poured generously over mashed potatoes and roast chicken, making everyone at the table go quiet (except for the happy mmm sounds). That’s the power of this recipe—it’s simple, but oh-so-flavorful. Just a few ingredients come together to create something that feels like a hug in a bowl. Whether you’re dressing up a weeknight dinner or hosting a holiday feast, this gravy will be your secret weapon.

Why You’ll Love This Homemade Mushroom Gravy
Trust me, once you try this gravy, you’ll never go back to the store-bought stuff. Here’s why it’s a game-changer:
- Rich, deep flavor that comes from properly browned mushrooms and caramelized onions—no bland gravy here!
- Ready in just 20 minutes from start to finish (perfect for when hunger strikes suddenly).
- Crazy versatile—equally amazing on mashed potatoes, biscuits, roasted meats, or even spooned over rice.
- Easy to customize—make it vegetarian or add cream for extra luxury, depending on your mood.
Seriously, this is the kind of recipe you’ll find yourself making again and again—it’s that good.
Ingredients for Homemade Mushroom Gravy
Here’s what you’ll need to make the most delicious mushroom gravy—I promise every ingredient plays a special role in creating that perfect savory flavor. I’ve included my favorite brands and substitutions where it matters most.
- 2 tbsp butter (or dairy-free butter for vegan version—I like Miyoko’s)
- 8 oz mushrooms, sliced (cremini or button work best, but wild mushrooms take it next-level!)
- 1 small onion, finely chopped (about 1/2 cup—yellow or sweet onions both work)
- 2 cloves garlic, minced (don’t skimp—fresh is best here!)
- 2 tbsp all-purpose flour (or gluten-free 1:1 blend if needed)
- 2 cups vegetable or beef broth (low-sodium lets you control the saltiness)
- 1 tsp Worcestershire sauce (look for vegan brands if needed—it adds that umami punch)
- Salt and pepper to taste (I prefer freshly cracked black pepper)
- 1/4 cup heavy cream (optional, but oh-so-good—sub coconut milk for dairy-free)
Pro tip: Slice your mushrooms about 1/4-inch thick—too thin and they’ll disappear, too thick and they won’t cook evenly. And if you’re feeling fancy, a splash of red wine when sautéing the mushrooms adds incredible depth!

Equipment You’ll Need
Don’t worry – you don’t need any fancy gadgets to make this amazing mushroom gravy. Just gather these basic kitchen tools (and I’ll share some handy alternatives in case you’re missing something):
- Medium saucepan (about 2-quart size works perfectly – stainless steel or enameled cast iron gives the best browning)
- Wooden spoon or silicone spatula (for sautéing those mushrooms to golden perfection)
- Whisk (essential for getting that gravy silky smooth – no lumps allowed!)
- Sharp knife and cutting board (for prepping your mushrooms and aromatics – safety first!)
- Measuring cups and spoons (because eyeballing flour measurements can lead to gravy disasters)
No whisk? A fork will work in a pinch – just whisk extra vigorously when adding the flour and broth. And if you’re between saucepans, a deep skillet works too – just be careful when whisking to avoid splatters. The most important tool? Your nose – when those mushrooms start smelling amazing, you’ll know you’re on the right track!
How to Make Homemade Mushroom Gravy
Alright, let’s get cooking! This is where the magic happens – turning simple ingredients into that rich, velvety gravy you’ve been dreaming about. Follow these steps closely, and you’ll have a perfect batch every time.
- Melt the butter in your saucepan over medium heat. You’ll know it’s ready when it stops foaming and smells slightly nutty – about 1-2 minutes. Don’t let it brown!
- Add your mushrooms, onion, and garlic all at once. Now here’s the important part – don’t stir too much! Let them sit for about 2 minutes to get some good color. Then stir occasionally until everything’s softened and golden brown – about 5 minutes total. The onions should be translucent, and your kitchen should smell amazing.
- Sprinkle the flour evenly over everything. Stir constantly for a full minute – this cooks out the raw flour taste and creates the base for your gravy’s thickness. You’ll see everything come together into a paste-like consistency.
- Time for the broth! Pour it in slowly, about 1/2 cup at a time, whisking continuously after each addition. This is the secret to preventing lumps – don’t dump it all in at once! Keep whisking until the mixture is completely smooth before adding more.
- Bring to a gentle simmer and let it bubble away for about 10 minutes, stirring occasionally. You’ll see it thicken to the perfect gravy consistency – it should coat the back of a spoon nicely.
- Finish with Worcestershire sauce, salt, and pepper to taste. If you’re using cream, stir it in now – it’ll make the gravy extra luxurious!
- Taste and adjust – more salt? More pepper? Trust your taste buds here. I always sneak an extra spoonful at this stage.
That’s it! Your homemade mushroom gravy is ready to transform any meal. Pour it generously while it’s hot – it thickens slightly as it cools, so don’t worry if it seems a bit thin at first.

Tips for Perfect Homemade Mushroom Gravy
After making this recipe more times than I can count, here are my hard-earned secrets for gravy success:
- Don’t rush the mushrooms! That golden brown color equals flavor. If they’re pale, your gravy will taste bland.
- Whisk like you mean it when adding the broth. Lumpy gravy is heartbreaking – but 100% preventable with steady whisking.
- Too thick? Add broth a tablespoon at a time. Too thin? Mix 1 tsp flour with 1 tbsp water, whisk it in, and simmer 2 more minutes.
- Make ahead tip: The gravy thickens as it sits. When reheating, add a splash of broth or water to bring it back to the perfect consistency.
- Salt carefully! Broth varies in saltiness. Always taste before adding extra salt – you can add more but can’t take it out!
Remember – even if something goes slightly wrong, mushroom gravy is very forgiving. Just keep tasting and adjusting until it’s perfect for you. That’s the beauty of homemade cooking! Understanding the science of thickening agents can also help prevent future issues.
Variations for Homemade Mushroom Gravy
One of my favorite things about this recipe is how easily you can change it up depending on what you’re craving or what’s in your fridge. Here are my go-to twists that keep things exciting:
Herb-Infused Mushroom Gravy
Sometimes I toss in a sprig of fresh thyme or rosemary while the mushrooms are cooking—it adds this incredible earthy depth that pairs perfectly with roasted meats. Just remember to remove the woody stems before serving! For a brighter flavor, a teaspoon of chopped fresh sage or a sprinkle of thyme leaves at the end works magic. My grandmother always said, “Good gravy needs good herbs,” and she wasn’t wrong!
Creamy Vegan Mushroom Gravy
When my vegan friends come over, I simply swap the butter for olive oil and use coconut milk instead of heavy cream. The coconut flavor disappears into the richness of the mushrooms, promise! I also make sure to use a vegan Worcestershire sauce (Annie’s makes a great one). The result is just as velvety and satisfying—my meat-eating husband can’t even tell the difference!
Umami-Bomb Mushroom Gravy
For those days when I want maximum savory flavor, I add a tablespoon of soy sauce or tamari when whisking in the broth. A teaspoon of mushroom powder (I keep some from dried porcinis in my pantry) takes it over the top. Sometimes I’ll even caramelize the onions separately first until they’re deeply golden—this extra step adds such incredible sweetness that balances the mushrooms perfectly. It’s my secret weapon for holiday dinners!
The beauty of this gravy is how adaptable it is—feel free to play around and make it your own. Just last week I added a splash of balsamic vinegar at the end for a tangy twist, and wow! What variations will you try first? For more ideas on boosting savory flavor, check out resources on making rich homemade stocks.
Serving Suggestions for Homemade Mushroom Gravy
Oh, where shouldn’t you pour this glorious gravy? My personal favorite is drowning a mountain of creamy mashed potatoes—the way it cascades down the sides is pure comfort food magic. But don’t stop there! Try it over:
- Flaky buttermilk biscuits (breakfast just got fancy)
- Juicy roasted chicken or turkey (holiday-worthy every time)
- Meatloaf (trust me, it’s a game-changer)
- Roasted veggies like Brussels sprouts or cauliflower (vegetarians will thank you)
- Poutine fries (because why not?)
Honestly? I’ve even eaten it by the spoonful—no shame!

Storing and Reheating Homemade Mushroom Gravy
Here’s the beautiful thing about this gravy—it actually tastes even better the next day! The flavors meld together beautifully overnight. But you’ll want to store it right to keep that perfect texture and taste.
Fridge Storage
Let the gravy cool completely before transferring it to an airtight container—I like using mason jars because you can see the layers. It’ll keep happily in your fridge for up to 3 days. Pro tip: Press plastic wrap directly onto the surface before sealing to prevent a skin from forming.
Freezer Storage
Yes, you can freeze this gravy! Pour cooled gravy into freezer-safe containers, leaving about 1/2 inch of space at the top for expansion. It’ll keep for up to 1 month—any longer and the texture might suffer. I like freezing it in ice cube trays for single servings—perfect for quick weeknight meals!
Reheating Like a Pro
When you’re ready to use it, transfer the gravy to a saucepan and reheat gently over medium-low heat, stirring frequently. Here’s my secret—add a splash of broth or water (about 1-2 tablespoons per cup of gravy) as it heats up. The gravy thickens as it cools, and this brings it back to that perfect pourable consistency.
Microwave works too—heat in 30-second intervals, stirring between each, and adding that splash of liquid. Just be careful—it tends to splatter! Always cover with a paper towel to prevent messes.
One last tip—if your gravy separates after storage, don’t panic! Just whisk vigorously while reheating—it’ll come back together beautifully. Trust me, I’ve rescued many a batch this way!
Homemade Mushroom Gravy Nutritional Information
Now, let’s talk about what’s in this delicious gravy—because I know some of you are curious! These numbers are estimates (your exact amounts may vary depending on ingredients used), but here’s the general breakdown per 1/4 cup serving:
- Calories: 70
- Total Fat: 5g (3g saturated, 2g unsaturated)
- Cholesterol: 15mg
- Sodium: 200mg
- Total Carbohydrates: 4g
- Dietary Fiber: 0.5g
- Sugars: 1g
- Protein: 1g
A few things to note—if you skip the cream or use low-sodium broth, those numbers will change. Same goes if you add extra mushrooms (which I often do—no judgment here!). The beauty of homemade is you control exactly what goes in. Personally? I think a little indulgence is worth it for that rich, comforting flavor. After all, we’re not drinking it by the gallon—just pouring it over our favorite dishes for that perfect finishing touch! For general guidance on understanding food labels, consult a resource like the U.S. Food and Drug Administration (FDA) website.
Frequently Asked Questions
Can I use dried mushrooms instead of fresh?
Absolutely! Dried mushrooms add incredible depth—I especially love porcini for this. Just soak 1 oz dried mushrooms in 1 cup hot water for 20 minutes first. Use the soaking liquid (strained) as part of your broth—it’s packed with flavor! Chop the rehydrated mushrooms and proceed with the recipe as written.
Help! My gravy is lumpy—how do I fix it?
Don’t panic—this happens to everyone at least once! First, try whisking vigorously while the gravy is hot—sometimes that’s enough. If lumps persist, strain it through a fine mesh sieve while pressing with a spoon. Worst case? Blend it briefly with an immersion blender (careful—it’s hot!). Next time, remember to whisk constantly when adding flour and broth – slow and steady wins the lump-free gravy race!
Can I make this gravy ahead of time?
You bet—in fact, I often do! The flavors deepen beautifully overnight. Just store cooled gravy in an airtight container in the fridge for up to 3 days. When reheating, add a splash of broth or water to thin it back to the perfect consistency—gravy thickens as it sits. Stir frequently while reheating to prevent sticking.
Is there a gluten-free version?
Easy swap! Just use gluten-free 1:1 flour blend instead of all-purpose flour—Bob’s Red Mill works great. Make sure your broth and Worcestershire sauce are gluten-free too (many brands are). The texture comes out nearly identical—I’ve served this version to gluten-free friends who couldn’t tell the difference!
What’s the best way to freeze mushroom gravy?
Freezes like a dream! Cool completely, then pour into freezer-safe containers (leave 1/2 inch space at top). For single servings, freeze in ice cube trays first, then transfer cubes to a bag. Thaw overnight in fridge before reheating gently with extra liquid. Pro tip: Label with date—it keeps best within 1 month.
Got more questions? Drop them in the comments—I’m happy to help! Now go make this gravy and tag me @[YourHandle] so I can see your delicious creations!
Print
20-Minute Homemade Mushroom Gravy That Will Wow You
- Total Time: 20 mins
- Yield: 2 cups 1x
- Diet: Vegetarian
Description
A rich and flavorful homemade mushroom gravy perfect for topping mashed potatoes, roasted meats, or vegetables.
Ingredients
- 2 tbsp butter
- 8 oz mushrooms, sliced
- 1 small onion, finely chopped
- 2 cloves garlic, minced
- 2 tbsp all-purpose flour
- 2 cups vegetable or beef broth
- 1 tsp Worcestershire sauce
- Salt and pepper to taste
- 1/4 cup heavy cream (optional)
Instructions
- Melt butter in a saucepan over medium heat.
- Add mushrooms, onion, and garlic. Cook until softened, about 5 minutes.
- Sprinkle flour over the mixture and stir for 1 minute.
- Gradually whisk in broth until smooth.
- Add Worcestershire sauce and season with salt and pepper.
- Simmer for 10 minutes, stirring occasionally.
- If using, stir in heavy cream for extra richness.
- Serve warm over your favorite dishes.
Notes
- Use fresh mushrooms for the best flavor.
- Adjust broth thickness by adding more or less flour.
- Store leftovers in the fridge for up to 3 days.
- Prep Time: 5 mins
- Cook Time: 15 mins
- Category: Sauce
- Method: Stovetop
- Cuisine: American
Nutrition
- Serving Size: 1/4 cup
- Calories: 70
- Sugar: 1g
- Sodium: 200mg
- Fat: 5g
- Saturated Fat: 3g
- Unsaturated Fat: 2g
- Trans Fat: 0g
- Carbohydrates: 4g
- Fiber: 0.5g
- Protein: 1g
- Cholesterol: 15mg