Oh, let me tell you about my obsession with Key Lime Pie Bars! It all started when I visited Florida years ago and tasted my first authentic key lime pie at a little roadside stand. The tartness! The creaminess! That buttery crust! I came home determined to create an easier version that captured that magic. These Key Lime Pie Bars are my answer – all the bright, tangy flavor of the original pie, but in convenient little squares that are perfect for parties (or, you know, sneaking just one more bite at midnight).
The best part? They’re ridiculously simple to make. Just press a graham cracker crust into a pan, whip up a zesty lime filling with only five ingredients, and let the fridge do most of the work. In less time than it takes to watch your favorite sitcom, you’ll have the most refreshing dessert that makes everyone think you’re a baking genius.

Why You’ll Love These Key Lime Pie Bars
Trust me, these bars will become your new go-to dessert—they’re that good. Here’s why:
- Effortless magic: Only 15 minutes of hands-on work, and the oven handles the rest. Perfect for when you want something impressive but don’t have all day.
- That addictive tang: The combination of sweet condensed milk and sharp lime juice creates a flavor that’s downright irresistible.
- Crowd-pleaser: Bring these to any gathering and watch them disappear faster than you can say “key lime.”
- No-bake option: Just bake the crust, then let the filling set in the fridge for a cooler treat on hot days.
Seriously, one bite and you’ll be hooked—just like I was!
Ingredients for Key Lime Pie Bars
Here’s what you’ll need to make these sunshine-in-a-bite bars (and yes, every single ingredient matters!):
- 1 1/2 cups graham cracker crumbs – pack them gently but firmly when measuring
- 1/3 cup granulated sugar – just enough to balance the tart lime
- 6 tbsp melted butter – use the real stuff, it makes all the difference
- 3 large egg yolks – save the whites for meringues!
- 14 oz sweetened condensed milk – one can, unopened until you’re ready
- 1/2 cup key lime juice – freshly squeezed if you can find those tiny limes
- 1 tbsp lime zest – the fragrant green part only, no bitter white pith
See? Simple ingredients, extraordinary results. Now let’s make some magic!
Equipment You’ll Need
Don’t worry – you probably already have everything needed for these bars! Just grab:
- 8×8-inch baking pan – lined with parchment for easy lifting
- Mixing bowls – one for crust, one for filling
- Whisk – to blend that dreamy lime filling smooth
- Measuring cups/spoons – precision matters with these bold flavors
That’s it! No fancy gadgets required for this simple, delicious treat.
How to Make Key Lime Pie Bars
Alright, let’s get to the fun part – making these dreamy bars! Follow these simple steps, and you’ll have perfect Key Lime Pie Bars every time. I’ve made this recipe dozens of times (okay, maybe hundreds), and these techniques never fail me.
Step 1: Prepare the Graham Cracker Crust
First things first – preheat that oven to 350°F (175°C). While it’s heating up, mix your graham cracker crumbs, sugar, and melted butter in a bowl until it looks like wet sand. Here’s my trick: I use the bottom of a measuring cup to press the mixture firmly into my parchment-lined 8×8-inch pan. Really pack it in there – you want a solid base that won’t crumble when you cut the bars later. Pop it in the oven for exactly 10 minutes, then let it cool slightly while you make the filling.
Step 2: Make the Key Lime Filling
Now for the star of the show! In a clean bowl, whisk those egg yolks until they’re smooth and pale yellow. Pour in the sweetened condensed milk and whisk again until perfectly combined. Here’s where the magic happens – slowly add the key lime juice while whisking constantly. Don’t stop until the mixture is silky smooth with no streaks. Finally, fold in that fragrant lime zest. The aroma alone will make your mouth water!
Step 3: Bake and Chill
Pour your gorgeous lime filling over the slightly cooled crust and smooth the top. Bake for 15-20 minutes – you’ll know it’s done when the edges are set but the center still has a slight jiggle. Now comes the hardest part: patience! Let the bars cool completely at room temperature, then refrigerate for at least 2 hours (I know, torture!). This chilling time is non-negotiable – it’s what gives the bars their perfect sliceable texture. Trust me, it’s worth the wait!
Tips for Perfect Key Lime Pie Bars
After making these bars more times than I can count, I’ve learned all the little tricks that take them from good to “Oh my goodness, what IS this magic?” Here are my can’t-live-without tips:
- Juice those limes fresh – bottled juice just doesn’t give the same bright pop of flavor
- Press that crust like you mean it – I use the bottom of a measuring cup to get an even, compact layer
- Don’t skip the chill time – I know it’s tempting, but those 2 hours in the fridge make all the difference
- Zest before juicing – it’s way easier to zest whole limes than slippery halves
Follow these simple tricks, and you’ll have bars that taste like they came straight from a Florida beachside café!
Variations and Substitutions
Can’t find key limes? No worries! Regular Persian limes work beautifully – just use 1/3 cup juice since they’re less tart. For dietary needs, try vegan butter in the crust and coconut condensed milk for the filling (though the texture changes slightly). Feeling fancy? Swirl in some raspberry puree before baking or top with toasted coconut after chilling. The possibilities are endless with this versatile recipe!
Serving and Storing Key Lime Pie Bars
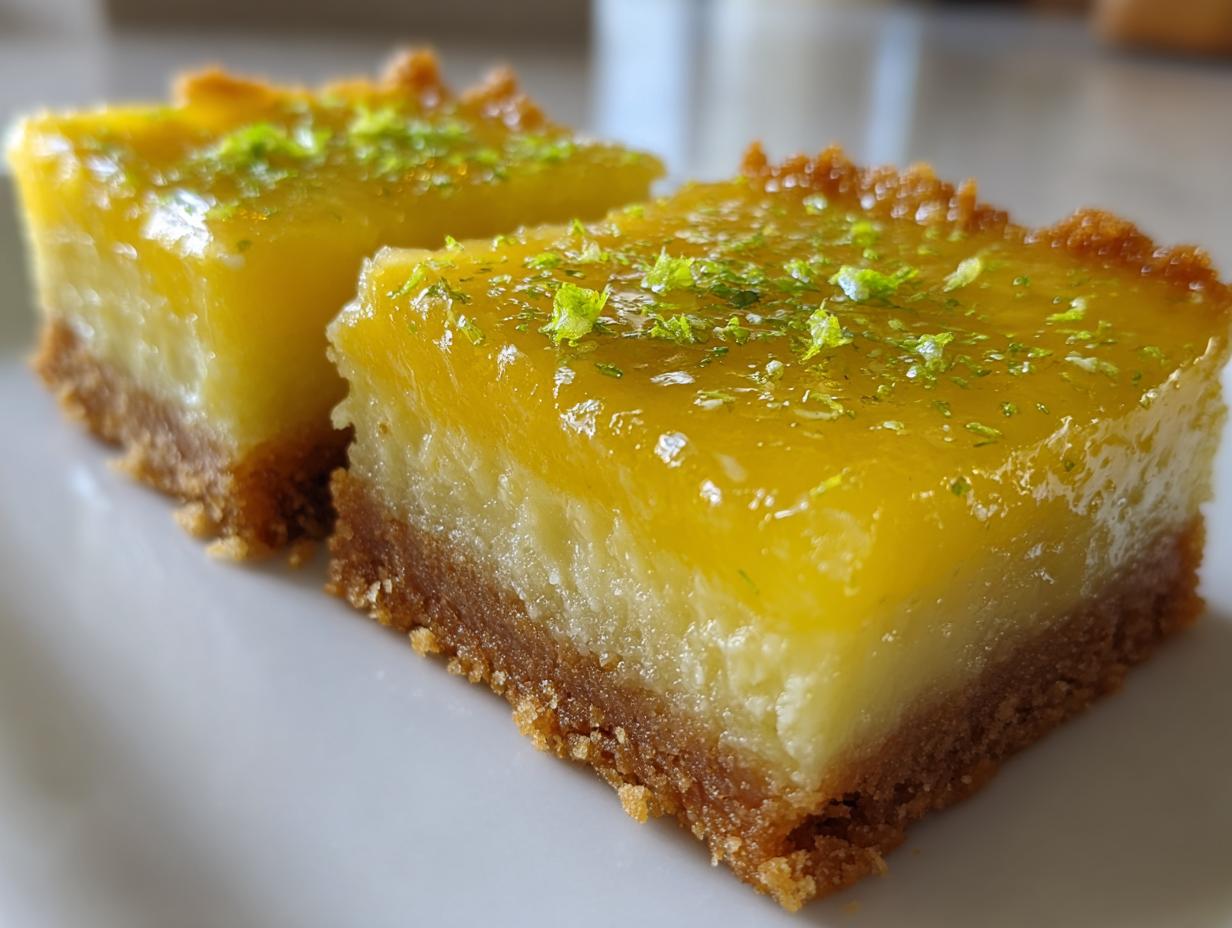
Presentation is everything with these beauties! I love serving them chilled with a dollop of fresh whipped cream and a sprinkle of lime zest – that pop of green makes them irresistible. For storage, keep them covered tightly in the fridge where they’ll stay perfect for up to 5 days (if they last that long!). Pro tip: layer parchment between bars if stacking them – that way they won’t stick together when you sneak just one more.
Nutritional Information
Now, I’m no nutritionist, but I know you might be curious about what’s in these dreamy bars. Keep in mind these numbers are just estimates – your exact results will depend on the specific ingredients you use and how big you cut those squares (no judgement if you go for “generous” portions!).
The beauty of homemade treats is you control exactly what goes in them. Want to lighten things up? Try reducing the sugar slightly in the crust or using low-fat condensed milk. But let’s be real – sometimes you just need that full-flavored, buttery, creamy goodness exactly as written. Life’s too short not to enjoy dessert! For a lighter dessert option, consider mini cheesecake bites.
Frequently Asked Questions
Can I use bottled lime juice instead of fresh?
While bottled juice works in a pinch, fresh key lime juice makes all the difference! The bottled stuff lacks that bright, zesty punch. If you must substitute, reduce the amount slightly since bottled juice tends to be more acidic. If you enjoy lemon flavors, fresh juice is key!
How long do Key Lime Pie Bars keep in the fridge?
These bars stay perfect for up to 5 days when stored in an airtight container. The crust might soften slightly by day 3, but they’ll still taste amazing. Pro tip: I sometimes freeze individual squares wrapped in parchment for up to a month – just thaw in the fridge overnight!
Can I make these gluten-free?
Absolutely! Just swap the graham crackers for gluten-free ones. I’ve had great results with gluten-free ginger snaps too – they add a lovely spicy note that pairs beautifully with the lime.
Why does my filling look runny after baking?
Don’t panic! The filling sets as it chills. That slight jiggle when it comes out of the oven is exactly what you want. Give it those crucial 2+ hours in the fridge, and you’ll have perfect sliceable bars. If you prefer no-bake desserts, this chilling step is crucial for texture.
Ready to Make Your Own Sunshine Bars?
There you have it – everything I’ve learned through years of making (and devouring) these incredible Key Lime Pie Bars! Now it’s your turn to experience that magical combo of buttery crust and tangy lime filling. I’d love to hear how your bars turn out – did you stick to the classic recipe or try one of the fun variations? Snap a photo of your creation and tag me on social media so I can see your masterpiece! Nothing makes me happier than seeing others fall in love with this recipe just like I did. Happy baking, friends!
Print
Irresistible Key Lime Pie Bars Recipe Ready in 15 Minutes
- Total Time: 40 minutes (plus chilling)
- Yield: 16 bars 1x
- Diet: Vegetarian
Description
Key Lime Pie Bars are a refreshing dessert with a tangy lime filling and a buttery graham cracker crust.
Ingredients
- 1 1/2 cups graham cracker crumbs
- 1/3 cup granulated sugar
- 6 tbsp melted butter
- 3 large egg yolks
- 14 oz sweetened condensed milk
- 1/2 cup key lime juice
- 1 tbsp lime zest
Instructions
- Preheat oven to 350°F (175°C).
- Mix graham cracker crumbs, sugar, and melted butter. Press into a lined 8×8-inch pan.
- Bake crust for 10 minutes, then let cool slightly.
- Whisk egg yolks, condensed milk, lime juice, and zest until smooth.
- Pour filling over crust and bake for 15-20 minutes.
- Cool completely, then refrigerate for at least 2 hours before cutting into bars.
Notes
- Use fresh key limes for best flavor.
- Bars firm up when chilled.
- Store covered in the refrigerator.
- Prep Time: 15 minutes
- Cook Time: 25 minutes
- Category: Dessert
- Method: Baking
- Cuisine: American
Nutrition
- Serving Size: 1 bar
- Calories: 180
- Sugar: 22g
- Sodium: 95mg
- Fat: 8g
- Saturated Fat: 4.5g
- Unsaturated Fat: 2.5g
- Trans Fat: 0g
- Carbohydrates: 25g
- Fiber: 0.5g
- Protein: 3g
- Cholesterol: 65mg