
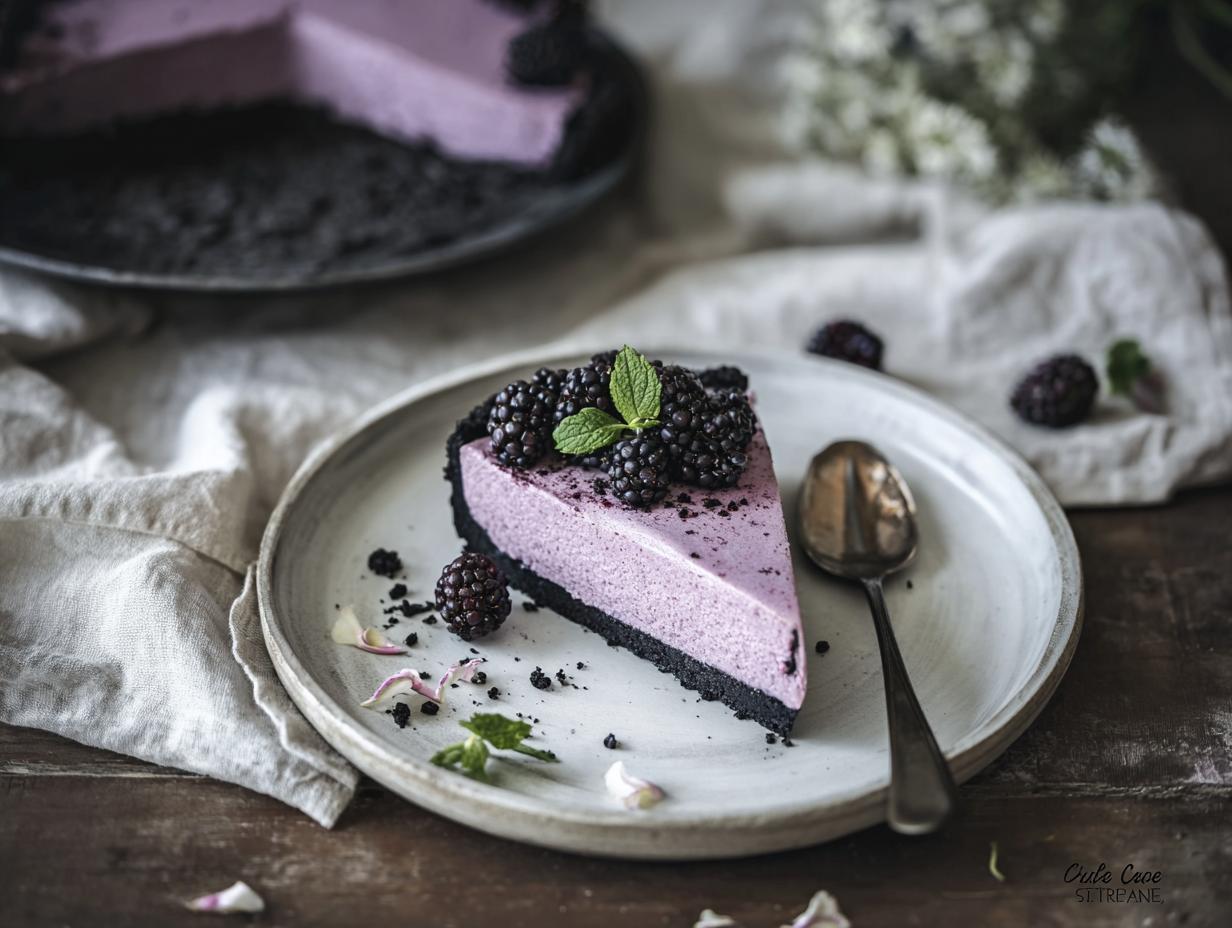
Let me tell you, this No-Bake Blackberry Oreo Tart has basically become my summer potluck secret weapon. I first whipped it up for a backyard barbecue last July when it was just too hot to even think about turning on the oven. Everyone gathered around the table, took one bite of that creamy, crunchy goodness, and just went silent for a second—then the recipe requests started flying. It’s one of those desserts that looks way more impressive than the effort you put in, and I’m honestly still a little giddy every time I make it.
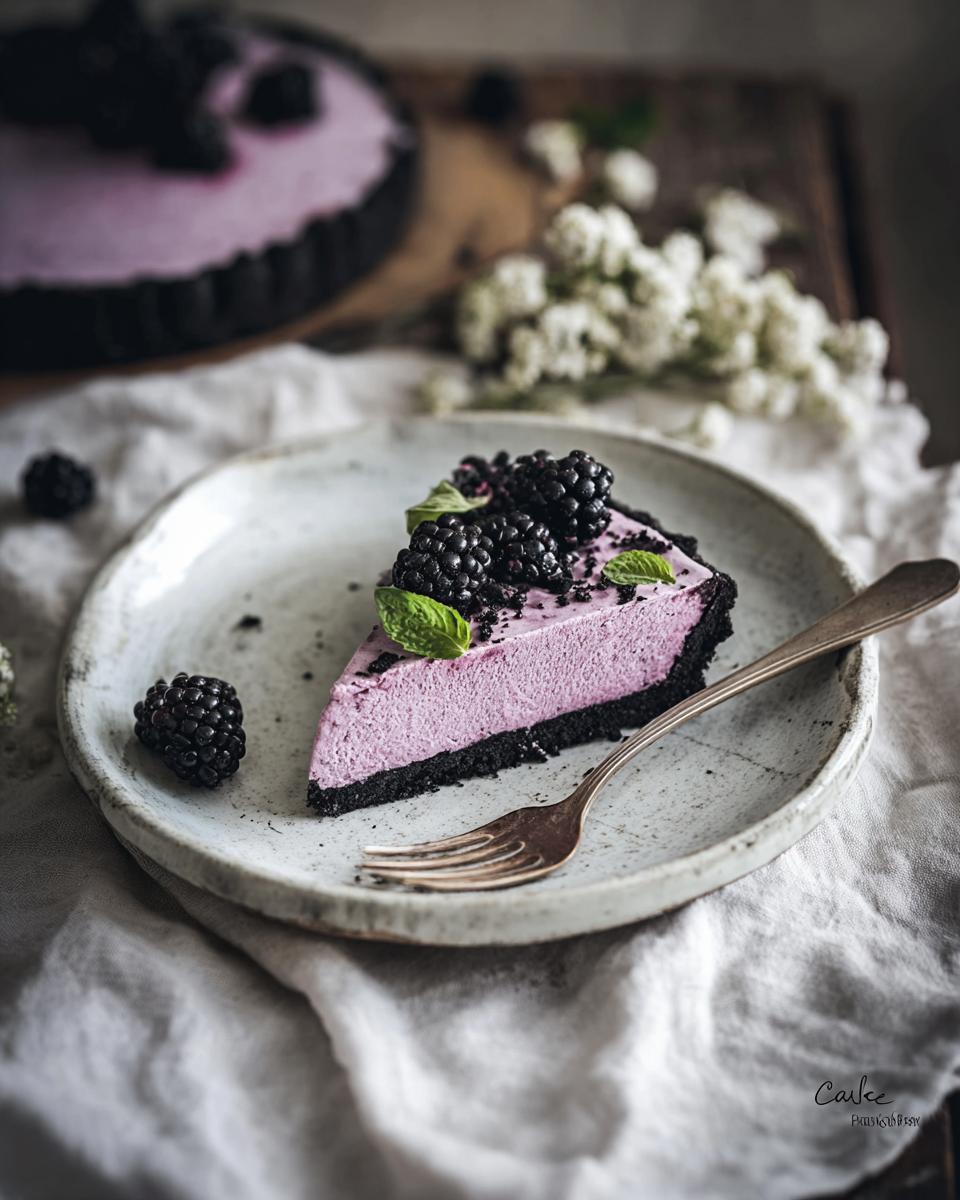
Why You’ll Love This No-Bake Blackberry Oreo Tart
Look, I’ve made my fair share of complicated desserts that leave me with a sink full of dishes and a headache. This No-Bake Blackberry Oreo Tart is the exact opposite of that, and honestly, that’s why I keep coming back to it. You get all the wow-factor of a fancy bakery tart without any of the stress.
- No oven required. Seriously, not even for the crust. On a sweltering July afternoon when my kitchen feels like a sauna, this is the only dessert I’m willing to make.
- 20 minutes of active work. That’s it. The rest of the time is just letting the fridge do its thing while you go about your day.
- The perfect texture combo. That crunchy, chocolatey Oreo crust against the light, airy, and fruity filling? It’s a match made in dessert heaven.
- Fresh berries shine. Using real blackberries gives it this bright, tangy flavor that cuts through the richness. It tastes like summer, pure and simple.
Quick and Easy Preparation
I’m not kidding when I say you can have this No-Bake Blackberry Oreo Tart ready for the fridge in about twenty minutes. There’s no rolling dough, no blind baking, no fussing with a water bath. You just crush some cookies, stir a few things on the stove, and whip some cream. If you can work a food processor and a whisk, you’re fully qualified. I’ve made this with my kids helping, and it’s honestly more fun than stressful.
Perfect for Hot Weather
Last summer, I brought this No-Bake Blackberry Oreo Tart to our neighborhood block party. It was one of those sticky, 95-degree evenings where everyone was just melting. Every other dessert on the table looked sad and droopy. But this tart? It held its shape perfectly, stayed cool and refreshing, and people were coming back for seconds (and thirds). It’s the kind of dessert that doesn’t fight the weather—it works with it.
Ingredients for No-Bake Blackberry Oreo Tart
Here’s the thing I love most about this No-Bake Blackberry Oreo Tart—the ingredient list is short, simple, and everything pulls double duty. You probably already have most of this stuff in your pantry. Let me walk you through exactly what you need and why each ingredient matters.
Oreo Crust Ingredients
For the crust, you’ll need just two things:
- 1 ½ cups crushed Oreo crumbs (about 18 whole cookies). And yes, I mean the whole cookie—filling and all. Don’t even think about scraping out the cream center; that sugary filling helps bind the crust together. Just toss them in a food processor or smash them in a zip-top bag with a rolling pin. If you need a gluten-free version, gluten-free Oreos work perfectly here.
- ¼ cup unsalted butter, melted. I always go with unsalted so I can control the salt level. If all you’ve got is salted butter, just skip adding any extra salt to the crust. You’ll want to make sure your butter is fully melted but not boiling hot when you mix it in.
Blackberry Filling Ingredients
For that gorgeous, jewel-toned filling:
- 2 cups fresh blackberries, rinsed. Fresh is my go-to for the best flavor and texture. But if blackberries aren’t in season, frozen ones work fine—just thaw them first and drain off any excess liquid. Nobody wants a watery tart.
- ¼ cup granulated sugar. This sweetens the berries just enough without overpowering their natural tartness. If your blackberries are super ripe and sweet, you can even cut back to 3 tablespoons.
- 1 tablespoon freshly squeezed lemon juice. This is a little secret weapon. The lemon does two things: it keeps the blackberry mixture from turning that unappetizing grayish color, and it balances the sweetness so every bite tastes bright and fresh. Please use real lemons—bottled juice just doesn’t have the same zip.
Whipped Cream Topping Ingredients
For that light, cloud-like topping:
- 1 cup heavy cream, cold. This is non-negotiable. Cold cream whips up fluffier and holds its shape way better than cream that’s even slightly warm. I pop my bowl and beaters in the fridge for ten minutes before starting, just to be safe.
- ¼ cup powdered sugar. Powdered sugar dissolves instantly into the cream, giving you a silky-smooth texture without any grittiness. Regular granulated sugar just won’t do the same job here.
- 1 teaspoon vanilla extract. Pure vanilla extract makes a difference, but if you only have imitation, that’s totally fine. It adds that warm, cozy flavor that ties everything together.
I usually use my stand mixer with the whisk attachment because it’s hands-free, but a hand mixer works just as well—just keep an eye on it so you don’t over-whip.
How to Make No-Bake Blackberry Oreo Tart
Alright, friend, here’s where the magic happens. This No-Bake Blackberry Oreo Tart comes together in four simple steps, and I promise, if you follow along, you’re going to end up with something absolutely gorgeous. It really is one of those recipes where the process is almost as fun as eating the finished product. Let’s get started.
Step 1: Prepare the Oreo Crust
First things first, grab your Oreo crumbs and melted butter. Toss them together in a bowl and mix until every crumb is coated and it looks a bit like wet sand. You want it thoroughly combined—if you see dry patches, keep stirring. Now, dump the mixture into your 9-inch tart pan. Here’s my favorite trick: wet your fingers slightly before pressing. It keeps the crumbs from sticking to you like crazy, and trust me, it makes the whole job way less frustrating. Press the mixture firmly and evenly along the bottom and up the sides of the pan. Don’t be shy here—really pack it down tight. Then pop the whole thing in the freezer for 15 minutes. This step is crucial because it sets the crust so it won’t crumble apart when you add the filling later. The butter solidifies, and you get that perfect, sturdy base.
Step 2: Cook the Blackberry Compote
While your crust chills out, let’s work on the star of the show. In a medium saucepan, combine the fresh blackberries, sugar, and lemon juice. Give it a quick stir, then turn the heat to medium. You’ll watch the berries start to release their juices and break down—it’s honestly so pretty. Let it simmer for about 5 minutes, stirring occasionally, until the mixture thickens into a gorgeous, deep purple compote. You can leave it a little chunky for texture, or if you prefer a super smooth tart, strain it through a fine-mesh sieve to remove the seeds. I usually leave the seeds in because I like that rustic feel, but it’s totally up to you. Now, here’s the most important part: let it cool completely. I know it’s tempting to move fast, but warm compote will melt your cream instantly. Give it at least 20-30 minutes at room temperature, or speed things up in the fridge.
Step 3: Whip the Cream
Once your compote is cool, it’s cream time. Pour the cold heavy cream into your mixing bowl (chilled bowl optional but wonderful), add the powdered sugar and vanilla, and start whipping on medium-high speed. You’re looking for stiff peaks—that means when you lift the whisk, the cream stands up tall and holds its shape without drooping. This usually takes 3-4 minutes with a hand mixer or stand mixer. But careful, don’t over-whip! If you go too far, you’ll end up with butter, and nobody wants that. Watch it closely as soon as it starts looking thick and luscious. The texture should be smooth, glossy, and cloud-like.
Step 4: Assemble the Tart
Now for the finale! Grab your cooled blackberry compote and your bowl of whipped cream. Using a rubber spatula, gently fold the two together. I like to start with a big scoop of cream folded into the compote to lighten it up, then add the rest. Fold slowly and carefully—you want to keep as much air in that cream as possible. You can leave it a bit swirly for a marbled effect, or fold until it’s one uniform pinkish-purple mixture. Both look gorgeous, honestly. Spread the filling over your chilled Oreo crust, smoothing the top with an offset spatula or the back of a spoon. Cover the tart loosely and refrigerate for at least 4 hours, though overnight is even better. This gives it time to set firm so it slices cleanly and holds its shape beautifully.
Tips for the Perfect No-Bake Blackberry Oreo Tart
I’ve made this No-Bake Blackberry Oreo Tart more times than I can count, and I’ve definitely learned a few things the hard way. Trust me, these little tricks will save you from a melted mess or a crust that crumbles into sad pieces. They’re simple, but they make all the difference between a good tart and a showstopper.
Keep Everything Cold
This is probably the most important tip I can give you. Cold cream whips up fluffier and holds its shape way better. I even chill my mixing bowl and beaters for ten minutes before starting—it’s like a little insurance policy for perfect peaks. And don’t skip freezing that crust for the full 15 minutes. A solid, cold crust means your filling won’t soak in and make it soggy. Think of it as giving your tart a strong foundation to stand on.
Fully Cool the Blackberry Mixture
I know, I know, you’re impatient. I am too. But please, please let that blackberry compote cool completely before you fold it into the whipped cream. Warm compote will deflate all that airy cream instantly, turning your beautiful filling into a runny, sad soup. I usually pop the compote in the fridge for about 20 minutes while I whip the cream, and that does the trick perfectly. Patience pays off here, I promise.
Use a Tart Pan with Removable Bottom
This is one of those little tools that changes everything. A tart pan with a removable bottom makes slicing and serving so much easier—no more wrestling with a stuck crust or tearing the edges. You just lift the bottom ring off, and you’ve got a perfect, clean slice. If you don’t have one, a regular pie dish works just fine. Just be extra gentle when you cut and serve, and maybe use a thin spatula to lift out the first piece.
Variations for No-Bake Blackberry Oreo Tart
One of the things I love most about this No-Bake Blackberry Oreo Tart is how easy it is to play around with. Once you’ve got the basic method down, you can totally make it your own. I’ve tried a bunch of different twists over the years, and these are my absolute favorites. They’re all super simple, but each one gives the tart a whole new personality.
Mixed Berry Version
If you’re like me and can never decide on just one berry, this one’s for you. Next time, swap out half the blackberries for an equal amount of raspberries or blueberries. The combination is gorgeous—you get these beautiful, jewel-toned pockets of flavor in every bite. Just keep an eye on the sugar. Blueberries are a bit sweeter than blackberries, so you might want to cut back to 3 tablespoons. Raspberries are more tart, so you can stick with the full ¼ cup. Trust your taste buds on this one.
Lemon Blackberry Twist
Okay, this might be my secret favorite. Before you cook the blackberries, stir in 1 teaspoon of fresh lemon zest along with the lemon juice. The zest adds this incredible, bright, almost floral note that just makes the blackberry flavor sing. It’s like sunshine in a tart. I first tried this on a whim last spring, and now I honestly can’t go back. It’s that good. If you’re a lemon lover like me, you’ll be obsessed.
Chocolate Drizzle
For those days when you want a little extra indulgence, a chocolate drizzle takes this tart over the top. After the tart has set and you’re ready to serve, melt about ¼ cup of dark chocolate chips with a teaspoon of coconut oil (or butter) in the microwave in 20-second bursts. Let it cool for a minute, then drizzle it all over the top with a spoon. The rich, slightly bitter chocolate against the sweet, creamy filling and crunchy Oreo crust? Absolute heaven. My kids beg for this version every single time.
Serving and Storing Your No-Bake Blackberry Oreo Tart
Alright, the hardest part is over—waiting those four long hours for your No-Bake Blackberry Oreo Tart to set. But now comes the really fun part: cutting into it and watching everyone’s faces light up. Here’s how I like to serve and store mine so every slice looks as good as it tastes.
How to Serve
Here’s a little trick I picked up that makes slicing this tart so much easier: run a sharp knife under hot water, dry it off, and then make your cut. The warm blade glides through the chilled filling and that crunchy Oreo crust without pulling or crumbling. Clean those slices after every cut, and you’ll have bakery-worthy pieces.
When it comes to garnishing, I keep it simple but pretty. A few fresh blackberries arranged right in the center, maybe a sprig of mint for that pop of green—it takes about thirty seconds and makes the tart look like it came from a fancy patisserie. And definitely serve it straight from the fridge. That cold, creamy filling against the crunchy crust is exactly what makes this dessert so special.
Storage Instructions
If you somehow have leftovers (which, honestly, rarely happens in my house), just cover the tart loosely with plastic wrap and pop it back in the fridge. It’ll stay fresh and delicious for up to three days. The crust stays crunchy, the filling stays creamy, and honestly, some folks say it tastes even better the next day once all the flavors have had time to hang out together.
One thing I really want to warn you about though—don’t freeze this tart. I know it’s tempting to save a slice for later, but the cream gets grainy and weird when it thaws, and that silky texture you worked so hard for just disappears. Trust me, I learned that one the hard way. This tart is best enjoyed fresh, so share it generously while it’s at its peak.
Nutritional Information for No-Bake Blackberry Oreo Tart
I know a lot of us like to know what we’re working with, especially when a dessert looks this good. So here’s the rundown for this No-Bake Blackberry Oreo Tart. Just keep in mind, these numbers are all approximate—they’ll vary a bit depending on the exact brands you use and whether you go crazy with that chocolate drizzle (which, honestly, I fully support).
| Nutrient | Amount per Serving |
|---|---|
| Calories | 350 |
| Total Fat | 22g |
| Saturated Fat | 12g |
| Carbohydrates | 36g |
| Fiber | 3g |
| Sugar | 22g |
| Protein | 4g |
So let’s talk about what these numbers actually mean for a second. That 22g of fat might sound like a lot, but keep in mind a good chunk of that comes from the butter in the crust and the heavy cream—the things that give this tart its rich, indulgent texture. And hey, you’re also getting 3g of fiber from those beautiful blackberries, which is more than your average dessert can say! At 350 calories per slice, it’s definitely a treat, but it’s not going to completely derail your day either. Just cut yourself a nice slice, enjoy every single bite, and don’t stress about the numbers. That’s what summer desserts are all about, right?
Frequently Asked Questions About No-Bake Blackberry Oreo Tart
I get a ton of questions about this No-Bake Blackberry Oreo Tart whenever I share it, so I figured I’d round up the ones I hear most often. If you’re wondering about something that’s not covered here, just drop a comment and I’ll get right back to you!
Can I use frozen blackberries?
Absolutely! I’ve made this tart in the middle of winter when fresh blackberries were nowhere to be found. Just thaw them first and drain off any excess liquid—I usually set them in a colander for a few minutes or pat them dry with a paper towel. Too much water means a soggy filling, and nobody wants that. After you’ve drained them, cook them exactly as the recipe says.
Can I make this tart vegan?
You sure can! Grab a package of vegan Oreos (they’re actually accidentally vegan, which I find hilarious), swap in your favorite dairy-free butter for the crust, and use chilled coconut cream instead of heavy cream for that fluffy topping. Just make sure you chill the coconut cream in the fridge overnight before whipping—it needs to be really cold to fluff up properly. I tested this version for a friend’s birthday, and honestly, everyone loved it, vegans and non-vegans alike.
How long does the tart need to set?
At least 4 hours, full stop. But if I’m being honest, overnight is the magic number. The filling gets so much firmer and slices like a dream after a good long chill. I know it’s tempting to cut into it early—I’ve been there, sneaking a peek at the fridge—but trust me, patience pays off. A rushed tart means messy, slump-y slices that just don’t do this beauty justice.
Can I freeze the tart?
I really, really don’t recommend it. The cream doesn’t survive the freezer well—it turns grainy and slightly watery once it thaws, and that silky, luscious texture just disappears. I learned that lesson the hard way with a leftover slice. This easy dessert is honestly best kept in the fridge, covered loosely, for up to three days. Though between you and me, leftovers rarely last that long in my house anyway!
Your Turn to Make This No-Bake Blackberry Oreo Tart
Okay, friend, I’ve shared all my secrets—now it’s your turn to get in the kitchen and make this No-Bake Blackberry Oreo Tart your own. I really hope you give it a try, because it’s one of those desserts that just makes you look like a rockstar with almost zero effort. When you do, snap a photo and tag me, or leave a comment below with your rating. I absolutely love seeing what you all make, and it helps other readers know what to expect. So go ahead, grab those Oreos, and let me know how it turns out. Happy tart-making!
Print
No-Bake Blackberry Oreo Tart The Perfect 4-Hour Dessert
- Total Time: 4 hours 30 minutes
- Yield: 8 servings 1x
- Diet: Vegetarian
Description
A simple no-bake tart with a crunchy Oreo crust and a creamy blackberry filling.
Ingredients
- 1 1/2 cups Oreo crumbs
- 1/4 cup melted butter
- 2 cups fresh blackberries
- 1/4 cup granulated sugar
- 1 tablespoon lemon juice
- 1 cup heavy cream
- 1/4 cup powdered sugar
- 1 teaspoon vanilla extract
Instructions
- Mix Oreo crumbs with melted butter. Press into a tart pan. Freeze for 15 minutes.
- Cook blackberries, sugar, and lemon juice in a saucepan over medium heat. Stir until berries break down. Simmer for 5 minutes. Let cool.
- Whip heavy cream with powdered sugar and vanilla until stiff peaks form.
- Fold cooled blackberry mixture into whipped cream.
- Spread filling over crust. Refrigerate for 4 hours.
Notes
- Use gluten-free Oreos for a gluten-free option.
- You can substitute frozen blackberries if fresh are not available.
- Prep Time: 20 minutes
- Cook Time: 10 minutes
- Category: Dessert
- Method: No-Bake
- Cuisine: American
Nutrition
- Serving Size: 1 slice
- Calories: 350
- Sugar: 22g
- Sodium: 180mg
- Fat: 22g
- Saturated Fat: 12g
- Unsaturated Fat: 8g
- Trans Fat: 0g
- Carbohydrates: 36g
- Fiber: 3g
- Protein: 4g
- Cholesterol: 55mg