
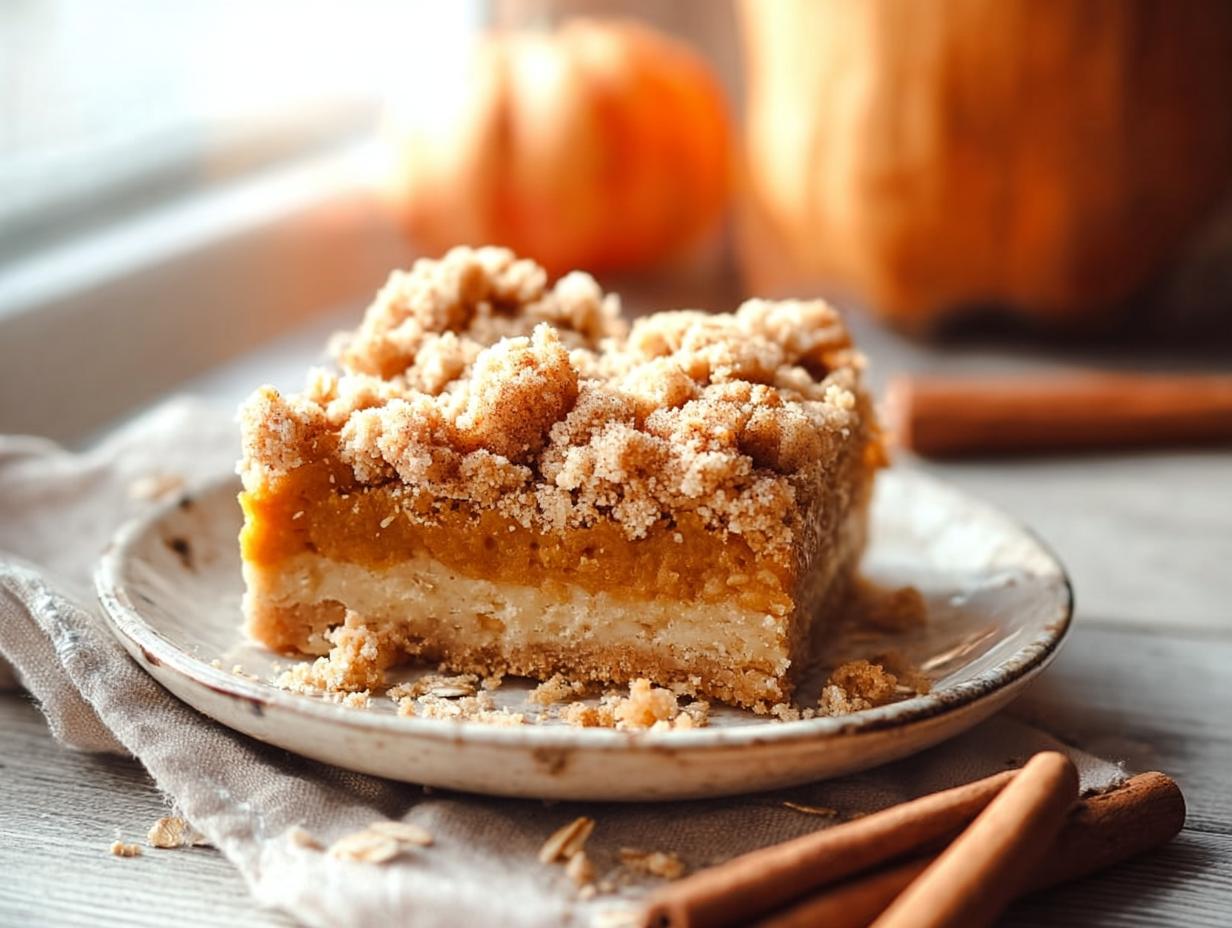
If you love pumpkin pie but hate the fuss of rolling out dough, these Pumpkin Pie Crumble Bars are about to become your new favorite fall dessert. They’ve got everything you crave—that buttery crust, a creamy pumpkin filling, and a crunchy oat crumble on top—but they’re so much simpler to throw together. No chilling dough, no rolling pins, just press and bake. I first made a batch for a cozy Friendsgiving gathering a few years ago, and honestly, they vanished before the pie even made it to the table. Everyone kept asking for the recipe, and I’ve been making them every autumn since.
I’ve been baking for years and tested this recipe more times than I can count, tweaking the spice blend and the crumble ratio until it was just right. The result is a bar that tastes like the holidays but takes way less effort. Whether you’re short on time or just want a portable pumpkin treat, these bars deliver all the cozy flavors without the stress. Trust me, you’re going to love them.
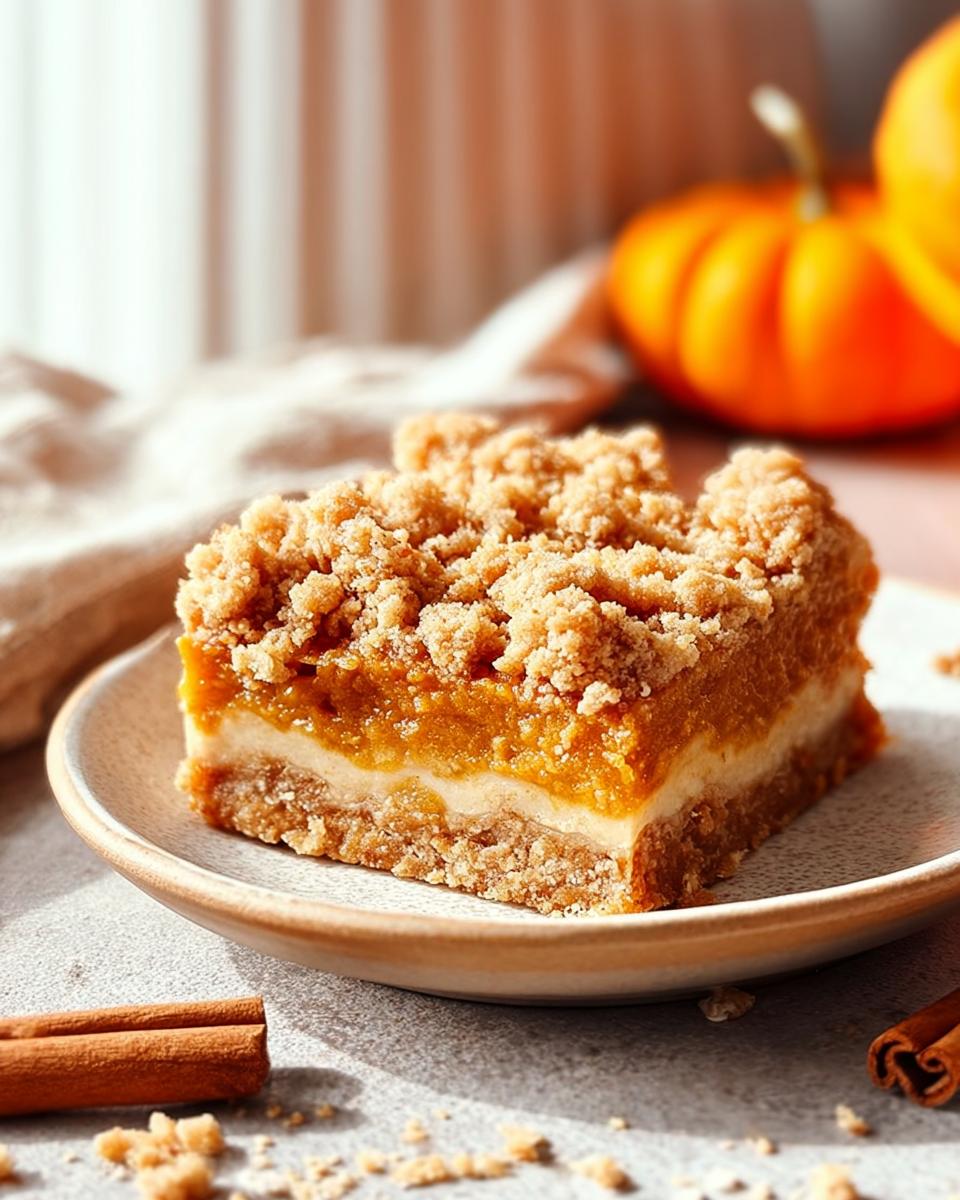
Why You’ll Love These Pumpkin Pie Crumble Bars
Let me tell you why these bars have become my go‑to fall dessert. They’re ridiculously easy—no rolling dough, no fussy crust, just press and bake. That alone wins me over every time.
- So simple to make: You don’t need any fancy equipment or pastry skills. Mix, press, pour, sprinkle, bake. Done.
- Perfect for gatherings: They slice cleanly and travel well, so they’re a hit at potlucks, Thanksgiving, or just a cozy weekend treat. My family devours them.
- Freezer‑friendly: Make a batch ahead, freeze individually, and pull one out whenever the craving hits. They taste just as fresh.
- Kid‑approved: My nieces and nephews go crazy for these. The buttery crust and crunchy topping make them way more fun than plain pumpkin pie.
Honestly, these Pumpkin Pie Crumble Bars deliver all the cozy fall flavor with half the effort. You’ll wonder why you ever bothered with pie crust.
Ingredients for Pumpkin Pie Crumble Bars
Let me walk you through what you’ll need. The ingredient list looks long, but it’s mostly pantry staples. The key is paying attention to how things are prepped—cold butter makes all the difference here.
Crust Ingredients
For that buttery, sturdy base you’ll need 1 1/2 cups all-purpose flour, 1/2 cup granulated sugar, and 1/2 cup cold butter, cubed. That’s it. Simple and perfect.
Filling Ingredients
You’ll whisk together 1 cup pumpkin puree (make sure it’s 100% pumpkin, not pumpkin pie mix), 2 large eggs, 1/2 cup packed brown sugar, 1 teaspoon pumpkin pie spice, and 1/2 teaspoon salt. The brown sugar adds that deep, caramel-like sweetness.
Crumble Topping Ingredients
For that crunchy topping, combine 1 cup rolled oats, 1/4 cup all-purpose flour, and 1/4 cup packed brown sugar. Then cut in 1/4 cup cold butter, cubed, until you get those lovely clumps. Don’t skimp on the cold butter here—it’s what gives you that perfect crumble texture.
Equipment You Will Need
You don’t need a ton of fancy gear for these bars, which is part of why I love them. Grab a 9×9 inch baking pan and some parchment paper for easy lifting. You’ll also want a couple of mixing bowls, a pastry cutter or fork for cutting in the butter, a whisk for the filling, and the usual measuring cups and spoons. A food processor can speed up the crust if you have one, but honestly, your hands work just fine. Don’t forget a cooling rack for letting them set up properly.
How to Make Pumpkin Pie Crumble Bars
Alright, let’s get baking! I promise these Pumpkin Pie Crumble Bars come together in a snap. The process is straightforward, but a few little tricks make all the difference. I’ll walk you through each step so you feel totally confident.
Prepare the Crust
First things first, preheat your oven to 350°F and line a 9×9 inch baking pan with parchment paper. Leave a little overhang on two sides—that’s your handle for lifting the bars out later.
In a medium bowl, whisk together 1 1/2 cups all-purpose flour and 1/2 cup granulated sugar. Now, grab your 1/2 cup of cold, cubed butter. Cut it into the flour mixture using a pastry cutter or just your fingertips until it looks like coarse crumbs. You want pea-sized bits of butter still visible—that’s what gives you a flaky crust.
Dump the mixture into your prepared pan and press it down firmly and evenly. I use the bottom of a measuring cup to really pack it in. Bake for 15 minutes, then let it cool slightly on a wire rack while you make the filling.
Make the Pumpkin Filling
While the crust is doing its thing, grab a large bowl. Whisk together 1 cup pumpkin puree (remember, not pumpkin pie mix!), 2 large eggs, 1/2 cup packed brown sugar, 1 teaspoon pumpkin pie spice, and 1/2 teaspoon salt. Whisk until everything is smooth and glossy. Don’t overmix—just until it’s combined.
Pour this beautiful, spiced filling right over the warm crust. It’ll spread out evenly on its own. The warmth from the crust helps everything settle nicely.
Make the Crumble Topping
Now for the best part—that crunchy topping! In another bowl, combine 1 cup rolled oats, 1/4 cup all-purpose flour, and 1/4 cup packed brown sugar. Add your remaining 1/4 cup cold, cubed butter. Cut it in until the mixture forms clumps of various sizes. Some bigger chunks are great—they get extra crispy.
Sprinkle the crumble evenly over the pumpkin filling. Don’t press it down; just let it sit on top. You want those buttery oat clusters to stay distinct.
Bake and Cool
Pop the pan into the oven and bake for 30 to 35 minutes. You’ll know it’s done when the filling is set (it should jiggle just slightly in the center, like a cheesecake) and the crumble topping is a lovely golden brown.
Here’s the hard part: let the bars cool completely in the pan on a wire rack. I know it’s tempting to dig in, but if you cut them while they’re warm, the filling will be a mess. For the cleanest slices, pop the cooled pan in the fridge for an hour before cutting. Trust me on this—it makes all the difference.
Tips for Perfect Pumpkin Pie Crumble Bars
After making these bars more times than I can count, I’ve picked up a few tricks that really make a difference. First and foremost, use cold butter for both the crust and the crumble. It seems fussy, but it’s what gives you that flaky, tender texture instead of something dense and greasy. Don’t overbake either—the filling should be set but still have a slight jiggle in the center. It’ll firm up as it cools.
And speaking of cooling, let the bars cool completely before you even think about cutting them. I know it’s torture, but it’s non-negotiable for clean slices. My personal trick? After they’re cool, I pop the whole pan in the fridge for about an hour. That extra chill makes the filling set up perfectly, and you get those gorgeous, sharp edges every time. Oh, and don’t forget to line your pan with parchment paper with some overhang—it makes lifting the whole slab out so much easier.
Variations and Substitutions
One of the things I love about this recipe is how flexible it is. If you need to go gluten-free, just swap in a good 1-to-1 gluten-free flour blend for both the crust and the crumble—it works like a charm. Dairy-free? Use a solid dairy-free butter alternative, just make sure it’s cold. For a little extra crunch, toss a handful of chopped pecans or walnuts into the crumble topping. And if you don’t have pumpkin pie spice on hand, no worries—just mix together ½ teaspoon cinnamon, ¼ teaspoon ginger, and ⅛ teaspoon cloves. You can even use homemade pumpkin puree if you’ve got it, just be sure to drain off any excess liquid so the filling doesn’t get watery. Easy peasy!
Serving Suggestions
Honestly, these bars are pretty hard to resist on their own, but if you want to dress them up a bit, I’ve got a few favorite ways. A big dollop of lightly sweetened whipped cream is a classic for a reason—it cuts through the richness perfectly. Or, go for a scoop of vanilla ice cream while the bar is still slightly warm. That melty, creamy situation is just incredible. And if you’re feeling extra fancy, a drizzle of caramel sauce takes them right over the top. They’re perfect for Thanksgiving dessert, fall potlucks, or honestly, just a cozy afternoon snack with a hot cup of coffee.
How to Store and Reheat Pumpkin Pie Crumble Bars
If you have any leftovers (which, let’s be honest, is rare in my house!), here’s how to keep them tasting fresh. Pop the bars in an airtight container and store them in the fridge—they’ll stay good for up to 5 days. I actually think they get even better after a day or two as the flavors meld.
For longer storage, wrap each bar individually in plastic wrap, then toss them in a freezer bag. They’ll keep for up to 3 months. When you’re ready for a treat, just grab one from the freezer. To reheat, zap it in the microwave for 15 to 20 seconds, or pop it in a 300°F oven for about 5 minutes. The crumble crispens back up nicely in the oven. I usually go the microwave route for a quick fix, but both work great!
Nutritional Information for Pumpkin Pie Crumble Bars
I know a lot of us like to keep an eye on what we’re eating, so here’s the rough breakdown for one bar. Remember, these are just estimates based on the standard ingredients I use. If you swap things around—like using a gluten-free flour blend or dairy-free butter—the numbers will shift a bit.
Per bar, you’re looking at about 250 calories, 10 grams of fat, 35 grams of carbs, and 3 grams of protein. They’ve also got 2 grams of fiber and 15 grams of sugar. Not too shabby for a treat that tastes this indulgent, right? I always figure a little pumpkin counts as a vegetable, so that’s a win in my book. But really, these bars are about enjoying the season, so I say just savor every bite and don’t stress too much about the numbers!
Frequently Asked Questions
I get asked a lot of questions about these Pumpkin Pie Crumble Bars, so I figured I’d answer the most common ones right here. They’re a pretty straightforward fall dessert, but a few little things can trip you up.
Can I use pumpkin pie filling instead of pumpkin puree?
Nope, stick with 100% pure pumpkin puree. Pumpkin pie filling is already sweetened and spiced, so it’ll throw off the balance and make your bars way too sweet—and the texture won’t be right. Trust me, I tried it once, and it was a goopy mess. Just grab a can of plain puree.
Can I make these gluten-free?
Yes! I’ve done it loads of times. Use a good 1-to-1 gluten-free flour blend (like the one from Bob’s Red Mill or King Arthur) for both the crust and the crumble. The bars turn out just as yummy, and nobody at my table ever notices the difference. These easy pumpkin bars are super forgiving.
Can I freeze the bars?
Absolutely! In fact, I often make a double batch and stash some in the freezer. Wrap each bar individually in plastic wrap, then pop them in a freezer bag. They keep for up to 3 months. When you want one, just thaw in the fridge or reheat briefly—see my storage section above for details.
Why is my filling watery?
This usually happens for one of two reasons. Either you used pumpkin pie mix (which has added liquid) or you overmixed the filling, which can break down the pumpkin’s structure. Also, if you’re using homemade pumpkin puree, be sure to drain off any excess water first. Stick with canned puree and whisk gently—just until smooth—and you’ll get a perfect, creamy layer every time.
Your Turn to Make These Bars
I hope you enjoy these Pumpkin Pie Crumble Bars as much as my family does. They’re the perfect easy fall dessert, and I’d love to hear how yours turn out. Leave a comment, rate the recipe, or tag me if you share them online—happy baking!
Print
Pumpkin Pie Crumble Bars Irresistible 30-Minute Treat
- Total Time: 1 hour 5 minutes
- Yield: 12 bars 1x
- Diet: Vegetarian
Description
These pumpkin pie crumble bars combine a buttery crust, a creamy pumpkin filling, and a crunchy oat topping. They are a simple dessert for fall.
Ingredients
- 1 1/2 cups all-purpose flour
- 1/2 cup granulated sugar
- 1/2 cup cold butter, cubed
- 1 cup pumpkin puree
- 2 large eggs
- 1/2 cup brown sugar
- 1 teaspoon pumpkin pie spice
- 1/2 teaspoon salt
- 1 cup rolled oats
- 1/4 cup all-purpose flour (for crumble)
- 1/4 cup cold butter, cubed (for crumble)
Instructions
- Preheat your oven to 350°F. Line a 9×9 inch baking pan with parchment paper.
- Make the crust: Mix flour and granulated sugar. Cut in butter until crumbly. Press firmly into the pan.
- Bake the crust for 15 minutes. Let it cool slightly.
- Make the filling: Whisk pumpkin puree, eggs, brown sugar, pumpkin pie spice, and salt until smooth. Pour over the crust.
- Make the crumble: Combine oats, flour, and brown sugar. Cut in butter until clumpy. Sprinkle over the filling.
- Bake for 30 to 35 minutes, until the filling is set and the crumble is golden. Cool completely before cutting into bars.
Notes
- Use canned pumpkin puree, not pumpkin pie mix.
- You can substitute gluten-free flour if needed.
- Store bars in the refrigerator for up to 5 days.
- Prep Time: 20 minutes
- Cook Time: 45 minutes
- Category: Dessert
- Method: Baking
- Cuisine: American
Nutrition
- Serving Size: 1 bar
- Calories: 250
- Sugar: 15g
- Sodium: 150mg
- Fat: 10g
- Saturated Fat: 5g
- Unsaturated Fat: 4g
- Trans Fat: 0g
- Carbohydrates: 35g
- Fiber: 2g
- Protein: 3g
- Cholesterol: 30mg