
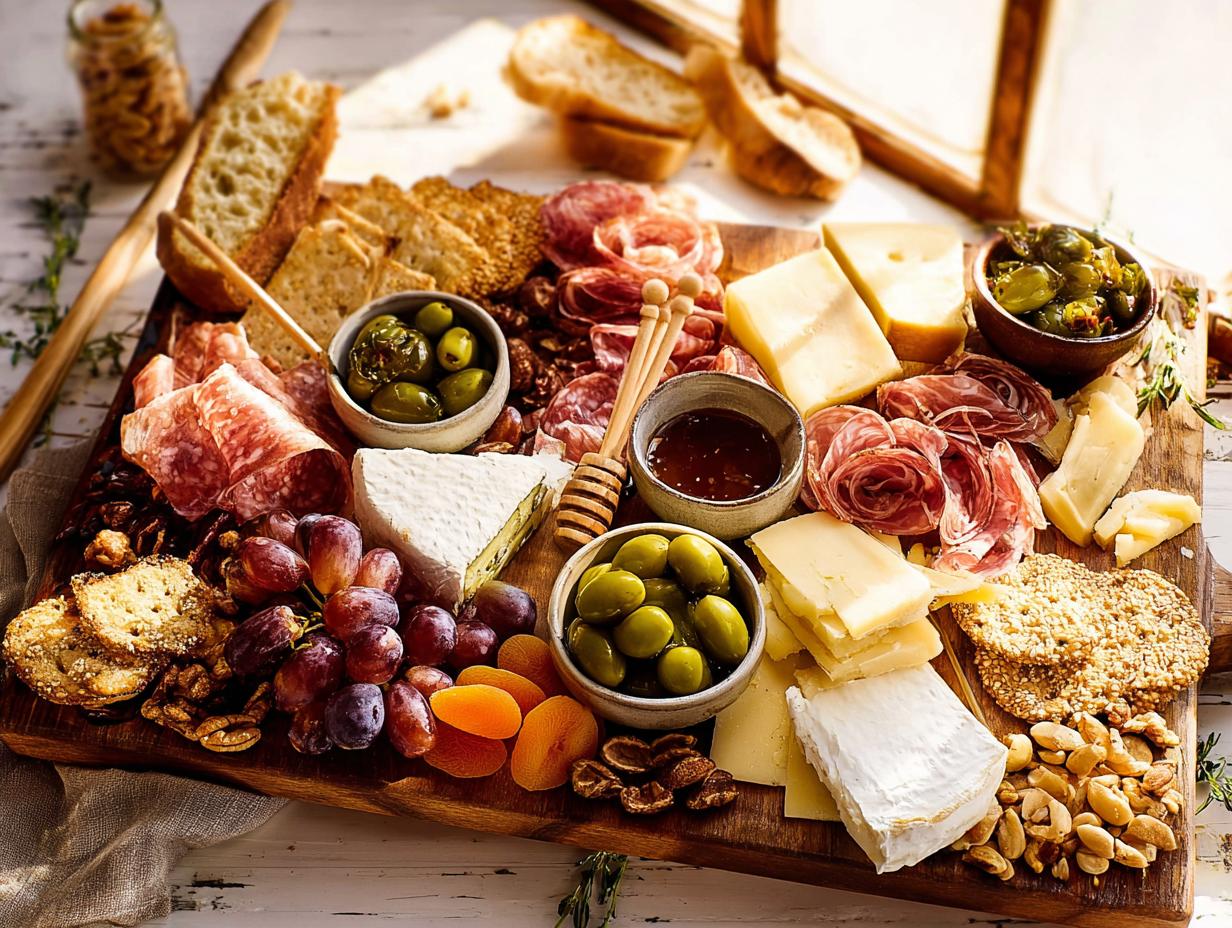
I still remember the first time I threw a last-minute get-together and panicked about what to serve. That’s when I discovered the magic of a charcuterie board. Seriously, it’s the ultimate party trick: no cooking required, totally flexible based on what you have, and it looks like you spent hours on it. With just a few simple guidelines, anyone can build a stunning charcuterie board that wows guests. Trust me, I’ve put together hundreds of these for everything from casual movie nights to holiday parties, and it never fails to impress.
Why a Charcuterie Board is Your Best Party Option
- It’s lightning fast. No cooking, no oven timer—just arrange and go. You can throw this together in 15 minutes flat.
- Totally customizable. Use whatever meats, cheeses, or snacks you have on hand. It adapts to any crowd or craving.
- Looks like a million bucks. A board piled high with colorful ingredients is naturally stunning. Guests always think you went all out.
- Minimal clean-up. No pots, no pans, no greasy mess. Just grab a board and maybe wipe it down after. Easy peasy.
Tools You Need for a Beautiful Charcuterie Board
You don’t need anything fancy to get started. I usually grab a large wooden board or even just a big platter—anything flat works. A couple of small bowls are great for sticky things like olives or honey, and a few cheese knives make serving easier. Honestly, none of this is mandatory; I’ve used a cutting board and ramekins in a pinch and it still looked gorgeous.
Ingredients for Your Charcuterie Board
Let’s get specific here—I’ve seen too many boards fall flat because someone just threw random stuff on there. For a solid board that feeds about six, you’ll want about 8 ounces of thinly sliced cured meats—think salami, prosciutto, or soppressata. For cheese, grab 8 ounces total of a mix: a hunk of sharp cheddar (hard), a wedge of brie (soft), and a block of gouda (semi-hard). Then round it out with 1/2 cup pitted olives, 1/2 cup raw almonds or walnuts, 1/2 cup dried apricots or figs, 1/4 cup runny honey or fig jam, a sliced baguette or a box of water crackers, and 1 cup fresh grapes or berries. But hey, this is your board—swap in whatever you love. That’s the beauty of it.
How to Build a Perfect Charcuterie Board in Six Steps
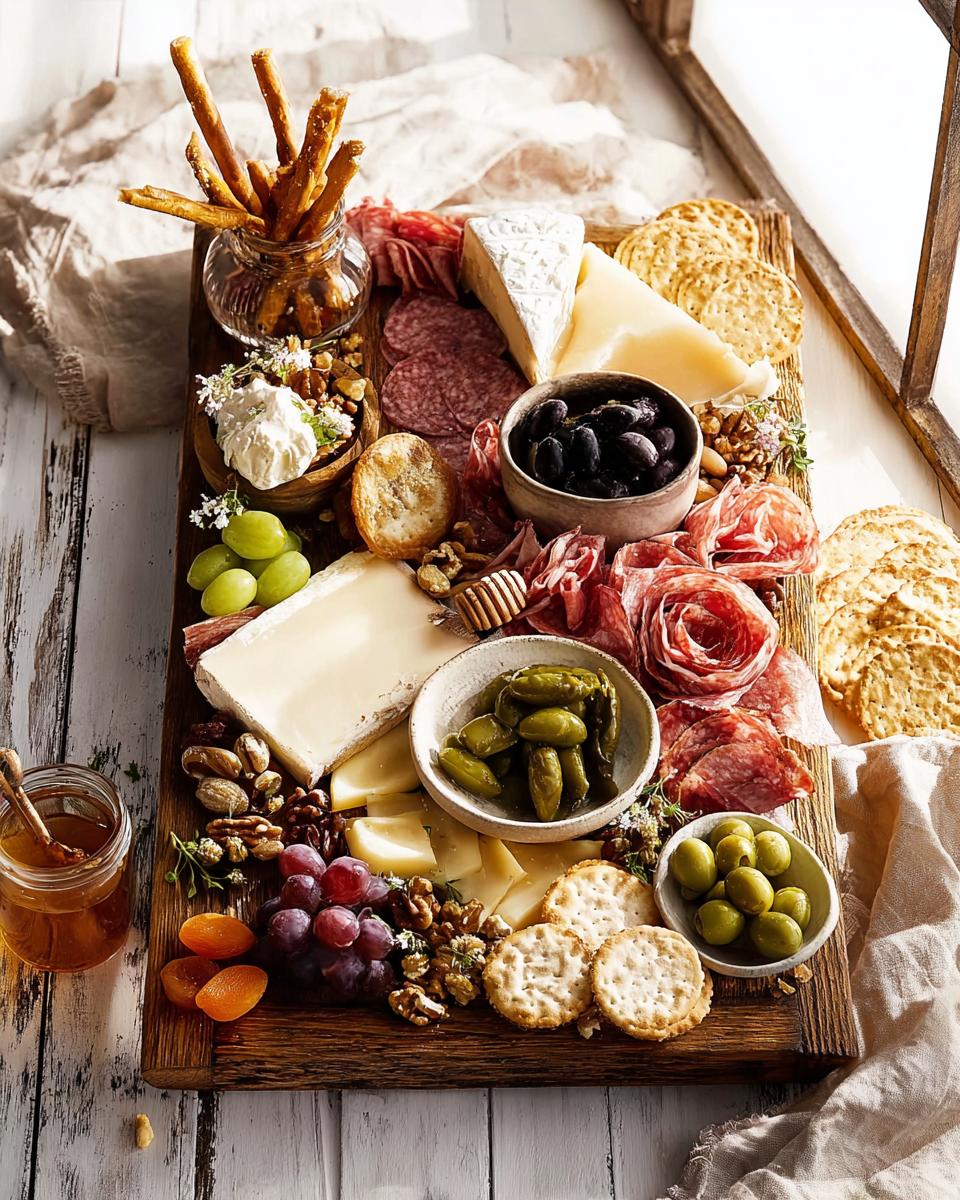
Alright, here’s the fun part—actually putting it all together. I’ve broken this down into simple steps so you don’t end up with a chaotic mess. Follow these, and your board will look like it came straight out of a magazine. Plus, you can do this in under 15 minutes if you move quick.
Step 1: Arrange Your Bowls
Start with your small bowls. I place them on the board first for anything loose or sticky—olives, nuts, honey, that sort of thing. This gives your board some structure and keeps everything tidy. Trust me, trying to wedge bowls in later is a pain, so do it now.
Step 2: Place Your Cheeses
Next, put your cheeses in different corners of the board. I like to space them out so people can reach them easily without reaching across the whole board. Put the block of cheddar in one spot, the brie wedge in another, and the gouda block somewhere else. Gives the eye a place to wander.
Step 3: Add the Cured Meats for Your Charcuterie Board
Now for the meats. I fold each slice of salami in half and line them up in a neat row—looks clean and professional. For prosciutto, I drape it in loose ribbons, almost like little waves. Place these near the cheeses so people can grab them together. I love how the folds add texture.
Step 4: Fill the Gaps
Finally, fill in all the empty spaces with clusters of crackers, slices of baguette, dried fruits, and fresh grapes. I aim for an abundant, full look—like you spilled a cornucopia on the board. But don’t over-crowd; you want people to actually pick stuff up without knocking everything over. A little breathing room is good.
Frequently Asked Questions About a Charcuterie Board
Can I make a charcuterie board ahead of time?
Oh, absolutely! I do this all the time when I’m hosting. You can prep everything except the bread and crackers up to about 2 hours ahead. Just cover the board loosely with plastic wrap and pop it in the fridge. Then pull it out about 30 minutes before serving so your cheeses soften up. Makes party day so much easier.
How much food do I need per person?
If the board is your main appetizer, I usually plan for about 3 to 4 ounces of meat and the same for cheese per person. For lighter snacking or if you have other dishes, you can scale back a bit. Honestly, it’s always better to have a little extra than to run out.
What if I cannot find specific meats?
Don’t stress over it at all! That’s the beauty of this party food. If you can’t find salami or prosciutto, just swap in whatever cured meat you like—capicola, pepperoni, even a simple roast beef works great. A charcuterie board is super flexible, so use what’s available.
How do I keep the cheese from drying out?
For a cheese board like this, room temperature is key. Serve your board at room temp and don’t leave it out for more than 2 hours. For leftovers, wrap the cheese tightly in wax paper first, then pop it in a ziplock bag in the fridge. That keeps it perfect for days.
Tips for Making Your Charcuterie Board Look Professional
I’ve picked up a few tricks over the years that really elevate a board without any extra fuss. These little details make it look like you spent ages planning when it honestly took just a few extra seconds.
Let the cheese sit out. Pull it from the fridge about 30 minutes before you start arranging. Cold cheese is like a locked box of flavor—at room temperature, it gets creamy and tastes so much better.
Use fresh herbs for a garnish. I always tuck a few sprigs of rosemary around the board. That pop of green instantly makes it look intentional and fancy, plus it smells lovely.
Create height by folding meats. Flat slices just look lazy. Take a moment to fold each slice of salami in half or drape prosciutto in loose ribbons. It adds beautiful texture and makes the board feel abundant.
Use a variety of colors. It’s easy to end up with a beige board. Throw in some deep purple grapes, bright orange dried apricots, or dark blackberries to wake up the whole presentation.
Simple Variations for Your Charcuterie Board
I love switching things up depending on the crowd. For a vegetarian board, just swap out the meats for marinated artichokes and a generous scoop of hummus—it’s still hearty and full of flavor. And if you’re craving something sweet? Go all in with dark chocolate squares, fresh berries, and a few shortbread cookies. Perfect for dessert or a lazy afternoon. For more dessert inspiration, check out these dessert recipes.
Nutritional Information
I always include this as a heads-up—the numbers you see are an estimate from a third-party calculator, based on the ingredients I listed. Real life is messier, so actual values will shift depending on your exact brands and how generously you pile your board. Just keep that in mind!
How to Store Leftovers from Your Charcuterie Board
So you’ve got leftovers from your charcuterie board? Lucky you. Here’s what I do to keep everything tasting fresh. First, separate your meats from your cheeses—don’t let them hang out together in the fridge. Wrap each cheese in wax paper (plastic wrap makes it sweat), then pop it in a ziplock bag. For the meats, an airtight container works best. And crackers? Store them in a dry container so they stay crunchy. Trust me, a little effort goes a long way. Your charcuterie board leftovers will taste great tomorrow.
Share Your Creation
Okay, now it’s your turn! Drop a comment below and let me know how your charcuterie board turned out. And if you loved it, a quick rating really helps me out. Oh, and please tag me on social media when you share a photo—I seriously love seeing your versions!
Print
5 Tips for a Stunning Charcuterie Board
- Total Time: 15 minutes
- Yield: 6 servings 1x
- Diet: Low Lactose
Description
A charcuterie board is a simple and elegant way to serve cured meats, cheeses, and accompaniments. You can customize it for any occasion.
Ingredients
- 8 ounces assorted cured meats (salami, prosciutto, soppressata)
- 8 ounces assorted cheeses (cheddar, brie, gouda)
- 1/2 cup olives
- 1/2 cup nuts (almonds, walnuts)
- 1/2 cup dried fruits (apricots, figs)
- 1/4 cup honey or jam
- 1 baguette or crackers
- Fresh grapes or berries
Instructions
- Choose a large board or platter.
- Place small bowls for olives, nuts, and honey on the board.
- Arrange cheeses in different spots on the board.
- Fold or roll the cured meats and place them next to the cheeses.
- Fill gaps with crackers, bread, dried fruits, and fresh fruits.
- Serve immediately.
Notes
- Use a mix of textures and flavors for variety.
- Let cheeses sit at room temperature for 30 minutes before serving.
- Add fresh herbs for garnish.
- Prep Time: 15 minutes
- Cook Time: 0 minutes
- Category: Appetizer
- Method: No-cook
- Cuisine: French
Nutrition
- Serving Size: 1 serving (about 1/6 of board)
- Calories: 350
- Sugar: 12g
- Sodium: 800mg
- Fat: 22g
- Saturated Fat: 10g
- Unsaturated Fat: 10g
- Trans Fat: 0g
- Carbohydrates: 20g
- Fiber: 3g
- Protein: 18g
- Cholesterol: 50mg