
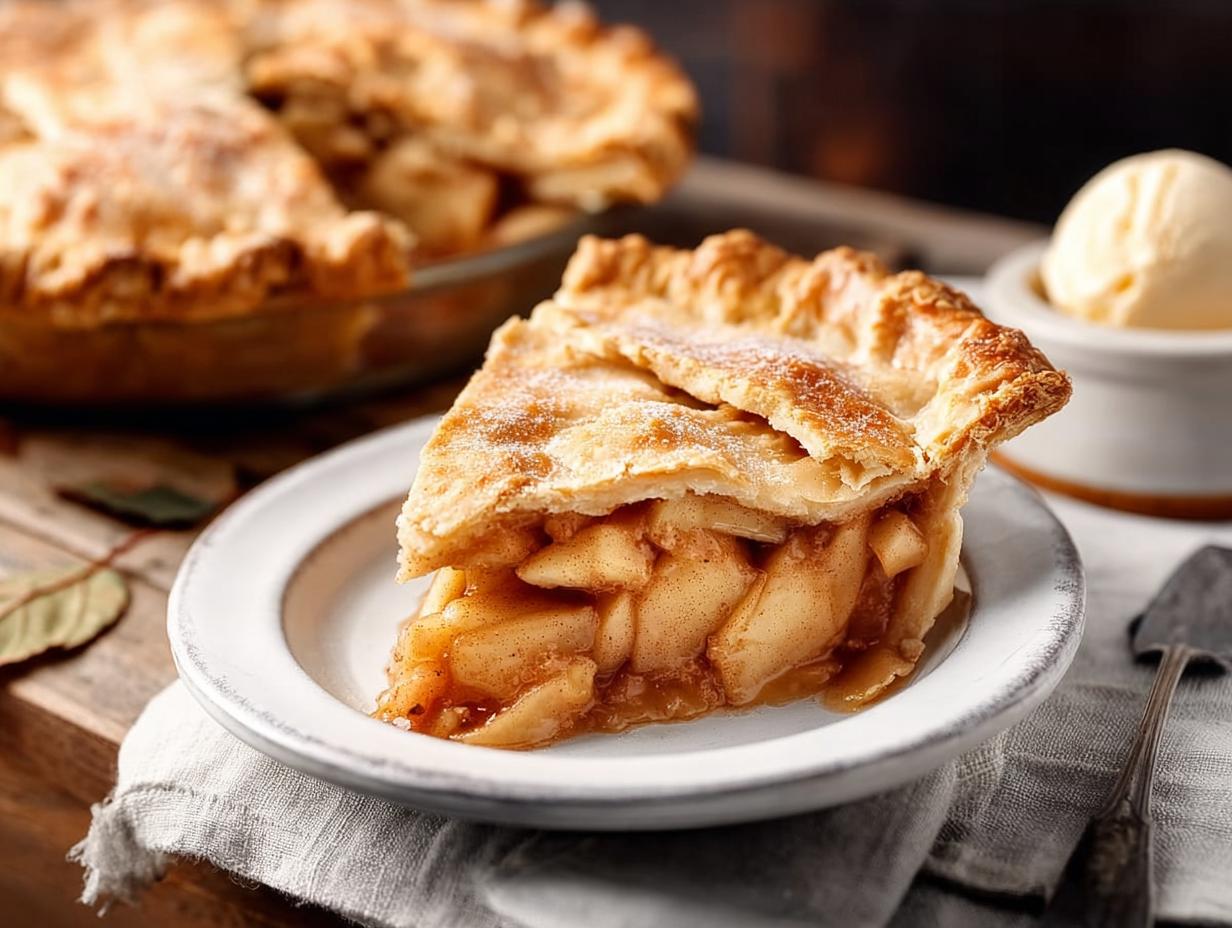
There’s nothing quite like the smell of a homemade apple pie wafting through the kitchen, is there? It’s pure comfort in a dish, and this apple pie recipe is the one I turn to again and again. I’m talking about a pie with a crust so flaky and buttery it practically melts in your mouth, cradling a filling of tender, spiced apples that are just sweet enough.
I can still picture my grandma teaching me to roll out the dough on her floured countertop, her hands gentle but sure. She’d always say, “Don’t overwork it, honey – a light touch makes all the difference.” That memory is baked into every pie I make. This recipe is built on that same simple wisdom. You get all the cozy, nostalgic flavor without any fussy techniques. It’s the kind of dessert that makes any day feel special, and I’m so excited to share it with you.
Why You’ll Love This Apple Pie
Trust me when I say this apple pie is everything you want in a dessert. It’s simple enough for a beginner but impressive enough for a holiday table. Here’s why it always works:
- Simple ingredients, big flavor. You probably have most of these in your kitchen right now. No fancy equipment, no hard-to-find items—just honest, classic baking.
- A foolproof, flaky crust. Cold butter and a light touch give you that golden, tender crust every single time. It’s forgiving, too, so don’t stress.
- Perfectly spiced, tender filling. The cinnamon and nutmeg warm your soul, while the apples hold their shape beautifully. It’s juicy but never soupy.
- A guaranteed crowd-pleaser. Bring this to any gathering and watch it disappear. I’ve never met a slice that didn’t get devoured.
Ingredients for Apple Pie
Here’s everything you’ll need for this classic apple pie. I’ve kept it straightforward because that’s how baking should feel.
- 2 1/2 cups all-purpose flour
- 1 teaspoon salt
- 1 cup cold butter, cubed (that’s 2 sticks, straight from the fridge)
- 6 to 8 tablespoons ice water
- 6 cups sliced peeled apples (such as Granny Smith—about 6 medium apples)
- 3/4 cup granulated sugar
- 2 tablespoons all-purpose flour (for the filling)
- 1 teaspoon ground cinnamon
- 1/4 teaspoon ground nutmeg
- 1 tablespoon lemon juice (fresh is best!)
- 1 large egg, beaten (for that golden wash on top)
Apple Pie Ingredient Notes
Every ingredient here does a specific job, and understanding why makes you a better baker. Cold butter is non-negotiable for that flaky crust—when it melts in the oven, it creates those tiny, tender pockets. Lemon juice does double duty: it keeps your apple slices from turning brown while you work, and its acidity balances the sweetness perfectly. As for the apples, Granny Smith are my go-to because their tartness holds up against the sugar and spices, giving you a filling that’s bright, not cloying. For more on apple varieties and their uses in baking, check out this guide to the best apples for pie.
Substitutions for Apple Pie
Need to tweak things? No problem. You can swap half the Granny Smiths for Honeycrisp or Fuji for a sweeter, more complex filling. For a gluten-free crust, use a 1:1 gluten-free baking flour blend—just add an extra tablespoon of ice water since those flours tend to be thirstier. If you’re dairy-free, substitute the butter with cold coconut oil or a plant-based butter stick; the key is keeping it cold. These swaps work, I’ve tested them myself.
How to Make Apple Pie Step by Step
Alright, let’s get our hands a little floury! I’m going to walk you through each part of making this apple pie, from dough to golden crust. Trust the process—it’s simpler than it looks, and I’ll point out the little tricks that make all the difference. We’ll break it into three clear steps: the dough, the filling, and the assembly. Ready? Let’s bake.
Making the Apple Pie Dough
Start by whisking together your flour and salt in a big bowl. Now grab that cold butter—it needs to be straight from the fridge, nice and firm. Drop the cubes into the flour and use a pastry blender (or two knives) to cut the butter in until the mixture looks like coarse meal, with some pea-sized butter lumps still visible. That’s your flakiness insurance right there. Slowly drizzle in the ice water, a tablespoon at a time, tossing with a fork until the dough just holds together when squeezed. Don’t overmix or you’ll get a tough crust. Divide the dough in half, flatten into disks, wrap tightly, and pop them in the fridge for at least 1 hour. This chill is non-negotiable—it relaxes the gluten and keeps the butter cold.
Preparing the Apple Pie Filling
While your dough chills, let’s deal with the apples. In a large bowl, toss those sliced apples with the sugar, the 2 tablespoons of flour, cinnamon, nutmeg, and lemon juice. Use your hands or a big spoon—just make sure every slice is evenly coated. I like to let the apples sit for about 10 minutes while the oven preheats; it helps the sugar draw out some moisture, which concentrates the flavor. You can even do this step a little earlier and set the bowl aside. The filling comes together in minutes, and the smell of cinnamon already has me smiling.
Assembling and Baking the Apple Pie
Preheat your oven to 375°F (190°C). Lightly flour your work surface and roll one dough disk into a 12-inch circle—about 1/8-inch thick. Gently lift it into your 9-inch pie plate, letting the edges hang over. Pile in all that beautiful apple filling, mounding it slightly in the center. Roll out the second dough disk and lay it over the filling. Press the edges together, then trim and crimp however you like—I use my thumb and forefinger for a classic ruffled edge. Cut a few slits in the top for steam (a sharp knife works fine). Brush the top with your beaten egg. Bake for 50 minutes, until the crust is golden brown and you see the filling bubbling through the slits. Here’s the hardest part: let it cool on a wire rack for at least 2 hours. I know, the smell is torture, but that cooling time lets the filling set so your slices hold together.
Tips for the Perfect Apple Pie
Getting that apple pie just right comes down to a few little tricks I’ve learned over the years. Here are my top tips to make sure yours turns out golden, flaky, and absolutely delicious:
- Keep everything cold. Your butter, your water, even your bowl if your kitchen’s warm. A cold dough means a flaky crust – when the butter melts in the oven, it creates those lovely layers. If the dough gets sticky, pop it back in the fridge for 10 minutes.
- Prevent a soggy bottom. Bake your pie on a preheated baking sheet – that extra heat from below helps the bottom crust crisp up. I also like using a glass pie dish; you can actually see when the bottom is golden brown. Another trick: brush the bottom crust with a little beaten egg white before adding the filling.
- Use a pie shield (or foil). The edges of your crust brown faster than the rest. To keep them from burning, cover them with a pie shield or strips of aluminum foil halfway through baking. Remove it for the last 10 minutes to let everything get evenly golden.
- Let it rest. I know it’s hard to wait, but letting that apple pie cool for at least 2 hours is non-negotiable. The filling needs time to set, or your slices will turn into a delicious but messy puddle.
Essential Tools for Apple Pie
You don’t need a fancy kitchen, but a few basics make everything easier: a 9-inch pie plate (glass is my favorite), a rolling pin, a pastry blender or food processor for cutting in butter, a sharp knife for slits, a pastry brush for the egg wash, and a wire rack for cooling. That’s it!
Pro Tips for Apple Pie Filling
Here’s my secret for a perfectly thick, not-runny filling: after tossing the apples with sugar and spices, let them sit for 15–20 minutes. You’ll see liquid pooling at the bottom – drain that off before piling the apples into the crust. It prevents a soggy pie and concentrates the apple flavor. Also, don’t use just one type of apple. A mix of tart (Granny Smith) and sweet (Honeycrisp or Fuji) gives you the best depth of flavor and texture in every bite of your apple pie.
Apple Pie Variations to Try
Once you’ve mastered the classic, it’s so fun to play around a little. I love having a few twists up my sleeve for when I’m feeling adventurous or want to surprise my family. Here are a couple of my favorite ways to change up this apple pie—each one keeps that same amazing filling but gives it a whole new personality.
Apple Crumble Pie Variation
Sometimes I’m just not in the mood to roll out a top crust, you know? That’s when I go for the crumble. Mix together 1/2 cup flour, 1/2 cup rolled oats, 1/2 cup brown sugar, and 1/4 cup cold butter cut in until crumbly. Sprinkle it over the filling instead of the second crust. Bake as directed, but keep an eye on the topping—if it’s browning too fast, tent loosely with foil for the last 15 minutes. Pure comfort.
Spiced Apple Pie with Cardamom
If you want something a little different but still cozy, try adding 1/2 teaspoon of ground cardamom to your cinnamon and nutmeg. It gives the filling this warm, slightly floral lift that’s absolutely gorgeous. I first tried it on a whim one fall and now I can’t go back. It pairs beautifully with the apples without overpowering them. One tiny change, huge payoff.
Serving Suggestions for Apple Pie
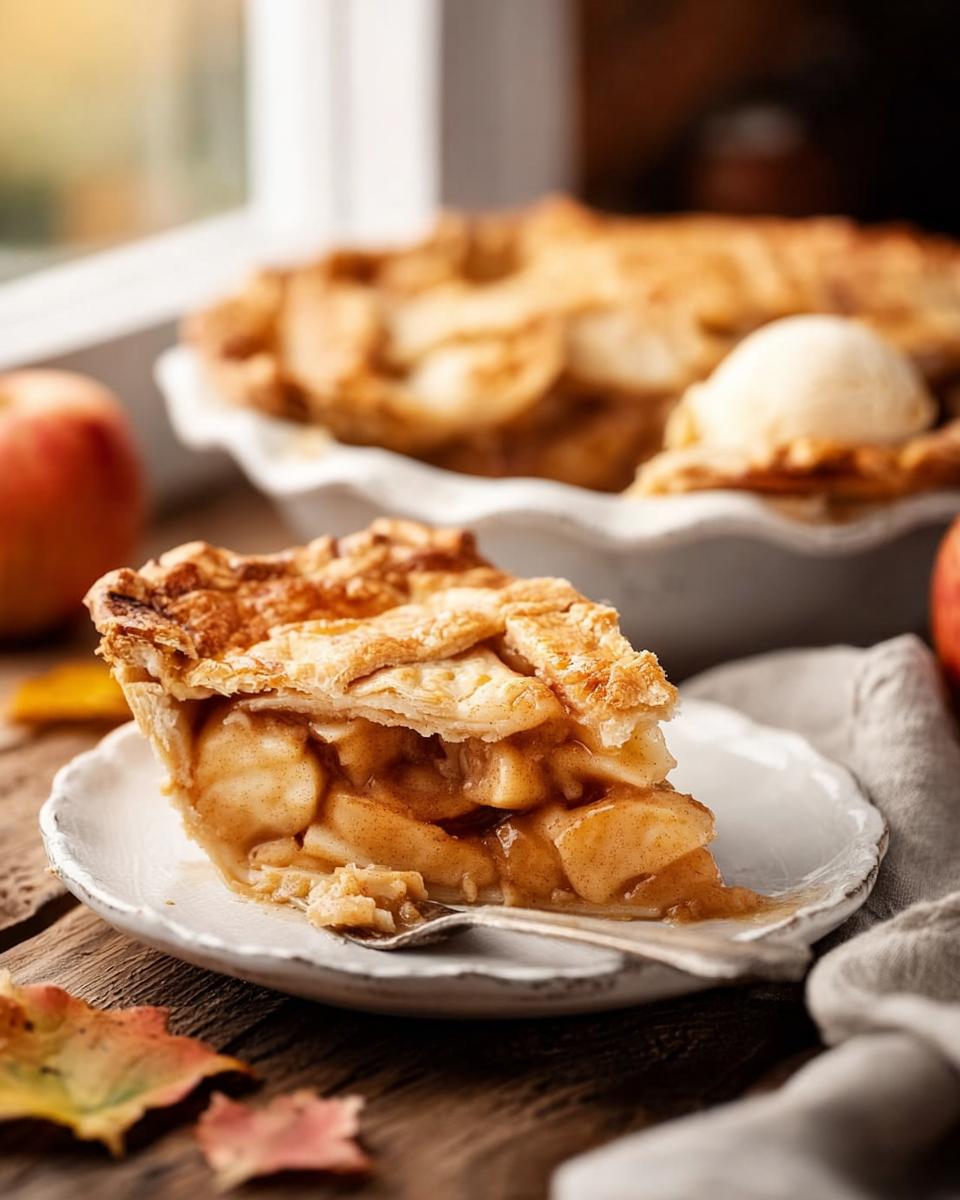
In my house, this apple pie is practically a holiday all on its own, but it shines especially bright at Thanksgiving and Christmas dinners. My absolute favorite way to serve it is warm, with a big scoop of vanilla ice cream melting into the cracks. Whipped cream is lovely too, and if you’re feeling bold (like my grandpa), a thin slice of sharp cheddar cheese alongside is a classic, salty contrast that’s surprisingly perfect. It’s just as welcome at a casual Sunday supper as it is at a festive gathering – the real question is whether there will be leftovers.
How to Store and Reheat Apple Pie
So you’ve got leftover apple pie – or maybe you made it a day ahead on purpose. Either way, keeping it fresh is easy. I just cover it loosely with foil or plastic wrap and leave it right on the counter for up to 2 days. If you need longer, pop it in the fridge (covered) – it’ll stay good for up to 5 days.
For reheating, skip the microwave (it’ll make the crust soggy). Instead, warm slices in a 300°F oven for 10–15 minutes. The crust gets crispy again and the filling turns all warm and gooey. Want to freeze it? Wrap the whole pie tightly in a layer of plastic wrap then foil. It’ll keep for up to 3 months. Thaw overnight in the fridge and reheat as usual. That apple pie is always ready when you are.
Apple Pie Nutritional Information
Curious about what’s in a slice? Based on my recipe, each serving of this apple pie is estimated at around 350 calories, 15g fat, 55g carbs, and 3g protein. Of course, these numbers can shift a bit depending on your exact apples or brand of butter—no two pies are exactly alike! I always say, it’s made with love, so enjoy every bite.
Frequently Asked Questions About Apple Pie
Can I use frozen pie crust for this Apple Pie?
Sure, you can! If you’re short on time, a frozen crust works in a pinch. Just thaw it according to the package directions before you fill it. That said, homemade crust really does give you that incredible flakiness and buttery flavor that makes this apple pie something special. But I get it – we’ve all been there, and it’ll still be delicious.
Why is my Apple Pie runny?
That’s almost always from extra moisture in the apples. I like to let my sliced apples sit with the sugar and spices for about 15 minutes, then drain off all that liquid before I pile them into the crust. You can also stir in a tablespoon of cornstarch or instant tapioca – it’ll thicken the filling as it bakes and keep your slices neat.
How do I prevent a soggy bottom crust?
A few tricks do the trick! First, bake your pie on a preheated baking sheet – that direct heat helps the bottom crisp up. I also swear by a glass pie dish so I can actually see when the crust is golden. And brushing the bottom crust with a little beaten egg white before adding the filling creates a nice barrier. No more sogginess!
What is the best apple for Apple Pie?
I’m all about Granny Smith for that tartness and firm texture – they hold their shape beautifully. But honestly, a mix is your best bet. Try half Granny Smith and half Honeycrisp or Fuji for sweetness and complexity. Just stay away from Red Delicious; they turn mushy. That combo makes your apple pie truly shine.
Your Turn to Bake This Apple Pie
I can’t wait to hear how yours turns out! Drop a comment below, rate the recipe, or tag me in your photos—I love seeing your bakes. Let us know how your Apple Pie turned out!
Print
Foolproof 2-Hour Apple Pie
- Total Time: 1 hour 20 minutes
- Yield: 8 servings 1x
- Diet: Vegetarian
Description
A classic apple pie with a buttery crust and spiced apple filling. Perfect for dessert or any occasion.
Ingredients
- 2 1/2 cups all-purpose flour
- 1 teaspoon salt
- 1 cup cold butter, cubed
- 6 to 8 tablespoons ice water
- 6 cups sliced peeled apples (such as Granny Smith)
- 3/4 cup granulated sugar
- 2 tablespoons all-purpose flour
- 1 teaspoon ground cinnamon
- 1/4 teaspoon ground nutmeg
- 1 tablespoon lemon juice
- 1 egg, beaten (for wash)
Instructions
- Mix flour and salt. Cut in butter until coarse crumbs form. Add ice water gradually, tossing with a fork until dough holds together.
- Divide dough in half. Flatten into disks, wrap, and refrigerate for at least 1 hour.
- Preheat oven to 375°F (190°C).
- Combine apples, sugar, flour, cinnamon, nutmeg, and lemon juice in a large bowl. Toss well.
- Roll out one dough disk on a floured surface to 12-inch circle. Place in a 9-inch pie plate.
- Fill with apple mixture.
- Roll out second dough disk. Place over filling. Trim and crimp edges. Cut slits for steam.
- Brush top with beaten egg.
- Bake for 50 minutes, or until golden and filling is bubbly. Cool on wire rack for at least 2 hours before serving.
Notes
- Use a mix of tart and sweet apples for best flavor.
- Refrigerate dough well for flaky crust.
- Serve warm with vanilla ice cream or whipped cream.
- Prep Time: 30 minutes
- Cook Time: 50 minutes
- Category: Dessert
- Method: Baking
- Cuisine: American
Nutrition
- Serving Size: 1 slice
- Calories: 350
- Sugar: 25g
- Sodium: 200mg
- Fat: 15g
- Saturated Fat: 7g
- Unsaturated Fat: 6g
- Trans Fat: 0g
- Carbohydrates: 55g
- Fiber: 3g
- Protein: 3g
- Cholesterol: 20mg