
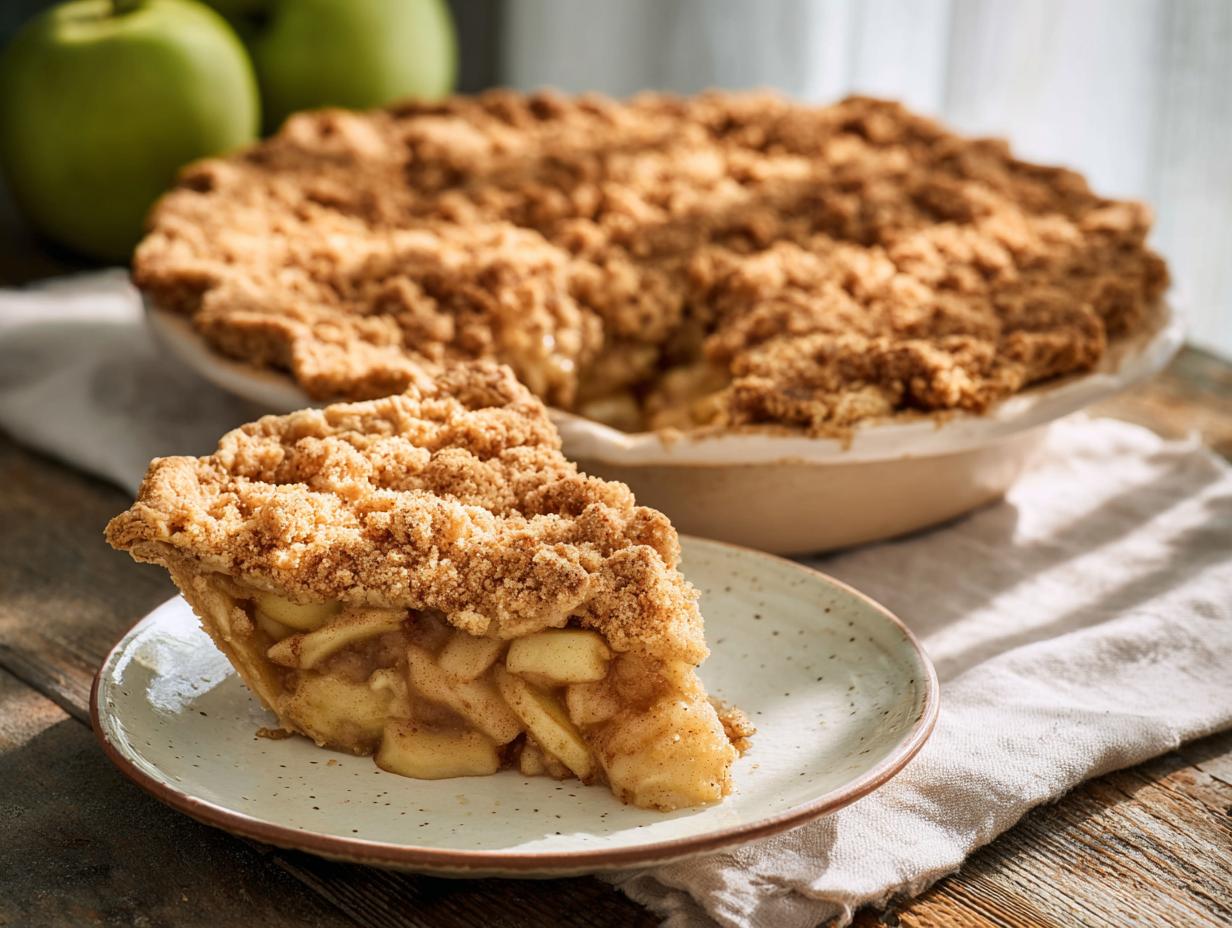
I can still picture my grandmother’s flour-dusted apron as she showed me how to press that buttery crust into the dish. This Old-Fashioned Dutch Apple Pie has always been our family’s favorite, and honestly, that crumb topping is pure genius—so much more forgiving than a fussy double crust, and ten times more delicious. The best tip she ever gave me? Chill your dough for at least 15 minutes. I learned that one the hard way my first time, and trust me, it makes all the difference for a flaky, tender crust.
Why You’ll Love This Old-Fashioned Dutch Apple Pie
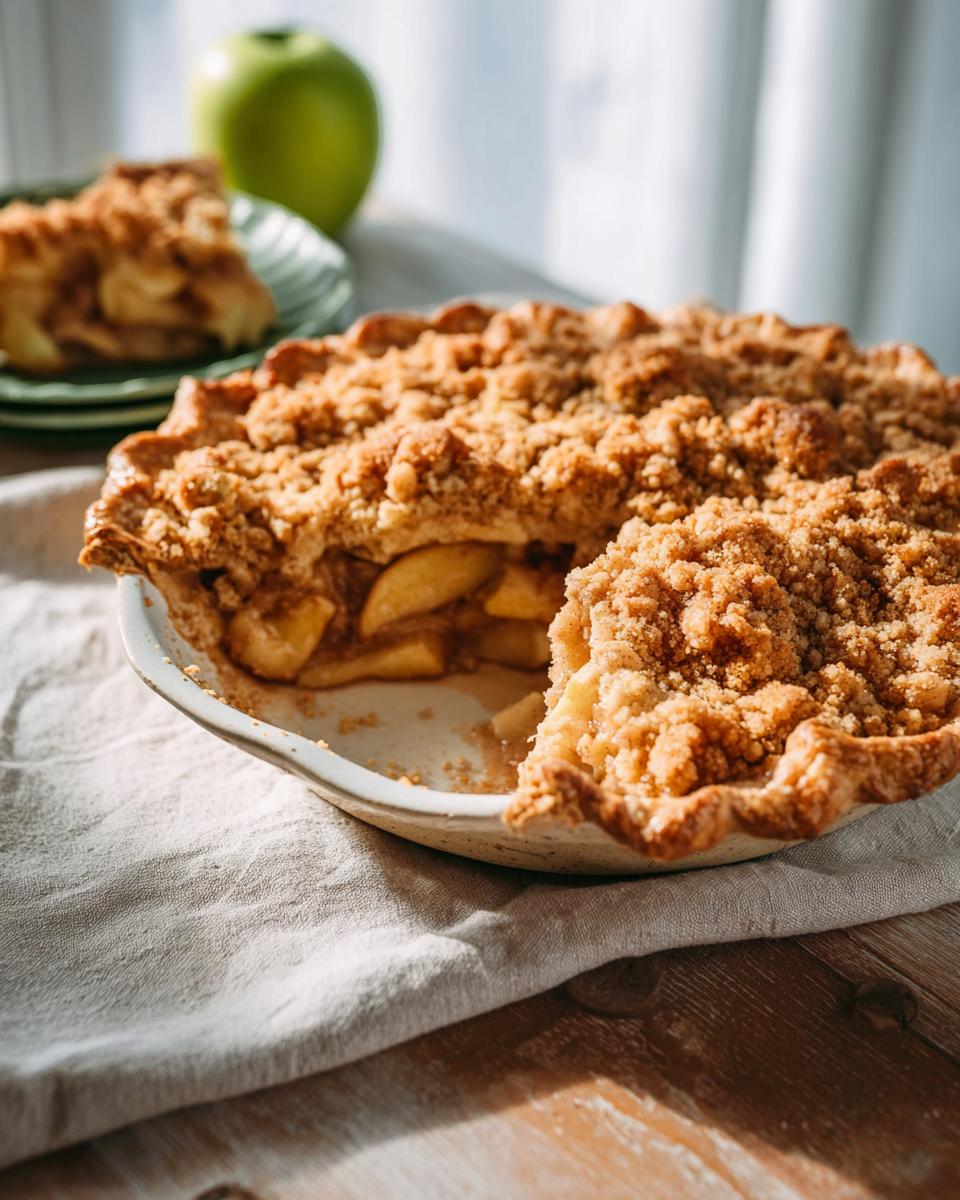
Let me tell you why this pie steals the show every single time. First off, that buttery crumb topping? It’s pure magic—crispy, golden, and way easier than wrestling with a top crust. The spiced apple filling hits all the right notes, warm cinnamon and nutmeg wrapping around tender apple slices like a cozy blanket. And the flaky crust? Oh, it’s that melt-in-your-mouth goodness you dream about. Best part? The technique is surprisingly simple. No fancy skills needed, just a little patience and love. This isn’t just dessert; it’s a hug on a plate, the kind of classic comfort that brings everyone back for seconds (and thirds, if I’m being honest).
Ingredients for Old-Fashioned Dutch Apple Pie
Okay, let’s talk about what you’ll need. I’ve listed everything below, but a few quick notes before you start shopping: make sure your apples are peeled and sliced (not diced—slices hold their shape better). And both the butter for the crust and the topping need to be cold and cubed. Oh, and pack that brown sugar firmly into your measuring cup, or you’ll end up with a dry crumb topping. The flour is split between the crust, the filling, and the topping, so read carefully.
- 2 1/2 cups all-purpose flour
- 1 teaspoon salt
- 1 cup cold unsalted butter, cubed
- 1/4 cup ice water
- 6 cups peeled and sliced apples (Granny Smith or Honeycrisp)
- 3/4 cup granulated sugar
- 2 tablespoons all-purpose flour
- 1 teaspoon ground cinnamon
- 1/4 teaspoon ground nutmeg
- 1 tablespoon lemon juice
- 1 cup all-purpose flour (for topping)
- 1/2 cup packed brown sugar
- 1/2 cup cold unsalted butter, cubed (for topping)
Ingredient Notes and Substitutions for Old-Fashioned Dutch Apple Pie
Let me walk you through a few choices. I always reach for Granny Smith or Honeycrisp apples—they’re tart enough to balance the sugar and hold their shape beautifully when baked. A mix of both gives you the best of both worlds: tangy and sweet, firm and tender. If you want a nuttier, slightly heartier crust, try swapping half the all-purpose flour with whole wheat pastry flour. It adds a lovely depth without making things dense.
Need this dairy-free? No problem. Use cold coconut oil or a good vegan butter in the crust and topping—just keep it cold and work it in the same way. For a gluten-free version, a 1-to-1 gluten-free flour blend (like the one with xanthan gum) works perfectly. I’ve tested it, and the crumb topping stays crisp and the crust stays flaky. Just don’t overmix, and chill everything well. Trust me, these swaps won’t disappoint.
How to Prepare Old-Fashioned Dutch Apple Pie
Alright, let’s get our hands dirty—in the best way possible. Start by preheating your oven to 375°F. I know it’s tempting to skip that step, but trust me, you want it hot and ready when the pie goes in.
First, the crust. In a large bowl, whisk together 2 1/2 cups flour and the salt. Drop in your cold, cubed butter. Now, here’s the fun part: “cut in” the butter using a pastry cutter or just your fingertips. You’re looking for pea-sized crumbs—some bigger, some smaller. That’s what gives you those flaky layers. Drizzle in the ice water, one tablespoon at a time, mixing with a fork until the dough just holds together when you squeeze it. Don’t overwork it! Press it evenly into your 9-inch pie dish, crimp the edges if you’re feeling fancy, then pop it in the fridge for 15 minutes. That chill is non-negotiable—it relaxes the gluten and keeps the butter cold, so your crust stays tender.
While the dough chills, make the filling. In another bowl, toss your sliced apples with the granulated sugar, 2 tablespoons flour, cinnamon, nutmeg, and lemon juice. Give it a good stir—every slice should be coated. Set it aside.
Now for the crumb topping. In a small bowl, mix 1 cup flour with the packed brown sugar. Cut in 1/2 cup cold butter the same way you did for the crust, until the mixture looks like coarse, crumbly sand. Don’t overdo it—you want some clumps for that crunchy texture.
Time to assemble. Pull the chilled crust out of the fridge and pile the apple filling right in. Spread it even, then sprinkle the crumb topping all over, covering every bit of fruit. Place the pie on a baking sheet (trust me, it’ll catch any drips) and slide it into the oven. Bake for 45 to 55 minutes. If the topping starts getting too dark around the 30-minute mark, just tent a piece of foil loosely over the top—no need to seal it.
You’ll know it’s done when the topping is golden brown and the filling is bubbly around the edges. Let it cool on a wire rack for at least 2 hours before slicing. I know, the waiting is the hardest part, but that cooling time lets the filling set so you get clean slices instead of a soupy mess. Patience pays off, I promise.
Equipment You’ll Need
- 9-inch pie dish (glass or metal—both work great)
- Pastry cutter or food processor (or just your hands)
- Baking sheet (to catch drips)
- Mixing bowls (a few different sizes)
- Measuring cups and spoons
- Wire rack for cooling
Tips for Success with Old-Fashioned Dutch Apple Pie
I’ll never forget the first time I got cocky and skipped chilling the dough. The crust shrunk up like a turtle and the butter melted everywhere before the pie even hit the oven. Total disaster. So trust me: keep your butter and water ice cold. It’s the single most important rule for a flaky crust.
Don’t skip tossing those apple slices with lemon juice! It’s not just for flavor—that little tang is lovely—but it stops the apples from turning brown and helps the filling thicken up just right. When you sprinkle on that crumb topping, be generous and make sure every bit of apple is covered. An even layer means every single bite gets that perfect buttery crunch instead of sad, naked spots.
And please, put your pie on a baking sheet before it goes in the oven. This filling gets bubbly and always tries to escape. A sheet saves you from a smoky oven and a messy cleanup. Finally, I know it’s torture, but let the pie cool completely—at least 2 hours. If you cut into it hot, the filling will run right out and your beautiful slices will turn into apple soup. Patience, my friend. It sets up into the most gorgeous, sliceable pie.
Variations on Old-Fashioned Dutch Apple Pie
Once you’ve mastered the classic, it’s so much fun to play around. Here are a few of my favorite twists that keep things interesting without messing with perfection.
Feeling festive? Toss in 1/2 cup dried cranberries or raisins along with the apples. They plump up beautifully in the oven and add little bursts of tart sweetness that make every bite a surprise. I love doing this around the holidays—it feels extra special.
For a little warmth that goes beyond the spices, stir 1 teaspoon of vanilla extract into the apple filling before you pile it into the crust. It sounds simple, but it rounds out all those cozy flavors in a way that makes you go “Mmm, what’s that?”
Want to shake up that crumb topping? Substitute 1/4 cup of the brown sugar with an equal amount of old-fashioned oats. It gives the topping a slightly heartier, almost granola-like crunch that I’m completely obsessed with. Just keep the butter and flour amounts the same, and you’re golden.
And if you’ve got a mix of apples and pears sitting on your counter, go for it! Swap about half the apples for firm, ripe pears (Bosc or Bartlett work great). The pears add a delicate sweetness and a softer texture that pairs beautifully with the cinnamon. Just don’t use overripe pears, or your filling might get a little too juicy.
Serving Suggestions for Old-Fashioned Dutch Apple Pie
Here’s my absolute favorite way to enjoy this pie: warm, with a big scoop of vanilla ice cream melting into that crumb topping. The cold creaminess against the warm spiced apples? Pure heaven. A dollop of whipped cream works beautifully too, or even a drizzle of caramel sauce if you’re feeling extra indulgent. And don’t forget the drink—a steaming mug of hot coffee or a cup of spiced cider makes the perfect companion. Honestly, any excuse to linger over a slice is a good one in my book.
Frequently Asked Questions
I get these questions all the time, so let me save you some head-scratching.
Can I use different apples?
Absolutely! A mix of tart and sweet is my go-to. Granny Smith brings that tangy bite, while Honeycrisp or Fuji add natural sweetness. The combination gives your apple pie filling layers of flavor that sing in every bite.
Can I make this pie ahead?
You bet. Bake it, let it cool completely, then wrap it up and pop it in the fridge for up to 2 days. When you’re ready, just reheat slices in a 350°F oven for 10 minutes. The crumb topping stays crisp, and the filling sets perfectly overnight—honestly, it might taste even better the next day.
Why is my crust tough?
Ugh, I’ve been there. Two culprits usually: you overworked the dough, or you didn’t add enough water. Overmixing develops too much gluten, making that pie crust tough instead of tender. Next time, mix just until it holds together, and make sure your butter stays cold. A little tenderness goes a long way.
Can I freeze the pie?
Yes! You can freeze it unbaked or baked. Wrap it tightly in plastic wrap then foil—no air sneaking in. If unbaked, bake straight from frozen, adding about 15 minutes to the time. If baked, thaw overnight in the fridge and reheat as usual. I always stash one in the freezer for emergencies. You know, pie emergencies.
Storing and Reheating Your Dutch Apple Pie
So you’ve got leftover pie—lucky you! Here’s how to keep it tasting amazing. You can leave it at room temperature, loosely covered, for up to 2 days. Any longer and I’d pop it in the fridge, where it’ll stay happy for about 5 days.
When you’re ready for another slice, here’s my trick: reheat individual slices in a 350°F oven for about 10 minutes. The crumb topping gets all crispy again, and the filling warms through perfectly. In a pinch, the microwave works too—30 seconds is plenty. Just don’t try reheating the whole pie in the microwave, or you’ll end up with a soggy, sad crust. Trust me, I’ve made that mistake.
Nutritional Information for Old-Fashioned Dutch Apple Pie
Here’s the scoop on what you’re getting per slice (that’s 1/8 of the pie, in case you’re counting). Each serving runs about 450 calories, 20 grams of fat, 60 grams of carbs, and 4 grams of protein. Keep in mind these are estimates—they’ll shift a little depending on the brands you use and any swaps you make. But honestly, some things are worth every single bite.
If you tried this Old-Fashioned Dutch Apple Pie, please leave a rating and comment below. Your feedback helps others and means the world to me.
Print
Old-Fashioned Dutch Apple Pie: 1 Secret to Flaky Crust
- Total Time: 1 hour 20 minutes
- Yield: 1 pie (8 servings) 1x
- Diet: Vegetarian
Description
A classic Dutch apple pie with a buttery crust, spiced apple filling, and a crisp crumb topping. This old-fashioned dessert is perfect for holidays or any comforting meal.
Ingredients
- 2 1/2 cups all-purpose flour
- 1 teaspoon salt
- 1 cup cold unsalted butter, cubed
- 1/4 cup ice water
- 6 cups peeled and sliced apples (Granny Smith or Honeycrisp)
- 3/4 cup granulated sugar
- 2 tablespoons all-purpose flour
- 1 teaspoon ground cinnamon
- 1/4 teaspoon ground nutmeg
- 1 tablespoon lemon juice
- 1 cup all-purpose flour (for topping)
- 1/2 cup packed brown sugar
- 1/2 cup cold unsalted butter, cubed (for topping)
Instructions
- Preheat your oven to 375°F (190°C).
- In a large bowl, mix 2 1/2 cups flour and salt. Cut in 1 cup cold butter until mixture resembles coarse crumbs. Add ice water, 1 tablespoon at a time, until dough holds together. Press into a 9-inch pie dish. Chill for 15 minutes.
- In another bowl, combine sliced apples, granulated sugar, 2 tablespoons flour, cinnamon, nutmeg, and lemon juice. Toss to coat. Set aside.
- For the crumb topping, mix 1 cup flour and brown sugar. Cut in 1/2 cup cold butter until crumbly.
- Pour apple filling into the chilled crust. Sprinkle crumb topping evenly over the apples.
- Place pie on a baking sheet to catch drips. Bake for 45 to 55 minutes, until topping is golden and filling is bubbly. If topping browns too quickly, cover loosely with foil.
- Cool on a wire rack for at least 2 hours before serving.
Notes
- Use a mix of tart and sweet apples for best flavor.
- Chill the dough and butter well for a flaky crust.
- Let the pie cool completely to allow the filling to set.
- Serve warm with vanilla ice cream or whipped cream.
- Prep Time: 30 minutes
- Cook Time: 50 minutes
- Category: Dessert
- Method: Baked
- Cuisine: Dutch
Nutrition
- Serving Size: 1 slice (1/8 of pie)
- Calories: 450
- Sugar: 30g
- Sodium: 200mg
- Fat: 20g
- Saturated Fat: 10g
- Unsaturated Fat: 8g
- Trans Fat: 0g
- Carbohydrates: 60g
- Fiber: 3g
- Protein: 4g
- Cholesterol: 30mg