
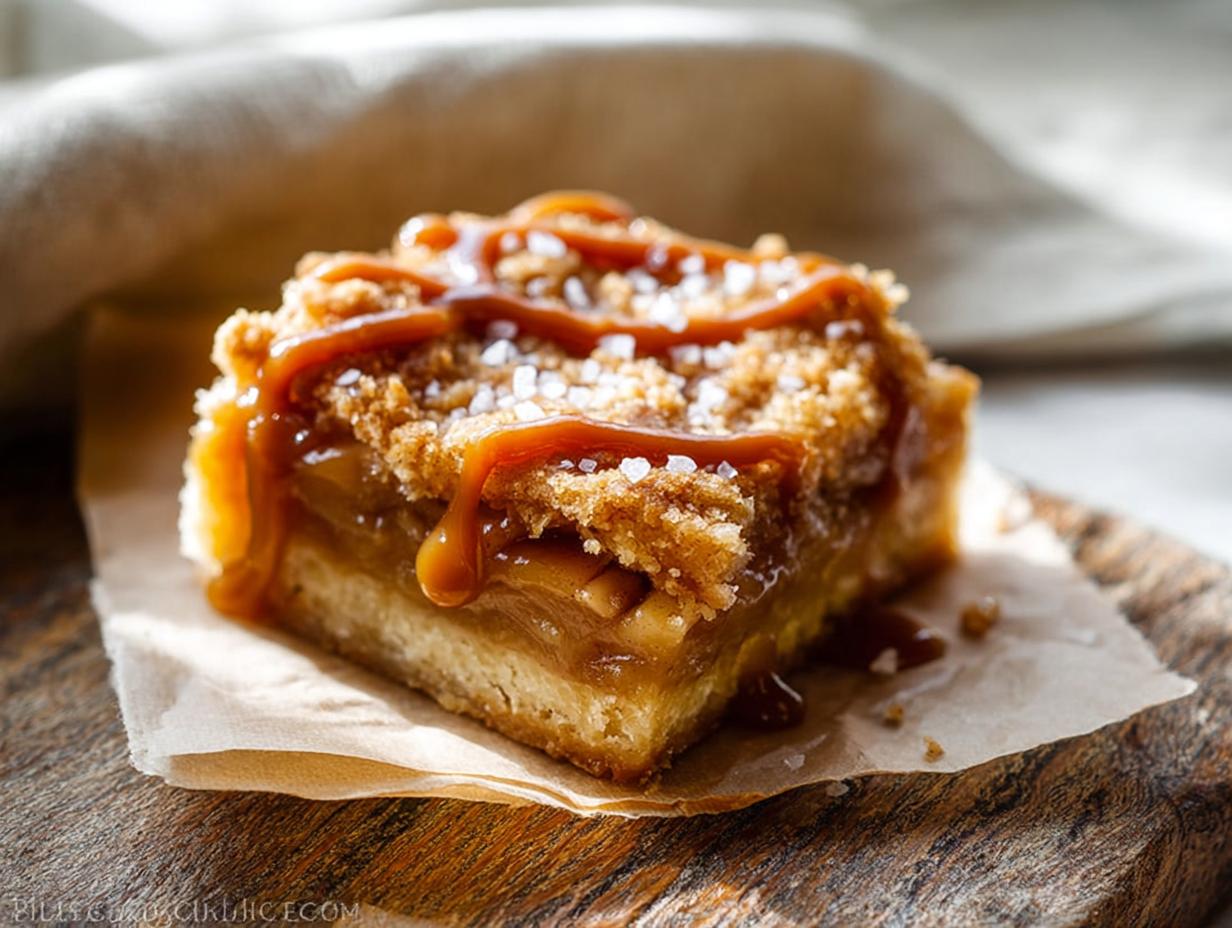
I’ve got a confession: I love apple pie, but I hate rolling out dough. There’s something about that sticky mess, the cracking edges, and the inevitable patchwork that makes me want to skip dessert entirely. That’s exactly why I started testing these Salted Caramel Apple Pie Bars. After about four batches—my family was happy to be my taste testers, trust me—I finally nailed the perfect texture. All the warm, spiced apple filling and buttery crust you crave, but with a fraction of the work. No rolling pin required. Just press, layer, bake, and you’ve got a dessert that tastes like you spent hours in the kitchen.
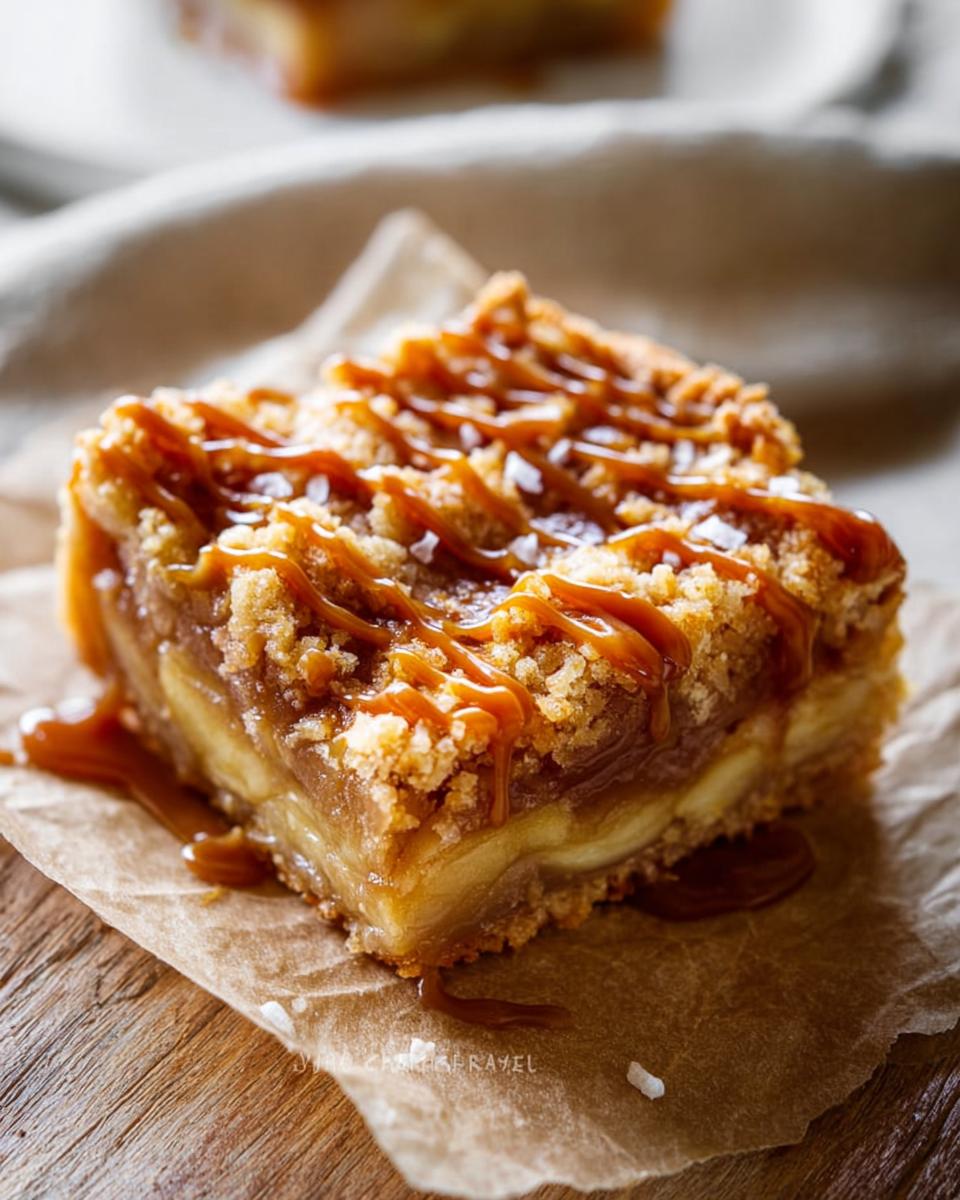
Why You Will Love These Salted Caramel Apple Pie Bars
Okay, so maybe you’re not a pie crust pro. Maybe you’re just looking for a dessert that doesn’t require a whole production. These Salted Caramel Apple Pie Bars are about to become your new best friend. Here’s why:
- No rolling dough. Seriously. You just press the crust into the pan like you’re making a giant cookie. It’s so much easier.
- Super portable. These bars hold their shape perfectly. You can stack them on a plate for a potluck or pack them in a lunchbox without any drama.
- Perfect for parties. Everyone can grab a neat square. No fighting over the last slice of pie or dealing with a sloppy mess.
- That salty-sweet combo. The buttery crust, the tender spiced apples, and that rich salted caramel on top? It’s the kind of flavor that makes people close their eyes and sigh. You just can’t beat it.
Key Ingredients for the Best Salted Caramel Apple Pie Bars
Let’s talk about what goes into these bars, because each ingredient is doing some serious heavy lifting. I’ve tested this recipe enough times to know that skimping or swapping here is a recipe for disappointment. The magic of these Salted Caramel Apple Pie Bars really comes down to a few specific choices.
First up, that crust. You’ll see cold unsalted butter, cubed in the list, and I cannot stress the “cold” part enough. We’re not making cookie dough here; we’re building a flaky, tender shortbread base. When those little cubes of cold butter hit the hot oven, they create steam, which leaves tiny pockets of air. That’s what gives you a crust that shatters beautifully, not a tough, dense one. And unsalted butter is key because we’re adding salt separately, so you have total control over the flavor.
Next, the caramel sauce. Don’t grab the thin, watery stuff you’d put on ice cream sundaes. You want a thick, luxurious sauce—the kind that coats a spoon. I often use a good quality jarred kind, like the one from the baking aisle, or honestly, a can of dulce de leche works like a charm. It’s a fantastic shortcut.
And finally, that flaky sea salt. Please, please don’t use regular table salt here. Table salt is too fine and will just dissolve, leaving you with a salty puddle. Flaky sea salt, like Maldon, is all about texture. You get these little bursts of salt that cut right through the sweetness of the caramel and apples. It’s the finishing touch that makes these bars taste professional.
One more thing about the apples: the recipe says “peeled and sliced.” Peel them for sure—nobody wants chewy apple skin in a bar. And slice them to about ¼-inch thick. Too thick and they won’t soften in time; too thin and they’ll turn to mush. That sweet spot gives you a tender bite that still holds its shape.
Choosing the Right Apples for Your Filling
This is probably the most important decision you’ll make for these bars. My absolute favorite combo is half Granny Smith and half Honeycrisp. The Granny Smiths are tart and firm, so they hold their shape beautifully during baking. They provide that classic apple pie tang. The Honeycrisp adds natural sweetness and a juicy, tender texture. Together? It’s perfection.
A word of warning: stay away from using only soft apples like Red Delicious or McIntosh. They break down way too fast and you’ll end up with a mushy, applesauce-like filling. Nobody wants that. A mix of firm, tart and firm, sweet apples is your ticket to the best texture.
The Importance of Cold Butter in the Crust
I know I already mentioned it, but it’s worth repeating: cold butter is non-negotiable. When you’re cutting it into the flour and sugar, you’re aiming for a texture that looks like coarse crumbs—think damp sand with some pea-sized butter chunks still visible. That’s exactly what you want!
Work quickly here. Use a pastry cutter or your fingertips, but don’t overdo it. The heat from your hands can start melting the butter, which will ruin that flaky texture. You want those little butter pieces to stay solid until they hit the oven. That’s the secret to a crust that’s tender and crisp, not tough and greasy.
Step-by-Step Instructions for Salted Caramel Apple Pie Bars
Alright, let’s get to the fun part! I’m going to walk you through exactly how I make these Salted Caramel Apple Pie Bars. The process is actually pretty straightforward, but there are a few little tricks I’ve learned along the way that make all the difference. Trust me, follow these steps and you’ll have a pan of bars that’ll disappear in minutes.
How to Prepare the Buttery Shortbread Crust
Start by preheating your oven to 375°F. In a large bowl, whisk together the all-purpose flour, granulated sugar, and the ¼ teaspoon of salt. Now, grab that cold cubed butter and drop it right in. Using a pastry cutter or your fingertips—I prefer a pastry cutter so my hands don’t warm the butter—cut the butter into the flour mixture until it looks like coarse crumbs. You want some pea-sized pieces of butter still visible. That’s the key to a flaky crust.
Here’s the important part: dump those crumbs into your 9×13-inch baking pan and press them down firmly and evenly. Don’t just pat them lightly! Really pack them in, especially into the corners and along the edges. If you don’t, your crust will crumble when you try to cut the bars later. I like to use the bottom of a flat measuring cup to get everything super even. Pop that pan in the oven and bake for 15 minutes, just until the edges start to turn a light golden brown.
Making and Assembling the Spiced Apple Filling
While your crust is baking, let’s get the filling ready. Grab a big bowl and toss your sliced apples with the brown sugar, cinnamon, and nutmeg first. I like to really coat them well with my hands. Then, sprinkle the cornstarch and drizzle the lemon juice over the top. Toss everything again until the cornstarch is completely dissolved and you don’t see any white streaks. Adding the lemon juice and cornstarch last helps prevent clumps from forming. You want that filling smooth and evenly coated.
Once your crust comes out of the oven, spread the apple mixture in an even layer right over the hot crust. Don’t just dump it in the middle and hope for the best—take a minute to arrange those apples so they’re all lying flat. This way every bar gets a good amount of filling. Then, drizzle that thick caramel sauce all over the top. Try to get it into the nooks and crannies between the apple slices.
Baking and Adding the Final Salted Caramel Touch
Pop the whole thing back in the oven for 35 to 40 minutes. You’ll know it’s done when the apples are tender when you pierce them with a fork and the filling is bubbly around the edges. That bubbling means the cornstarch has activated and your filling will set up properly as it cools.
Here’s the most important step: the minute you pull that pan out of the oven, sprinkle the flaky sea salt all over the top. The caramel is still hot and molten, so the salt will stick right to it. Don’t wait! If you let it cool first, the salt will just slide right off. Now, here’s the hard part: you have to let these bars cool completely before you even think about cutting them. I’m talking at least 2 hours at room temperature, or pop the pan in the fridge for about an hour if you’re impatient like me. If you cut them while they’re warm, the filling will ooze everywhere and you’ll have a delicious but messy situation. Trust me, I’ve learned that lesson the hard way!
Expert Tips for Perfect Salted Caramel Apple Pie Bars
After making these Salted Caramel Apple Pie Bars more times than I can count, I’ve picked up a few tricks that separate good bars from absolutely incredible ones. These little details make all the difference, I promise you.
- Line your pan with parchment paper. This is my number one tip. Cut two long strips that overhang on opposite sides of the pan—like slings. After the bars are cool, you just lift the whole thing out in one piece and cut them on a cutting board. No struggling to pry the first bar out of the corner. It’s a game-changer.
- Don’t overmix that crust. Seriously. Once you cut in the butter, stop as soon as it looks like coarse crumbs. If you keep working it, you’ll develop too much gluten and the crust will turn out tough and dense instead of tender and crumbly. A few pea-sized butter lumps are your friend here.
- Let them cool fully. I know, I know. The smell is absolutely intoxicating and you want to dig in immediately. But this is non-negotiable for clean slices. If you cut into warm bars, the filling will run everywhere and you’ll end up with a delicious puddle instead of neat squares. Give them at least two hours at room temperature, or one hour in the fridge. Your patience will be rewarded with perfect, beautiful bars.
Recipe Variations for Your Salted Caramel Apple Pie Bars
One of the best things about this recipe is how easy it is to play around with. I’ve made these Salted Caramel Apple Pie Bars so many times that I’ve started experimenting, and honestly, every version has been a hit. Here are a few of my favorite twists.
First up, if you’re a nut lover like me, try adding about half a cup of chopped pecans or walnuts right into the crust mixture before you press it into the pan. It adds this amazing crunch and a toasty flavor that pairs perfectly with the apples. Just make sure you chop them finely so the crust still holds together.
Another easy swap is the spice blend. Instead of just cinnamon, replace half a teaspoon of it with pumpkin pie spice. It gives the filling a warmer, more complex flavor—think chai-spiced apples. It’s perfect for fall baking or when you want something a little cozier.
And for a pretty presentation that feels extra special, let the bars cool completely, then drizzle melted white chocolate all over the top. Let it set for a few minutes before cutting. The white chocolate looks gorgeous against the dark caramel and adds a lovely creamy sweetness. It’s a simple trick that makes these look bakery-worthy.
How to Store and Reheat Salted Caramel Apple Pie Bars
So you’ve managed to have some leftovers—congratulations, that’s a real achievement! These Salted Caramel Apple Pie Bars store beautifully, which is great for making them ahead of time. Just pop them in an airtight container and keep them in the fridge for up to 5 days. I actually think the flavors get even better after a day or two, as everything settles and melds together.
Now, when you’re ready for round two, you’ve got options. My go-to is the microwave—just warm an individual bar for about 15 to 20 seconds. That’s enough to soften the apples and take the chill off without making the crust soggy. If you’re serving a few bars at once, pop them in a 300°F oven for 5 to 7 minutes. They come out smelling like you just baked them, with that caramel getting all warm and gooey again. Just don’t forget the vanilla ice cream on top!
Frequently Asked Questions About These Bars
I get a lot of questions about these Salted Caramel Apple Pie Bars, which makes sense—they’re a little different from a traditional pie or a standard apple dessert bar. People want to make sure they get it right, and honestly, I love that! Here are the answers to the most common ones I hear.
Can I use pre-made caramel sauce?
Absolutely, you can! I do it all the time. But here’s the catch: you need a thick caramel sauce. You know the kind that pours slowly and coats a spoon? That’s what you want. Stay away from the thin, runny ice cream topping—it’ll just soak into your crust and make everything a soggy mess. My secret weapon? A can of dulce de leche. It’s the perfect consistency, super rich, and tastes incredible. Just warm it up a little so it’s drizzle-able, and you’re golden.
How do I prevent the crust from getting soggy?
This is the number one question, and the answer is two-fold. First, pre-baking the crust for that 15 minutes is totally crucial. Don’t skip it! That short bake starts cooking the butter and sets the structure so it can stand up to the juicy apples. Second, keep an eye on your apples. When you toss them with the sugar and cornstarch, you might notice some liquid pooling at the bottom of the bowl. Before you spread them on the crust, just give them a gentle drain. You don’t want all that extra juice flooding your beautiful pre-baked base. Do those two things, and you’ll have a perfectly crisp crust every single time.
Can I make these bars gluten-free?
Yes, you definitely can! I’ve tested this a few times for friends, and it works great. Just swap the all-purpose flour for a 1-to-1 gluten-free baking flour blend. Make sure the blend you buy already has xanthan gum in it—that’s the ingredient that helps mimic gluten and gives your crust the right structure. If your blend doesn’t have it, you’ll need to add about ½ teaspoon yourself. Otherwise, follow the recipe exactly the same. The crust might be a little more delicate, but the flavor is spot on.
What type of apples are best for this recipe?
I’ve said it before, but it’s worth repeating for the FAQ. My absolute favorite combo is half Granny Smith and half Honeycrisp. The Granny Smiths are tart and firm, so they hold their shape beautifully. The Honeycrisp brings natural sweetness and a tender bite. Together, they make the perfect balanced filling. Whatever you do, don’t use only soft apples like Red Delicious or McIntosh. They’ll turn to mush, and you’ll lose that lovely apple texture in your bars. Stick with the firm, crisp varieties for the best caramel apple bars recipe.
Estimated Nutritional Information for These Dessert Bars
I always want to be upfront with you guys. The nutritional info I provide is just an estimate based on the ingredients and brands I use in my kitchen. Your numbers will definitely change depending on what apples you grab, which caramel sauce you love, and how big you cut your bars. Please remember this is a helpful guide, not a substitute for professional medical advice.
Did You Make These Salted Caramel Apple Pie Bars?
I’d absolutely love to hear how they turned out! Leave a comment and a star rating below—it seriously makes my day. And if you snap a photo, tag me on social media so I can see your beautiful creation. Happy baking, friend!
Print
Salted Caramel Apple Pie Bars: Perfect 1-Pan Dessert
- Total Time: 1 hour 15 minutes
- Yield: 12 bars 1x
- Diet: Vegetarian
Description
A dessert bar with a buttery crust, spiced apple filling, and salted caramel topping.
Ingredients
- 2 cups all-purpose flour
- 1/2 cup granulated sugar
- 1 cup cold unsalted butter, cubed
- 1/4 teaspoon salt
- 6 cups peeled and sliced apples (about 6 medium)
- 1/2 cup brown sugar
- 2 tablespoons lemon juice
- 1 teaspoon cinnamon
- 1/4 teaspoon nutmeg
- 2 tablespoons cornstarch
- 1/2 cup caramel sauce
- 1/2 teaspoon flaky sea salt
Instructions
- Preheat your oven to 375°F.
- Mix flour, granulated sugar, and salt in a bowl.
- Cut in butter until mixture resembles coarse crumbs.
- Press mixture into a 9×13-inch baking pan.
- Bake crust for 15 minutes.
- Toss sliced apples with brown sugar, lemon juice, cinnamon, nutmeg, and cornstarch.
- Spread apple mixture over crust.
- Drizzle caramel sauce over apples.
- Sprinkle flaky sea salt on top.
- Bake for 35 to 40 minutes until apples are tender.
- Cool completely before cutting into bars.
Notes
- Use a mix of tart and sweet apples for best flavor.
- Let bars cool fully to set the filling.
- Store leftovers in the refrigerator.
- Prep Time: 30 minutes
- Cook Time: 45 minutes
- Category: dessert
- Method: baking
- Cuisine: American
Nutrition
- Serving Size: 1 bar
- Calories: 380
- Sugar: 28g
- Sodium: 220mg
- Fat: 18g
- Saturated Fat: 11g
- Unsaturated Fat: 6g
- Trans Fat: 0g
- Carbohydrates: 52g
- Fiber: 3g
- Protein: 3g
- Cholesterol: 45mg