
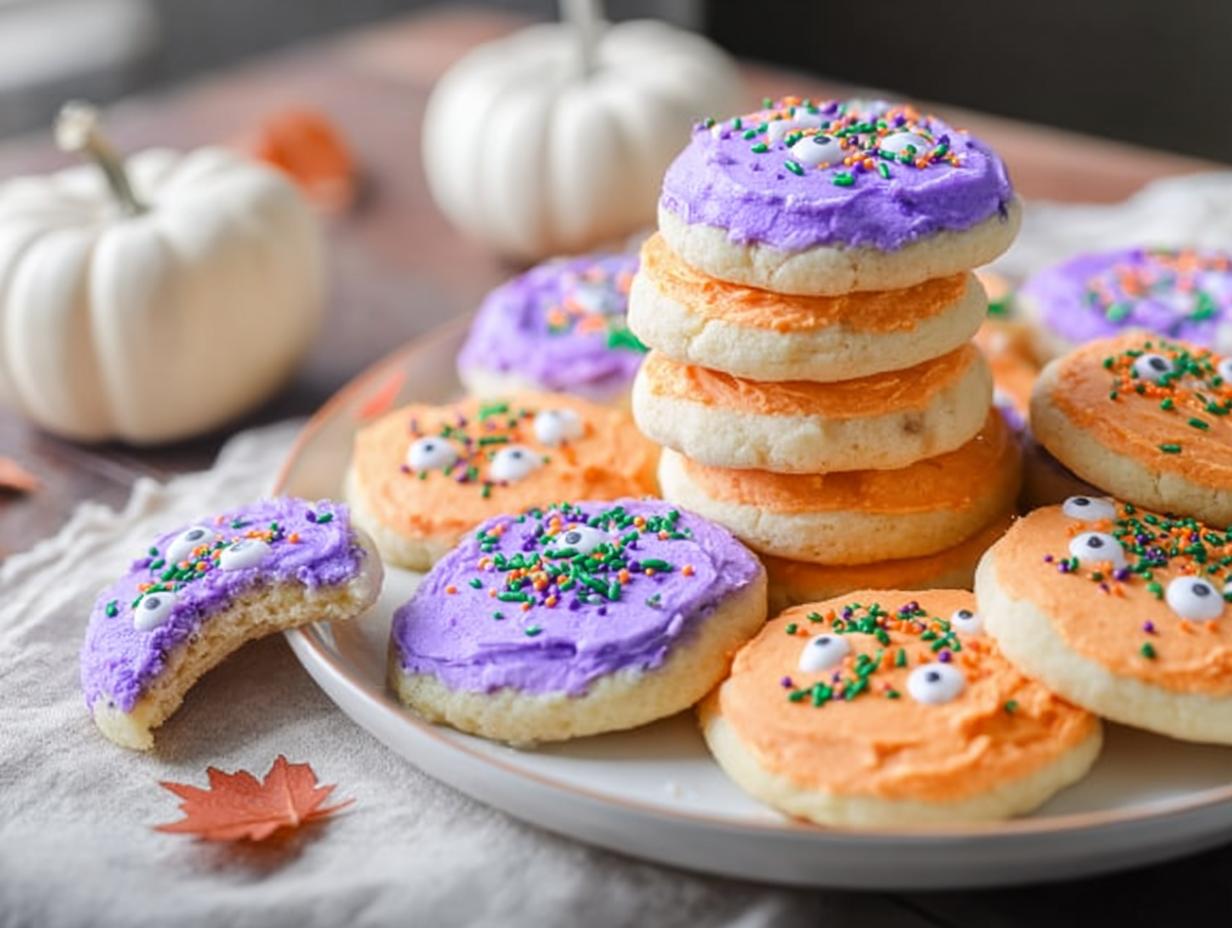
There’s nothing quite like the smell of soft Halloween sugar cookies baking in the kitchen while the kids are getting their costumes ready. I’ve been making these for years, and they’ve become our go-to for Halloween parties, school treats, and just for fun. The secret? They come out perfectly soft every time – not crispy or cakey, just that tender, melt-in-your-mouth texture that makes you reach for another one.
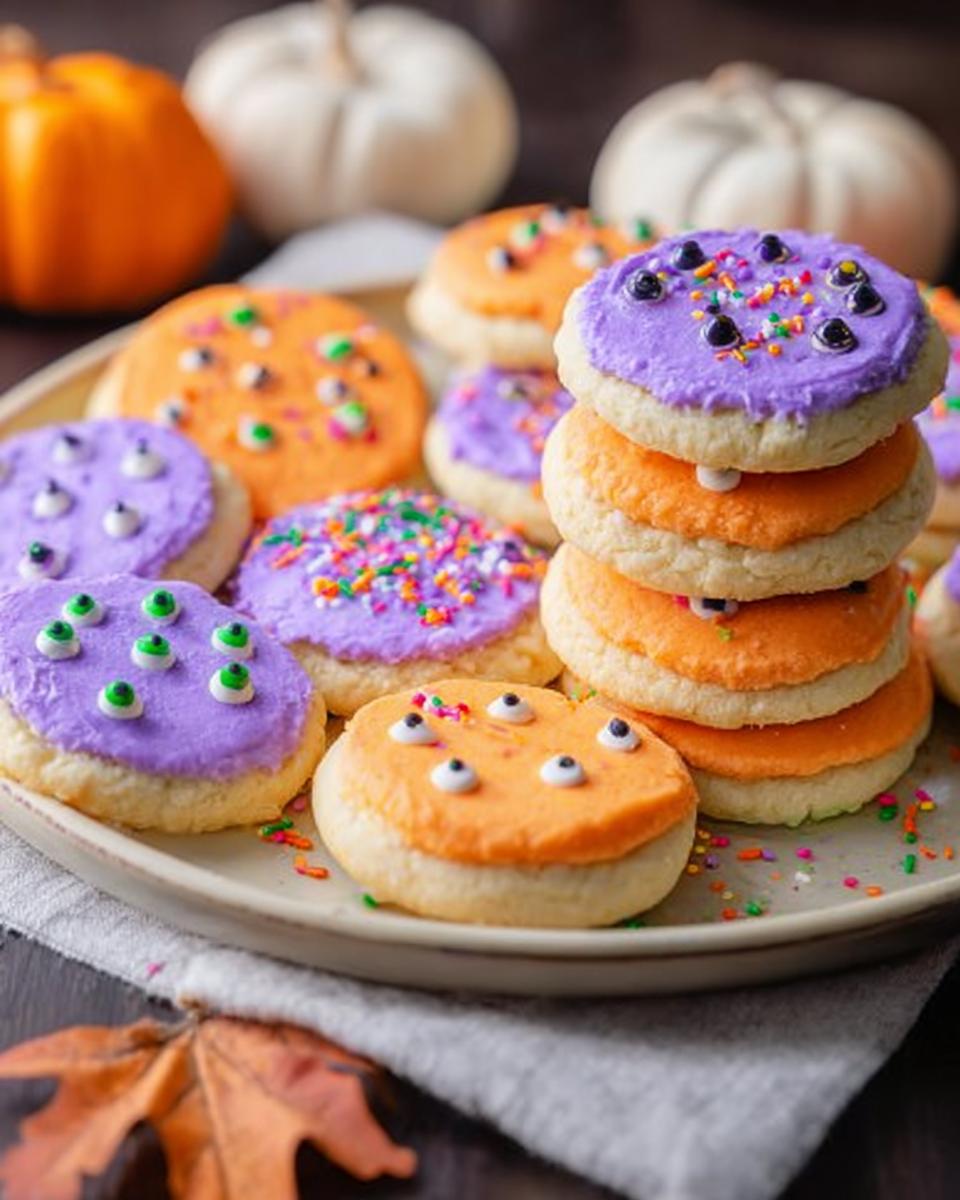
My favorite part is how easy they are to decorate. You can go wild with orange and purple gel coloring, press on some candy eyes, and suddenly you’ve got a batch of little monsters that look as good as they taste. Last year, my niece spent an hour carefully adding sprinkles to each one, and the cookies still came out soft and delicious. That’s the beauty of this recipe – it’s forgiving enough for little hands but impressive enough for grown-up parties.
So grab your apron and let’s make some magic. Trust me, once you try these, you’ll never go back to store-bought again.
Why These Soft Halloween Sugar Cookies Work
Let me tell you why this recipe has earned a permanent spot in my Halloween rotation. It all comes down to three things: texture, ease, and crowd appeal.
The perfect softness – The balance of butter to sugar here is key. I use a full cup of butter and an extra half cup of sugar, which creates that tender, almost pillowy crumb. Too many sugar cookies turn out rock-hard, but this ratio keeps them soft for days.
Crazy easy to color – The dough takes gel food coloring like a champ. You can split it into three or four colors without worrying about the texture getting weird. I’ve made neon green monsters and deep purple ghosts that held their shape beautifully.
Everyone loves them – These disappear fast at parties. Kids go wild for the sprinkles and candy eyes, and adults keep coming back because they actually taste amazing – not just cute but genuinely delicious. Trust me, you’ll be making double batches by next week.
Ingredients for Soft Halloween Sugar Cookies
Here’s what you’ll need to make these little treasures. I’ve tested these exact measurements more times than I can count, so trust me when I say every ingredient plays a role.
2 3/4 cups all-purpose flour – Make sure you spoon it into your measuring cup and level it off with a knife. Scooping straight from the bag packs in too much flour, and that’s a one-way ticket to dry cookies. We don’t want that.
1 teaspoon baking soda and 1/2 teaspoon baking powder – This combo gives the cookies just the right lift without making them puffy.
1 cup unsalted butter, softened to room temperature – Please, please use unsalted. Salted butter can throw off the flavor, and we want full control over the salt. Let it sit out for about an hour until it’s soft but not melty.
1 1/2 cups white sugar – This is what makes them so wonderfully soft. Don’t cut back on it.
1 large egg – Just one. Room temperature works best.
1 teaspoon pure vanilla extract and 1/2 teaspoon almond extract – The almond is my secret weapon. It adds a subtle nuttiness that makes people wonder what’s different. You can skip it for a nut-free version, but the cookies won’t taste quite as special.
Gel food coloring (orange, purple, black) – Drop the liquid stuff. Gel gives you vibrant colors without adding extra moisture that could mess up the dough. I’ve used Wilton and Americolor brands, and both work beautifully.
Sprinkles or candy eyes for decoration – Let your inner child run wild here. The more colorful, the better.
Step-by-Step Instructions for Soft Halloween Sugar Cookies
Alright, let’s get baking! I’ve made these so many times that I could probably do it in my sleep, but here’s the full breakdown so you get perfect results your first time out.
Prepare the Dough
Start with the dry stuff. In a medium bowl, whisk together the 2 3/4 cups all-purpose flour, 1 teaspoon baking soda, and 1/2 teaspoon baking powder. Just give it a good stir – no need to sift unless you’re feeling fancy. Set that aside.
Now for the magic. In a large bowl, beat the 1 cup softened unsalted butter with 1 1/2 cups white sugar. You want to cream them together until the mixture looks light, fluffy, and almost pale – this takes about 2 to 3 minutes with an electric mixer. Don’t rush it. Those tiny air bubbles are what make the cookies soft instead of dense. Add the 1 egg, 1 teaspoon vanilla, and 1/2 teaspoon almond extract, then beat until well combined.
Time to bring it together. Gradually add the flour mixture to the butter mixture. I usually add it in three batches, mixing on low speed just until each addition disappears. Stop as soon as you don’t see any more white streaks. Overmixing develops gluten, and that leads to tough cookies – we want tender ones here. The dough should be soft but not sticky. If it feels too sticky to handle, pop it in the fridge for 30 minutes.
Color and Shape the Cookies
Split and color. Divide the dough into three equal portions. Drop a few drops of orange gel food coloring into one, purple into another, and black into the last. Use your hands to knead the color in – it’s faster than mixing and you can feel when it’s even. Gel color is key here; liquid will make the dough sticky and dilute the flavor.
Shape them up. Roll each portion into 1-inch balls. I use a small cookie scoop for consistency, but your hands work great too. Place them on parchment-lined baking sheets, spacing them about 2 inches apart. They don’t spread much, but give them room to breathe. Gently flatten each ball with your palm, just slightly – think thick hockey pucks, not pancakes.
Decorate and Bake
Get creative. Press sprinkles, candy eyes, or any decorations gently into the top of each cookie. Don’t press too hard or they’ll sink in and disappear. A light touch is all you need. I love using candy eyes for monsters – they look hilarious and kids gobble them up.
Into the oven. Preheat your oven fully to 375 degrees F (190 degrees C). Bake the cookies for 8 to 10 minutes. I start checking at 8 minutes – you want the edges to look just barely golden, not brown. The centers will look slightly underdone, but that’s perfect. They’ll continue setting as they cool.
Cooling time. Let the cookies cool on the baking sheets for exactly 2 minutes. This helps them firm up without drying out. Then transfer them to a wire rack to cool completely. If you move them too soon, they’ll fall apart. If you wait too long, they’ll stick. Trust the 2-minute rule – it never lets me down.
Tips for Perfect Soft Halloween Sugar Cookies
After many batches (and a few disasters), I’ve learned a few tricks that make all the difference. Chill the dough if it feels too soft – 30 minutes in the fridge firms it up so the cookies hold their shape better. I’ve skipped this step before and ended up with flat, sad ghosts. Not cute.
Don’t overmix. I know it’s tempting to keep beating until everything’s silky smooth, but stop as soon as the flour disappears. Overmixing develops gluten, and that’s what makes cookies tough instead of tender. We’re going for soft, not jaw-workout material.
Parchment paper is your best friend. Trust me on this one. It prevents sticking, makes cleanup a breeze, and helps the cookies bake evenly. Plus, you can reuse the same sheet for multiple batches – just let it cool between rounds.
Check at 8 minutes. Every oven runs a little differently, so start peeking early. The edges should be lightly golden but the centers will still look slightly underdone. That’s exactly what you want. Pull them out then, and they’ll finish setting on the hot sheet. Overbaking by even a minute can cost you that perfect soft texture.
Ingredient Substitutions for Soft Halloween Sugar Cookies
I get it – sometimes you’re out of something or have dietary needs to work around. I’ve tested a few swaps so you don’t have to guess.
Butter swap: You can use coconut oil in place of the butter. Use the same amount, but make sure it’s softened, not melted. The cookies will be a little less rich and have a slight coconut hint, but they’ll still be soft. I’ve done this for a dairy-free friend, and they disappeared just as fast.
Nut-free version: Simply skip the almond extract. The cookies will still taste great – just more vanilla-forward. No need to replace it with anything else.
Gluten-free option: A good gluten-free all-purpose flour blend works here. I’ve used Bob’s Red Mill 1-to-1 with solid results. The dough might feel a bit more delicate, and the cookies won’t be quite as soft, but they’re still delicious. Just don’t overmix, and add a tablespoon of milk if the dough seems too dry.
One thing I’ll say honestly – the texture will change with substitutions. They’re still tasty, but nothing beats the original for that perfect softness. So if you can use the real deal, do it. If not, these swaps get the job done.
Variations for Your Soft Halloween Sugar Cookies
Once you’ve mastered the basic recipe, the fun really begins. I love switching things up to keep Halloween exciting year after year.
Try cookie cutters instead of rolling balls. Just roll the dough to about 1/4-inch thick, cut out your shapes, and bake. Ghosts, pumpkins, and bats all work great. Just remember to chill the cut-out dough for 10 minutes so the edges stay sharp.
Play with colors. Green dough makes perfect Frankenstein cookies – add candy eyes and a red licorice mouth. White dough turns into cute little ghosts. I’ve even done a batch of purple and orange swirls by gently twisting two colors together before rolling.
Chocolate version? Yes, please! Replace 1/4 cup of the flour with unsweetened cocoa powder. The cookies turn out dark and rich, perfect for making spider webs or creepy crawlies. My kids call them “dirt cookies” and they’re always the first to disappear.
Serving Suggestions for Soft Halloween Sugar Cookies
I swear by a tall glass of cold milk with these cookies. That classic combo never gets old. For a grown-up Halloween gathering, I love setting them out on a dessert platter with a warm mug of apple cider. They’re also fantastic for stuffing into little treat bags for school parties. However you serve them, just be ready to watch them disappear!
Storage and Reheating for Soft Halloween Sugar Cookies
Got leftovers? These cookies stay soft for up to 5 days if you store them in an airtight container at room temperature. I usually stack them with a sheet of wax paper between layers so the decorations don’t smear.
Here’s what’s cool – you can freeze the unbaked dough balls for up to 3 months. Just roll them, flash-freeze on a sheet pan, then toss them in a zip-top bag. When craving hits, bake straight from frozen and add 2 minutes to the time. Works like a charm.
And if you want that fresh-from-the-oven feel, pop a cookie in the microwave for about 10 seconds. The warmth makes them taste like they just came out of the oven. Dangerous knowledge, trust me.
Frequently Asked Questions About Soft Halloween Sugar Cookies
I get asked a lot of questions about these easy Halloween cookies, so I figured I’d answer the most common ones here. Whether you’re a first-time baker or a seasoned pro, these tips should help you nail these decorated sugar cookies every single time.
Can I use natural food coloring?
You sure can, but fair warning – the colors will come out way more muted than the bright, spooky shades you see in the store. I’ve tried beet powder for pink and spirulina for green, and they work, but they’re not nearly as vibrant. If you’re going for a softer, earthy look, go for it. But if you want those intense orange and purple cookies that scream Halloween, gel coloring is your best bet. It doesn’t add extra liquid, and a little goes a long way.
Why are my cookies not soft?
Oh, I’ve been there. Two things usually cause that: overbaking or too much flour. For overbaking, pull them out the moment the edges look barely golden – the centers should still look a little underdone. They’ll set perfectly as they cool. For the flour issue, make sure you’re spooning it into your measuring cup and leveling it off. Scooping straight from the bag packs in way more flour than you need, and that’s a one-way ticket to dry, crumbly cookies. Trust me, I learned that the hard way!
Can I freeze the dough?
Absolutely! This is my favorite time-saving trick. Roll the dough into 1-inch balls, place them on a baking sheet lined with parchment, and pop them in the freezer for about an hour. Once they’re solid, transfer the balls to a zip-top bag. They’ll keep for up to 3 months. When you’re ready to bake, just pull out what you need and bake straight from frozen – add 2 minutes to the baking time. No need to thaw. It’s a lifesaver when you’re hosting a last-minute Halloween party.
How do I prevent cookies from spreading?
Nothing worse than putting cute little monster cookies in the oven and pulling out flat blobs, right? The fix is simple: chill the dough for 30 minutes before baking. Also, make sure your butter is softened but not too soft – if it’s greasy or melty, the cookies will spread like crazy. If your kitchen is warm, I’d even recommend chilling the shaped dough balls for 10 minutes before they go in the oven. That extra step keeps them thick and perfect.
Nutritional Information for Soft Halloween Sugar Cookies
I know you’re probably wondering, so here’s the breakdown. Each cookie comes out to about 120 calories, 5g fat, 18g carbs, 10g sugar, and 1g protein. Keep in mind this is an estimate – it’ll shift depending on which brands you use, how much coloring you add, and whether you go heavy on the sprinkles. But it’s a good ballpark if you’re tracking. Honestly though, Halloween only comes once a year, so I say enjoy every single bite.
Your Turn to Bake
I can’t wait for you to try these! They’re so much fun to make and even better to share. Drop a comment with your spookiest decorating idea – I’m always looking for new inspiration. And if you loved them, a 5-star rating would mean the world to me. Happy Halloween baking!
Print
Soft Halloween sugar cookies: 1 Secret to Amazing Softness
- Total Time: 30 minutes
- Yield: 36 cookies 1x
- Diet: Vegetarian
Description
These soft Halloween sugar cookies are easy to make and decorate. They are perfect for parties or treats.
Ingredients
- 2 3/4 cups all-purpose flour
- 1 teaspoon baking soda
- 1/2 teaspoon baking powder
- 1 cup unsalted butter, softened
- 1 1/2 cups white sugar
- 1 egg
- 1 teaspoon vanilla extract
- 1/2 teaspoon almond extract
- Food coloring (orange, black, purple)
- Sprinkles or candy eyes for decoration
Instructions
- Preheat your oven to 375 degrees F (190 degrees C). Line baking sheets with parchment paper.
- Mix flour, baking soda, and baking powder in a bowl.
- Beat butter and sugar together until light and fluffy. Add egg, vanilla extract, and almond extract. Mix well.
- Gradually add dry ingredients to wet mixture. Stir until dough forms.
- Divide dough into portions. Add food coloring to each portion to create Halloween colors.
- Roll dough into 1-inch balls. Place them 2 inches apart on baking sheets.
- Flatten each ball slightly with your palm. Decorate with sprinkles or candy eyes.
- Bake for 8 to 10 minutes. Edges should be lightly golden.
- Cool on baking sheets for 2 minutes. Transfer to wire racks to cool completely.
Notes
- Chill dough for 30 minutes if it feels too soft to handle.
- Store cookies in an airtight container for up to 5 days.
- Prep Time: 20 minutes
- Cook Time: 10 minutes
- Category: Dessert
- Method: Baking
- Cuisine: American
Nutrition
- Serving Size: 1 cookie
- Calories: 120
- Sugar: 10g
- Sodium: 75mg
- Fat: 5g
- Saturated Fat: 3g
- Unsaturated Fat: 2g
- Trans Fat: 0g
- Carbohydrates: 18g
- Fiber: 0g
- Protein: 1g
- Cholesterol: 15mg